
You can use formulas within database automations to set custom values for properties, craft notifications and emails, and more.
Here’s what you need to know at a glance:
- You can use formulas in nearly every automation action – editing properties, adding new pages, editing multiple pages, sending notifications/mail/Slack notifications, and defining variables
- The formula syntax is the same as in Formula properties
- Automation steps also have access to context and user variables
- Context variables include the person who trigger the automation, the page creator, the Trigger page, and the time and date of the trigger. When pasting formulas outside of the editor, they’re wrapped in the
context()function. - User variables are created using the Define Variables action. They have custom names, and their values can be of any valid data type. When pasting formulas outside of the editor, they’re wrapped in the
var()function.
How to Use Formulas in Automations
If you’re on a paid Notion plan, you can create powerful automations in databases that trigger when certain conditions are met, such as:
- A new page is created
- A property value is updated in an existing page
- A specific date or time is reached
When you’re crafting an automation, you can use Notion formulas to gain additional flexibility.
For an example, check out the automation below:
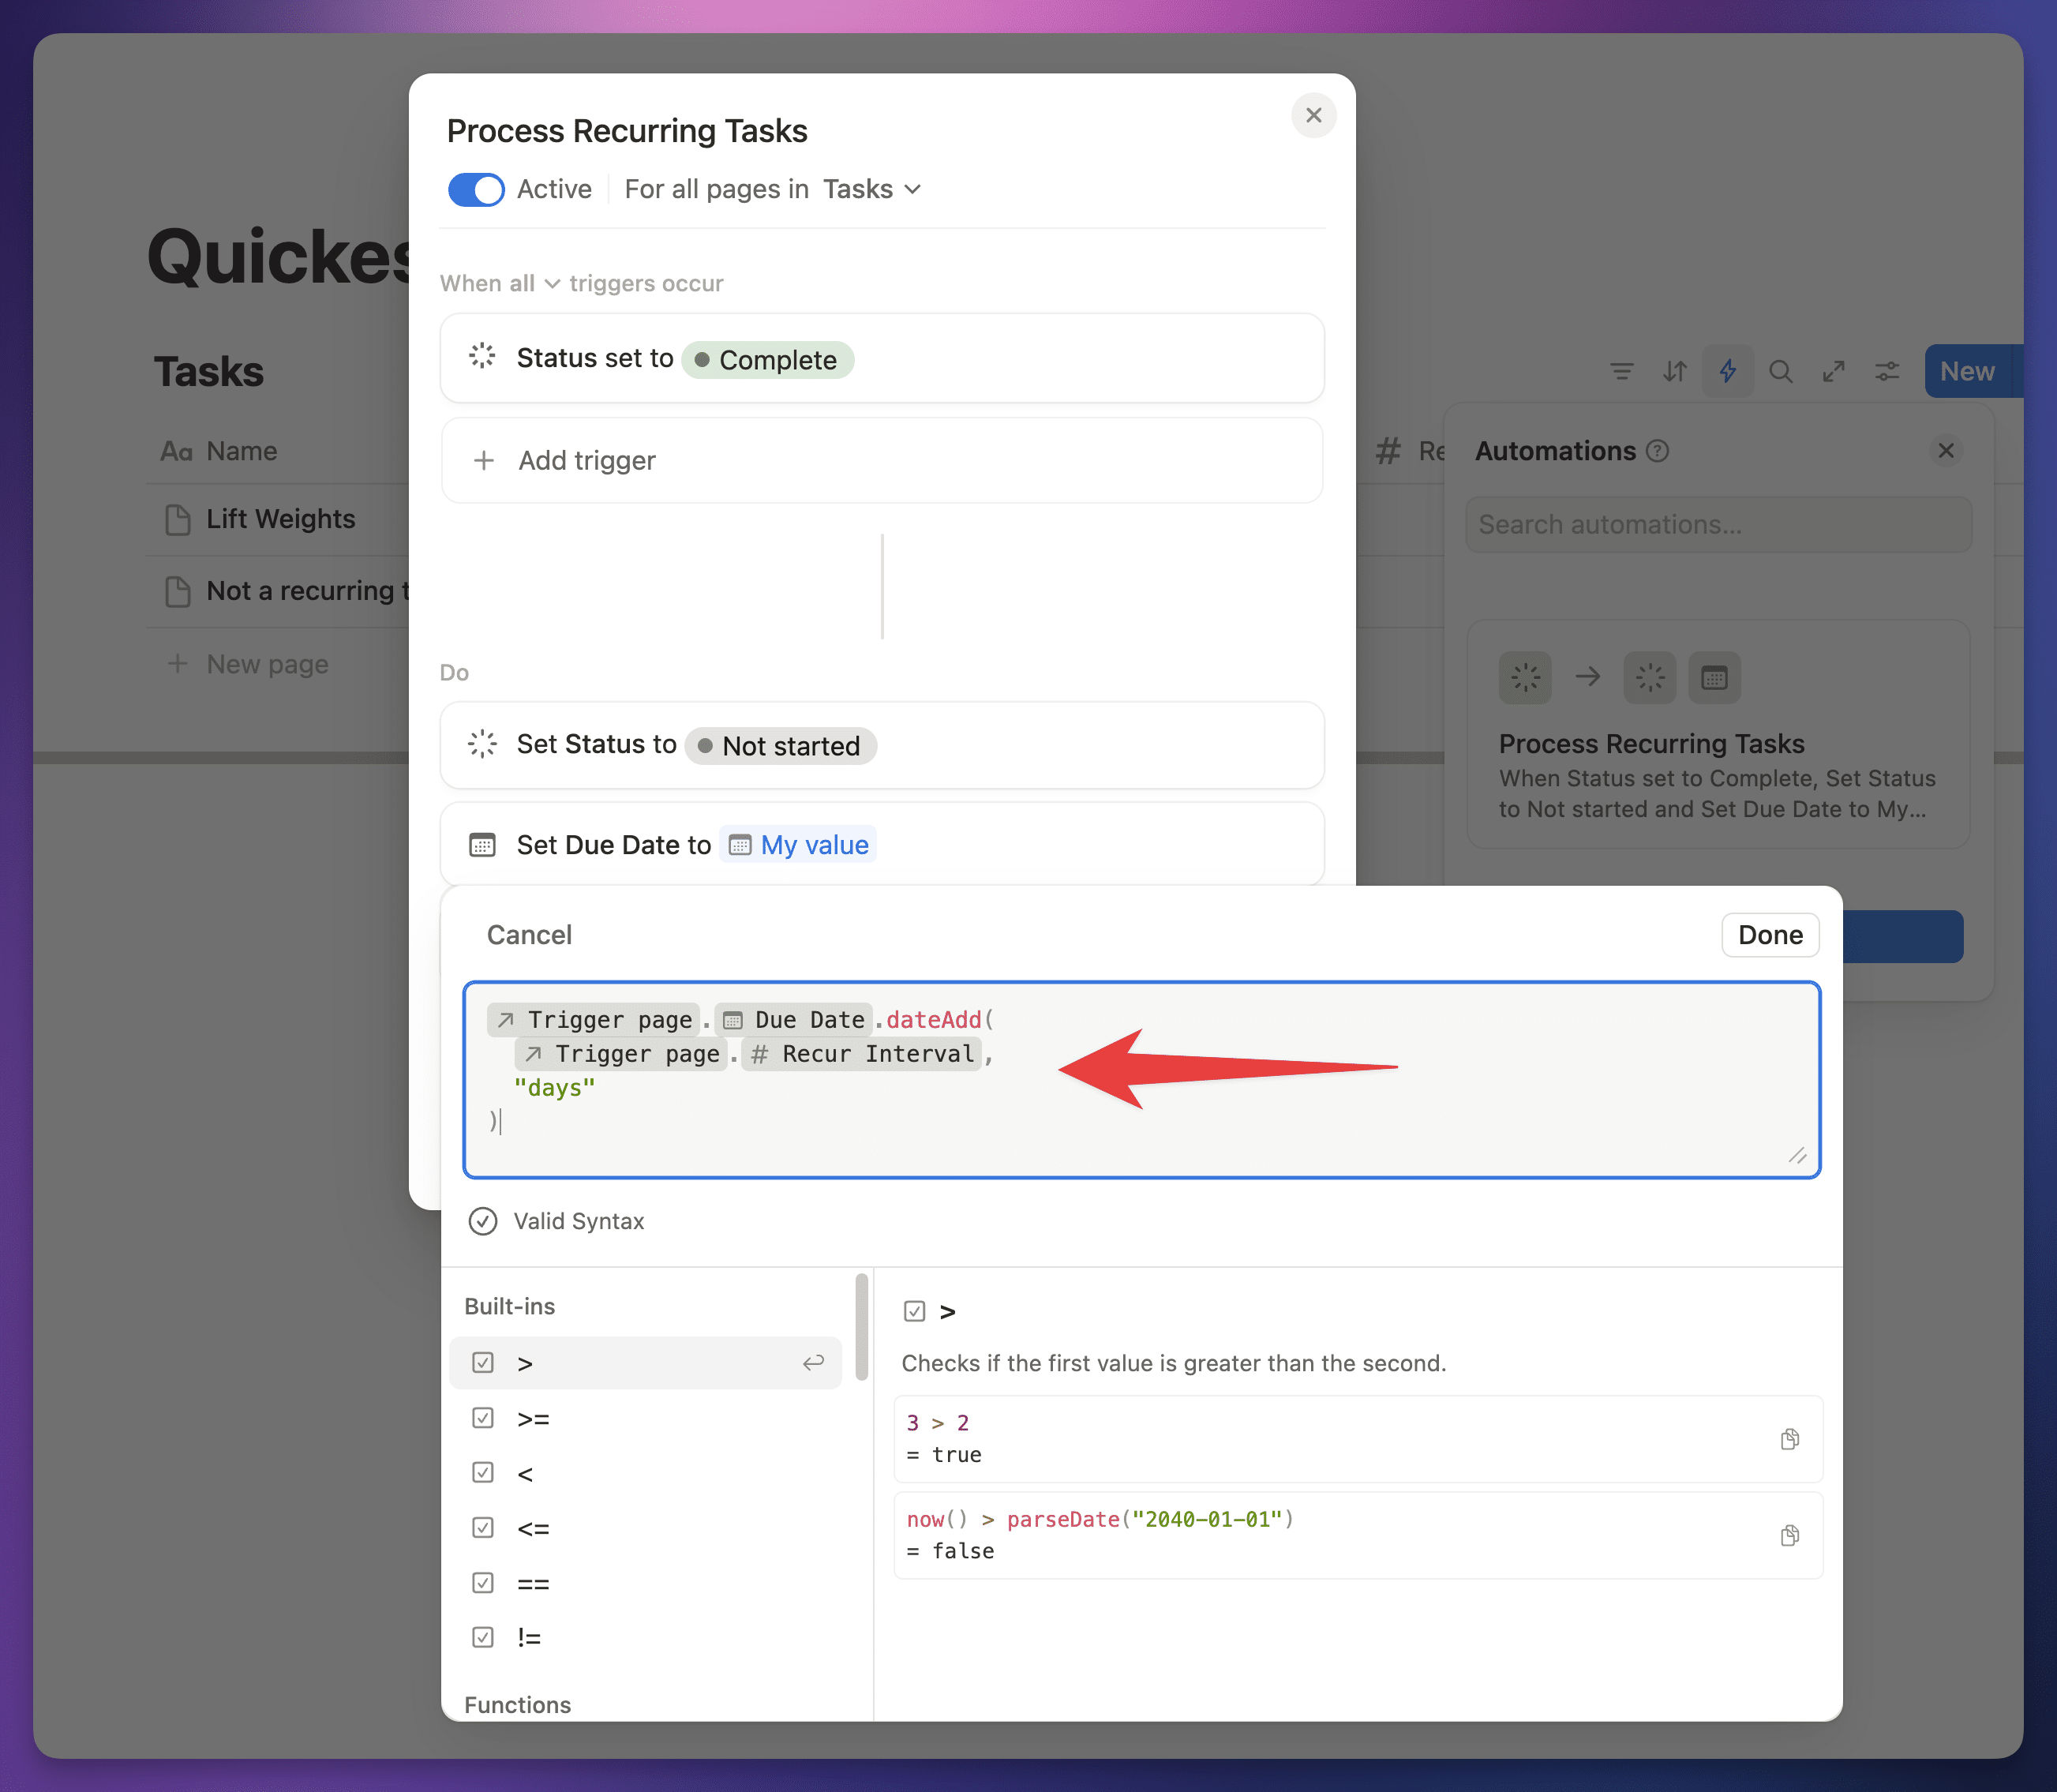
This automation processes recurring tasks in a Tasks database. It’s a super-simplified version of the recurring tasks automation that I’ve included in Ultimate Brain, and that you can add to your own databases using my recurring tasks guide.
You’ll notice that the first action under the Do sub-header is very simple; it just sets the Status property to Not Started. That makes sense; when processing a recurring task, you’d want to reset its status back to the same value every time.
Updating the Due Date is a bit trickier, because you can’t just pick a static value. The next due date will be based off of the current one.
In the case of this database, we have a separate, Number-type property called Recur Interval that indicates how many days forward the task should be moved. For example, a weekly task would have a Recur Interval of 7.
This means that the Due Date property needs to be updated to a value that is dynamically determined when the automation runs (which is whenever the task is completed).
None of the regular choices will fit the bill here – we can’t use Time Triggered, Date Triggers, or Pick a Date (which would be a static date, like July 24, 2025). That’s where the Custom Formula option comes in.
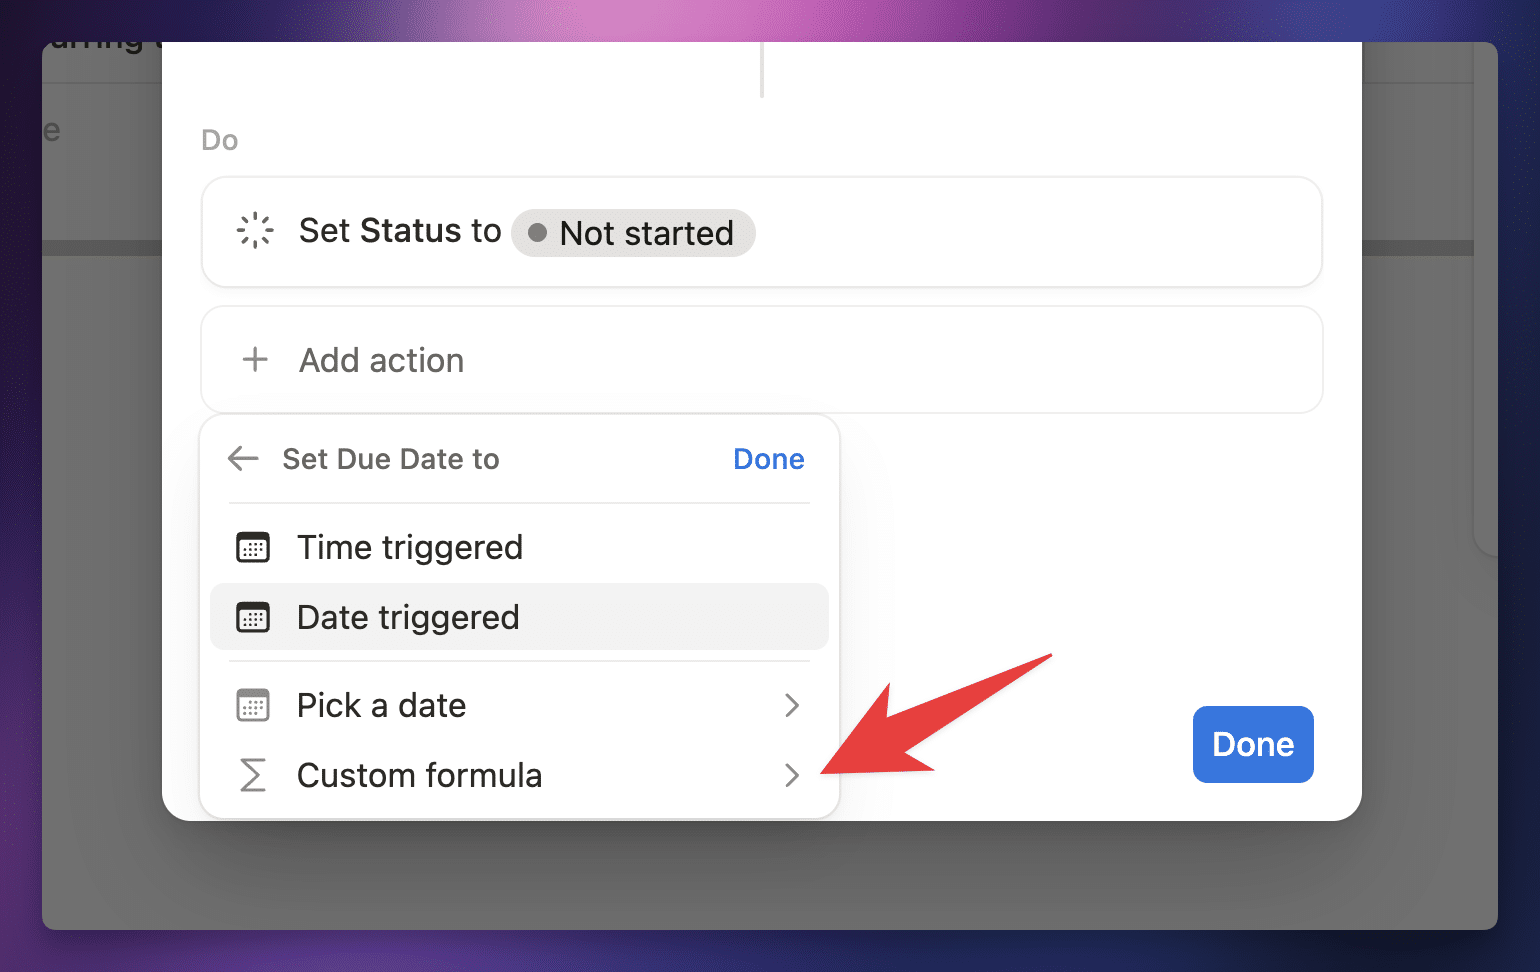
Once you select this option, you’ll find yourself looking at a formula editor that looks almost exactly like the one you’re used to seeing in normal Formula-type database properties.
However, there are some additional capabilities you’ll find within this automation-specific formula editor, which we’ll cover in the sections below.
Where Can You Use Formulas in Automations?
You’ll be able to use formulas within many of the different actions you can perform in an automation. These include:
- Edit Property – all property types that can be edited via an automation can use Custom Formulas
- Add Page To – when adding a new page, you can write formulas to set it property values
- Edit Pages In – when editing pages, you can write formulas to set property values
- Send Notification To – you can use a formula to craft the notification’s message
- Send Mail – you can use a formula to craft the notification’s message
- Send Slack Notification to – you can use a formula to craft the notification’s message
- Define Variables – you can use the formula editor to dynamically determine the value of a variable
In fact, the only automation action in which you can’t currently use formulas is the Send Webhook action.
Copy link to headingContext and User Variables
In addition to the entire formula syntax available in normal Formula-type properties, the formula editor you’ll find in automations give you access to two additional, special types of information:
- Context variables
- User-defined variables
Context Variables
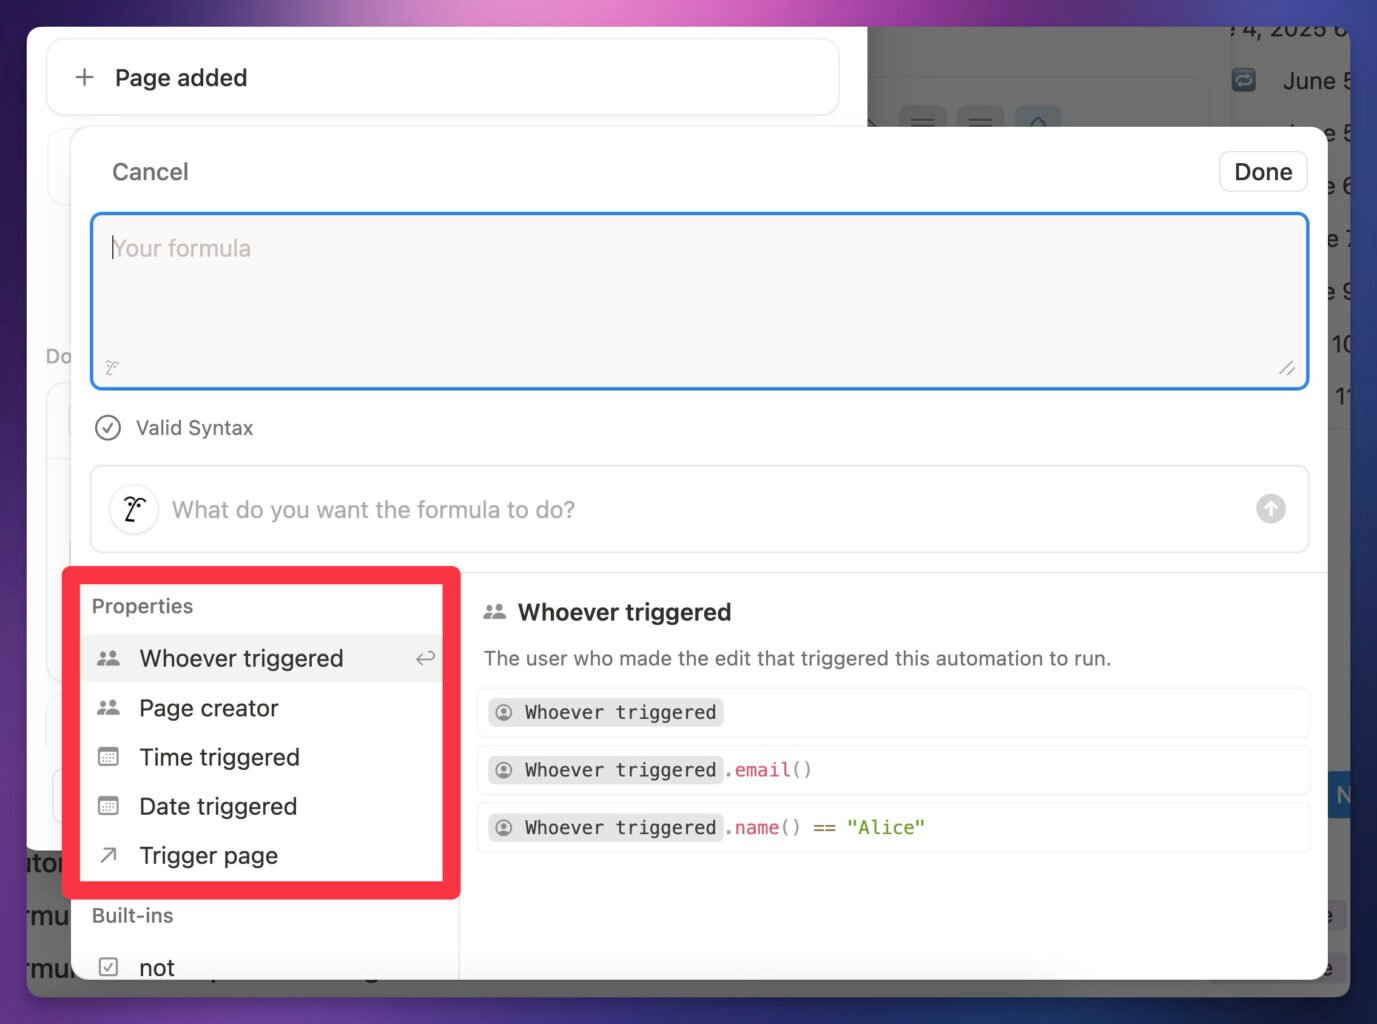
Context variables are pieces of information that pertain to the current run of the automation and any pages and/or pages associated with it. These can include:
- Whoever triggered – the user who triggered the automation
- Page creator – the user who created the page that triggered the automation (page creation or edit triggers)
- Time triggered – the date and time that this run of the automation was triggered (e.g.
- Date triggered – the date (not including time) that this run of the automation was triggered
- Trigger page – the page that triggered this run of the automation (page creation or edit triggers)
- Page added – if a prior step created a new page, this variable references it
The trigger(s) you have defined in the When section of the automation determine which context variables you’ll be able to access. Most triggers will give you access to all of the above, but the Every trigger (e.g. Every 2 Days) will only show Time Triggered and Date Triggered, since the automation is triggered without a user doing anything or a page action being taken.
When you copy a formula containing context variables and paste it somewhere other than the Notion formula editor, these variables will be wrapped in the context() function – much like page properties are wrapped in the prop() function. For example:
context("Trigger page").prop("Due").formatDate("dddd")
Code language: JavaScript (javascript)
As you can see from the images on this page, this context() function syntax is hidden when you’re working in the actual editor.
Here’s the full list of potential context variables you’ll see:
context("Whoever triggered")
context("Page creator")
context("Time triggered")
context("Date triggered")
context("Trigger page")
Code language: JavaScript (javascript)User Variables
User variables are custom variables that you can create within an automation using the Define Variable action.
Here, I’ve created a variable called Full English Due Date. The value of this variable is calculate when the automation runs, using the formula I’ve defined for it.
In this case, I’m accessing the Trigger Page context variable, getting the value of the Due property from it, and running it through formatDate with arguments that create a string like “Tuesday, July 29”.
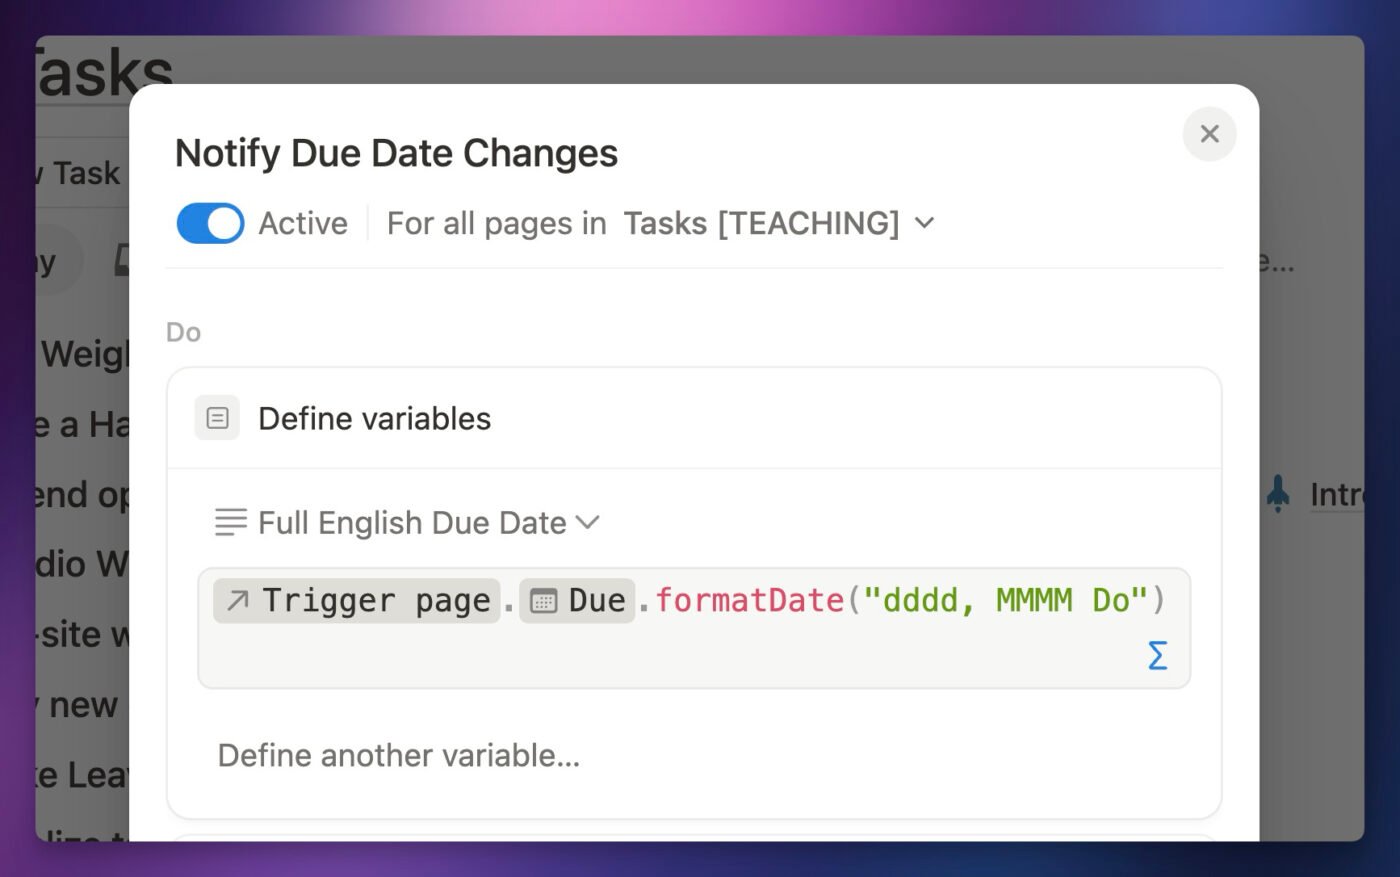
The value of this user variable is a string, but it could just as easily be any of the of the other data types.
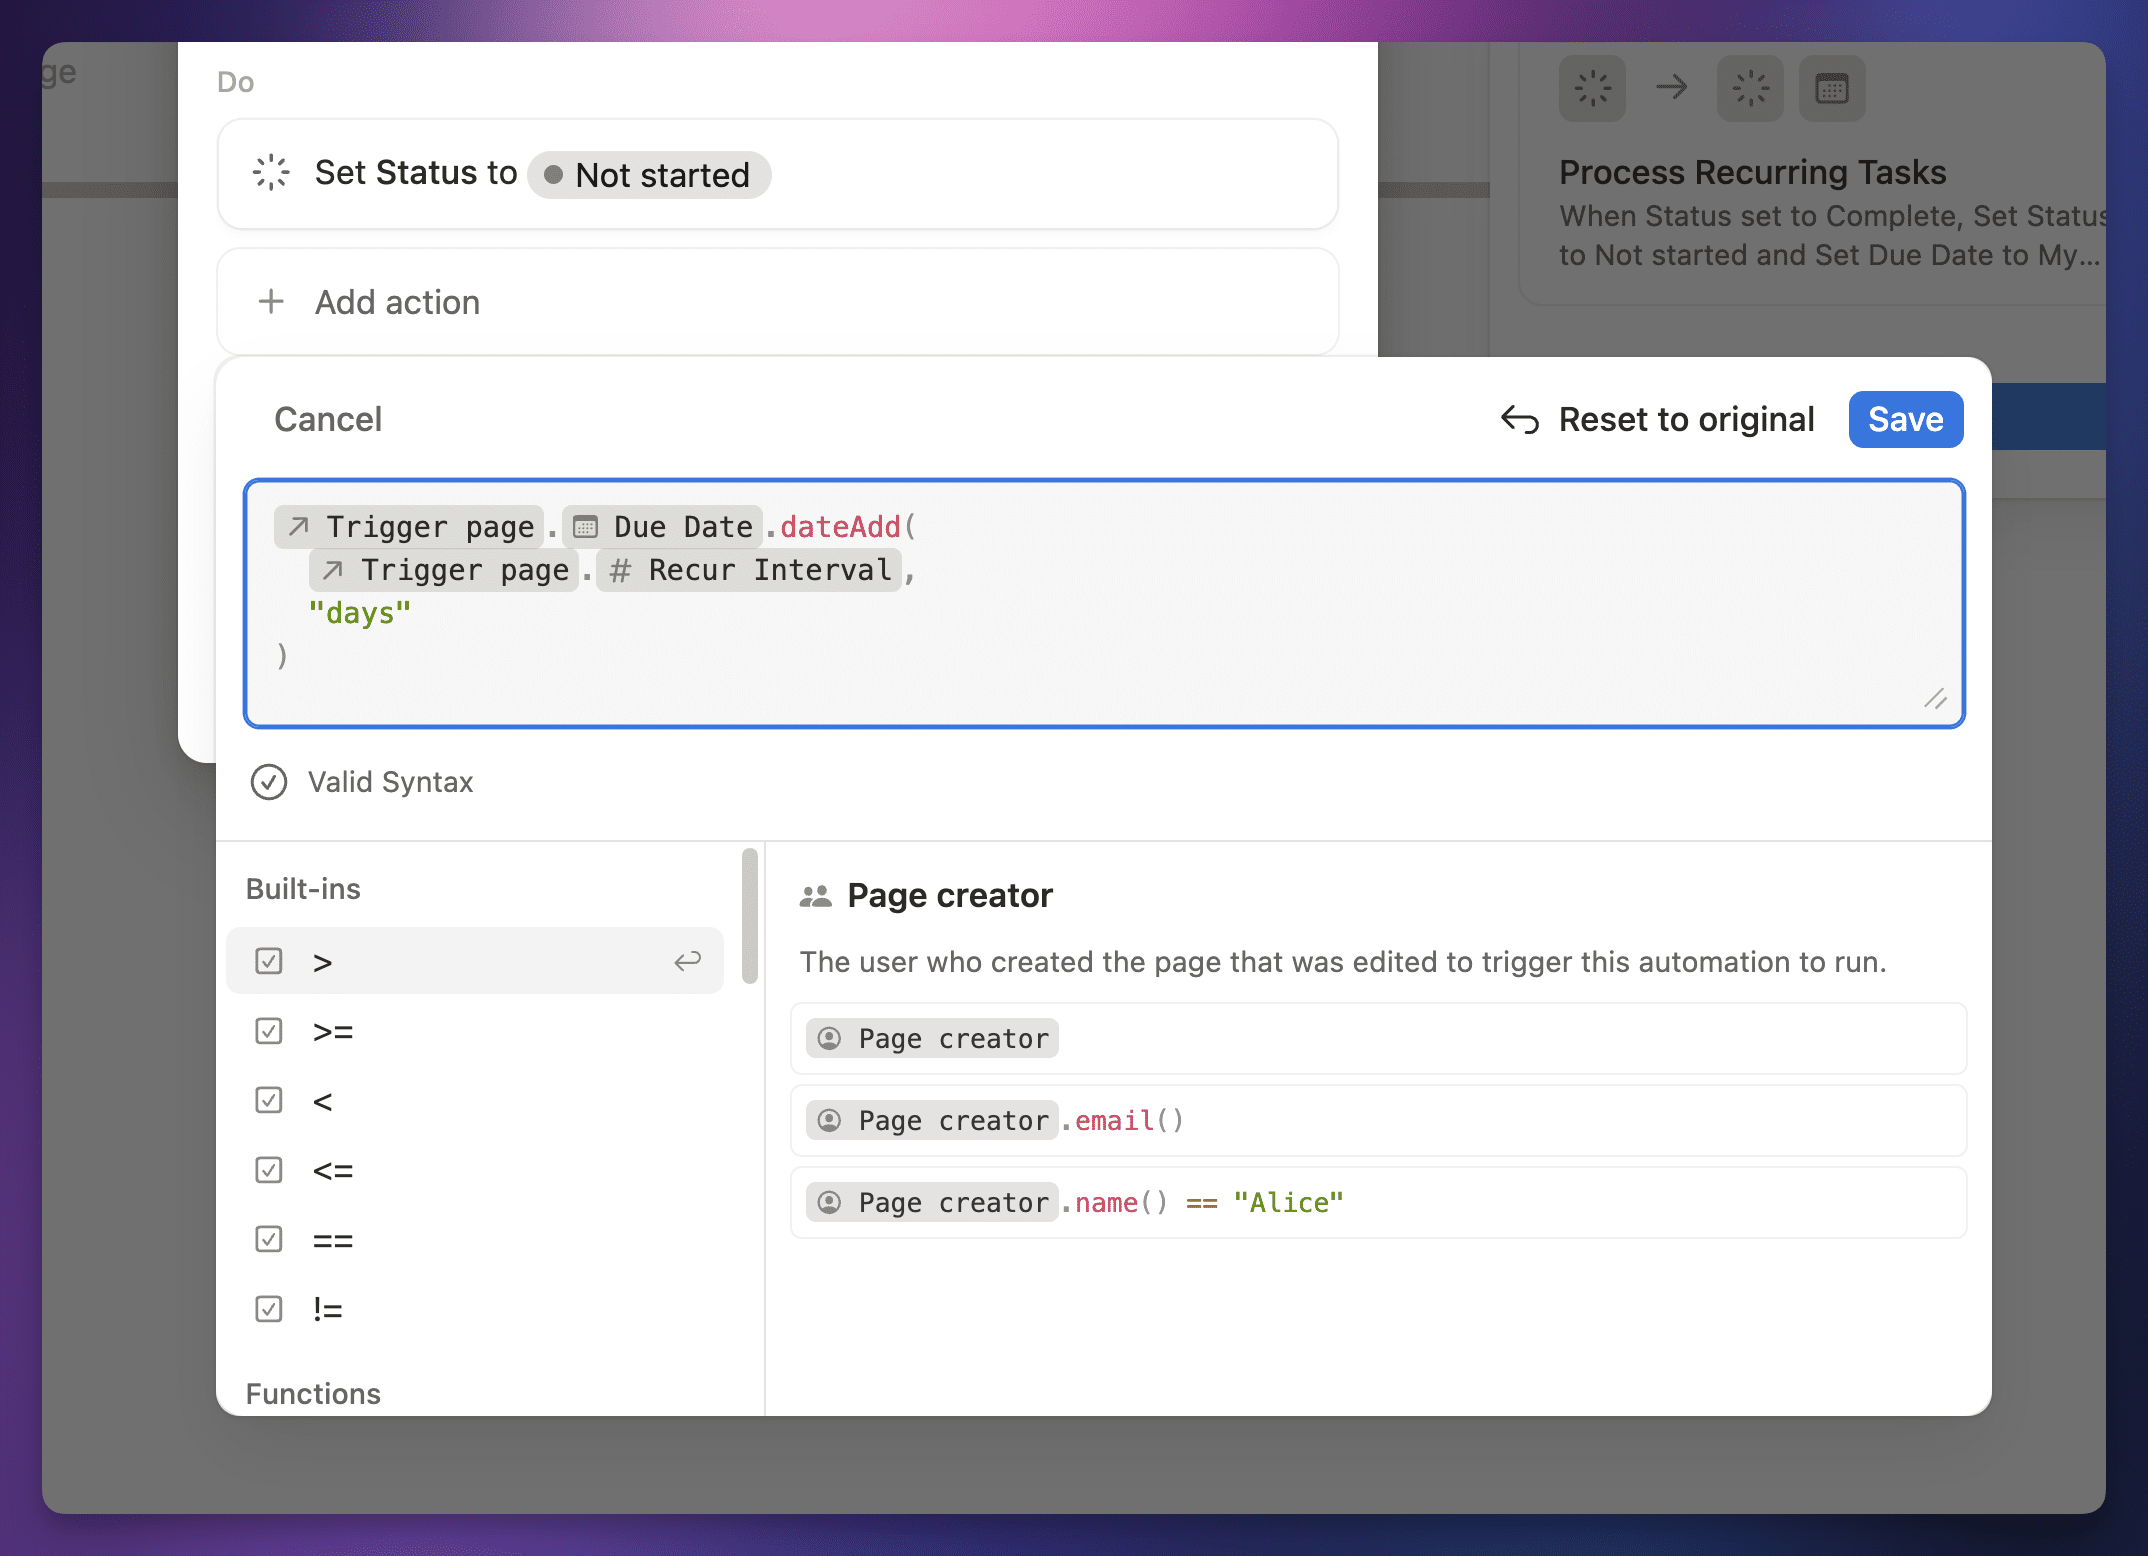
In automation steps that come after the Define Variable step where you’ve defined a variable, you’ll find that variable in the Properties menu alongside all the context variables.
You’ll also be able to easily tell where a user variable is referenced in a formula, as it is shown in blue and looks quite different from context and property variables.
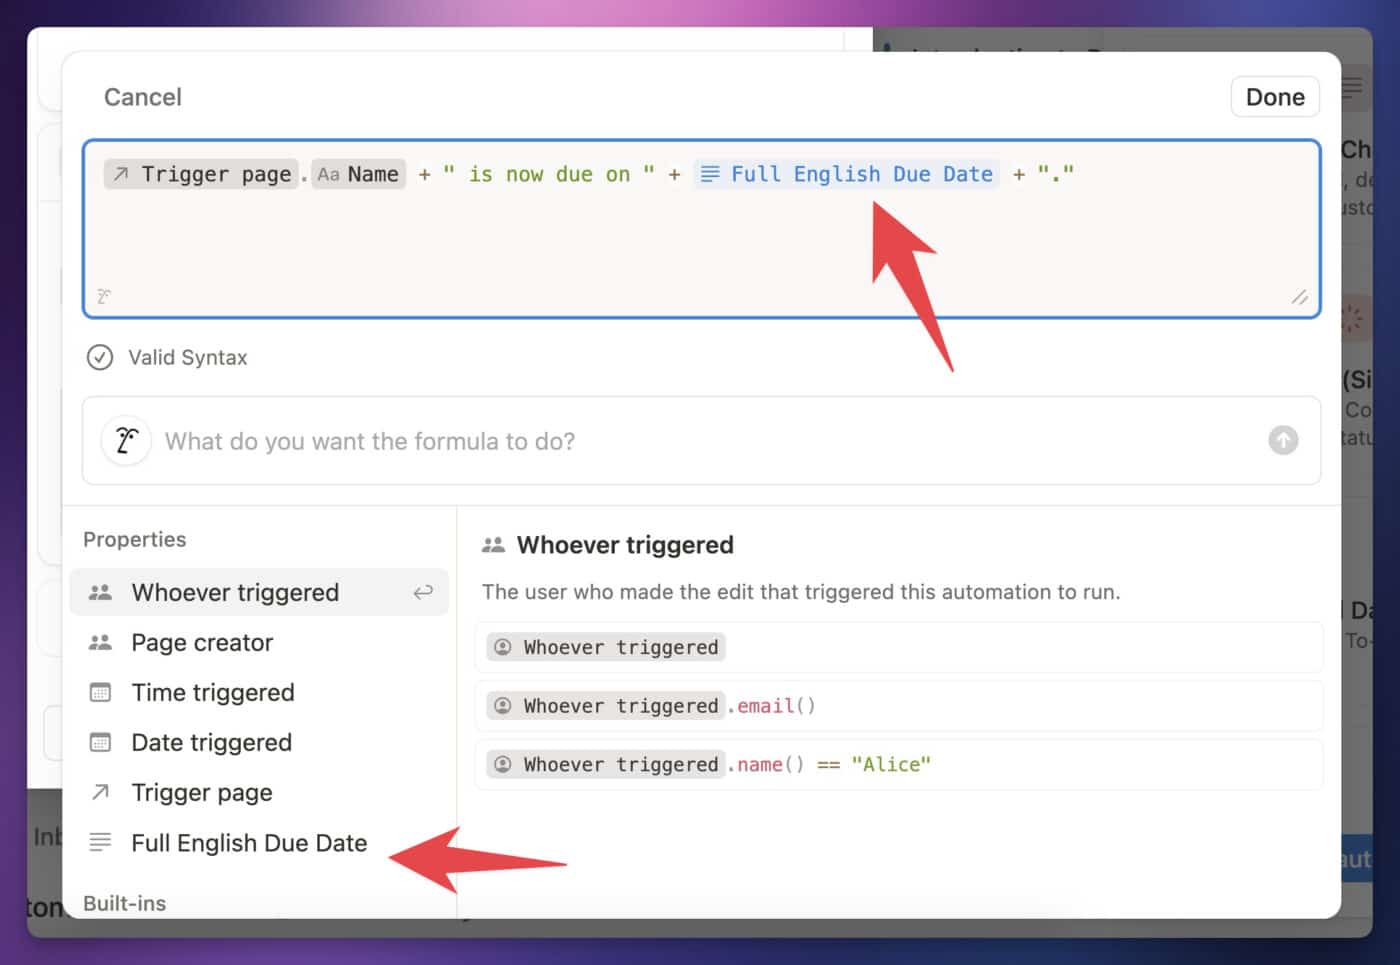
When you copy a formula containing user variables and paste it somewhere other than the Notion formula editor, these variables will be wrapped in the var() function.
Using the example above, we’d see:
context("Trigger page").prop("Name") + " is now due on " + var("Full English Due Date") + "."
Code language: JavaScript (javascript)