
Creator’s Companion 3.0 equips you with the best set of tools in the world for managing your YouTube channel(s), podcasts, blog, and any other places you post content.
It’s the latest evolution of the sytem I designed from scratch to manage my own YouTube channels and podcasts, and many other creators use it to manage their channels – including Practical Engineering (4.3 million subscribers), Deep Pocket Monster (1.5 million subscribers), and more.
Creator’s Companion is packed with advanced tools that you may find helpful if you’re a full-time creator or work with a team – like the Sponsor Dashboard for managing brand deals, the Edit Bay for keeping your editor on track, etc.
However, if you’re a solo creator, you’ll find that these more advanced features stay out of your way until you need them.
Above all, Creator’s Companion is designed to be simple and quick to use. Its #1 job is to stay out of your way, letting you quickly brain-dump video ideas, instantly open up a script you’re working on, or jump into the shotlist for a video editing session.
This guide – and the video that accompanies it above – is your essential training for getting started with Creator’s Companion.
Our goal here will be to get you quickly up and running in minimal time, so you can get back to what you’re good at – making cool stuff on the internet!
I’ll assume you’re already added Creator’s Companion to your Notion workspace. Check out my guide to Adding Creator’s Companion to Notion if you haven’t done that already!
Copy link to headingSetting a Baseline
Creator’s Companion is primarily designed to help you do three things:
- Publish new content more frequently
- Produce better-performing content
- Manage publishing across multiple platforms and channels
You’ll find plenty of additional tools in the template as well, including a dashboard for managing brand deals, SEO/keyword tools, and a Wiki for documenting processes. Feel free to explore those parts of the template if they’re relevant to you.
However, the three goals I’ve listed above are the most important. Fittingly, they’re what we’ll focus on in this getting-started guide.
To that end, let’s establish three to-do items:
- Set up a Channel for each platform/channel on which you create content.
- Create your first Content Project (which can be a video, podcast, blog post, etc).
- Capture research and inspiration that will help you make better content.
Before we dive into these, though, let’s take a brief tour of the Creator’s Companion home page.
Copy link to headingOne Page to Rule Them All
Creator’s Companion is designed to be simple to use, and one of my primary design goals was to help you jump into your current projects in a minimum number of clicks.
Fittingly, all of the most important stuff is accessible right from the home page. On it, you’ll find four main sections:
- Content Projects – Videos, streams, podcasts, blog posts, and any other pieces of content you’re creating.
- Channels & Courses – Any place where you regularly publish content is a “Channel”. These can include YouTube channels, Instagram accounts, blogs, etc. Every Channel gets it own dedicate dashboard – essentially its own mini-Creator’s Companion.
- Wiki – Here you can create documentation, checklists, and Standard Operating Procedures (SOPs). If you’re working with a team, these will be invaluable.
- Research – Here you can access topical research you’ve captured, along with Swipes (great thumbnails and other visual inspiration), and more.
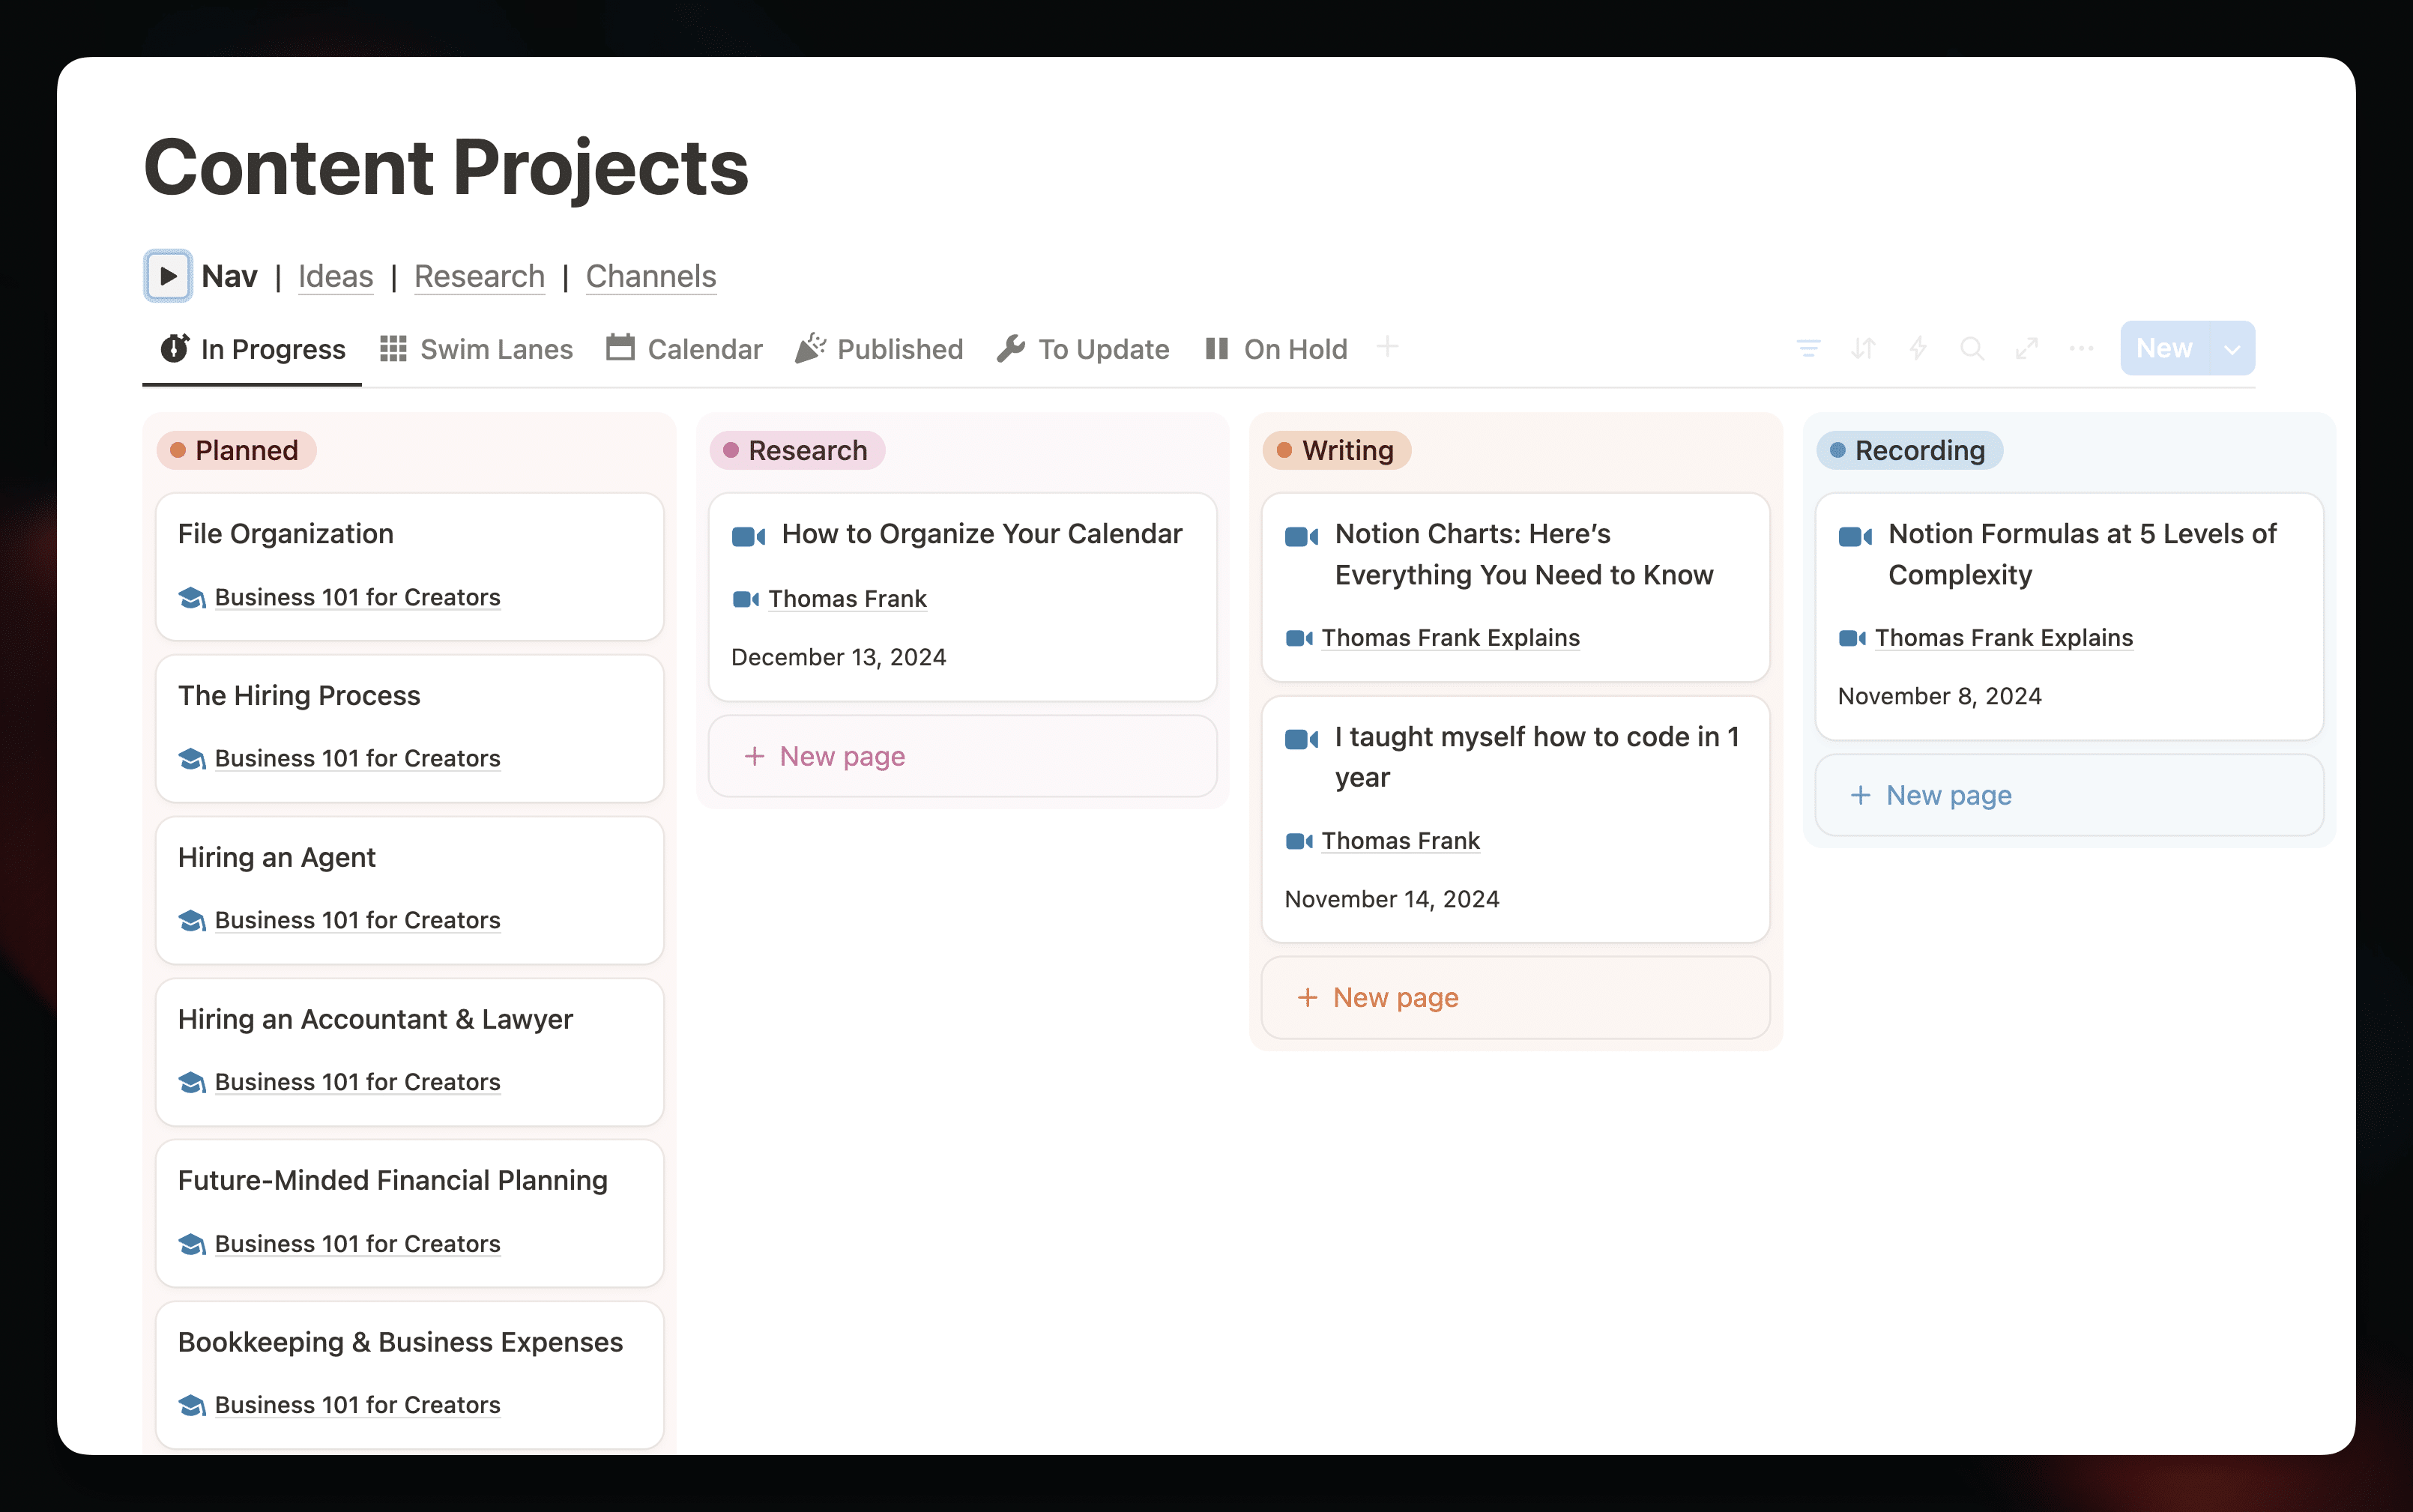
Content Projects
The Content Projects section gives you quick access to all of your content, including:
- Active projects (stuff you’re actively working on)
- Planned content (ideas you’ve validated and greenlit)
- Ideas
- Published projects
The views in this section are roughly split up into these categories, which helps you to stay focused.
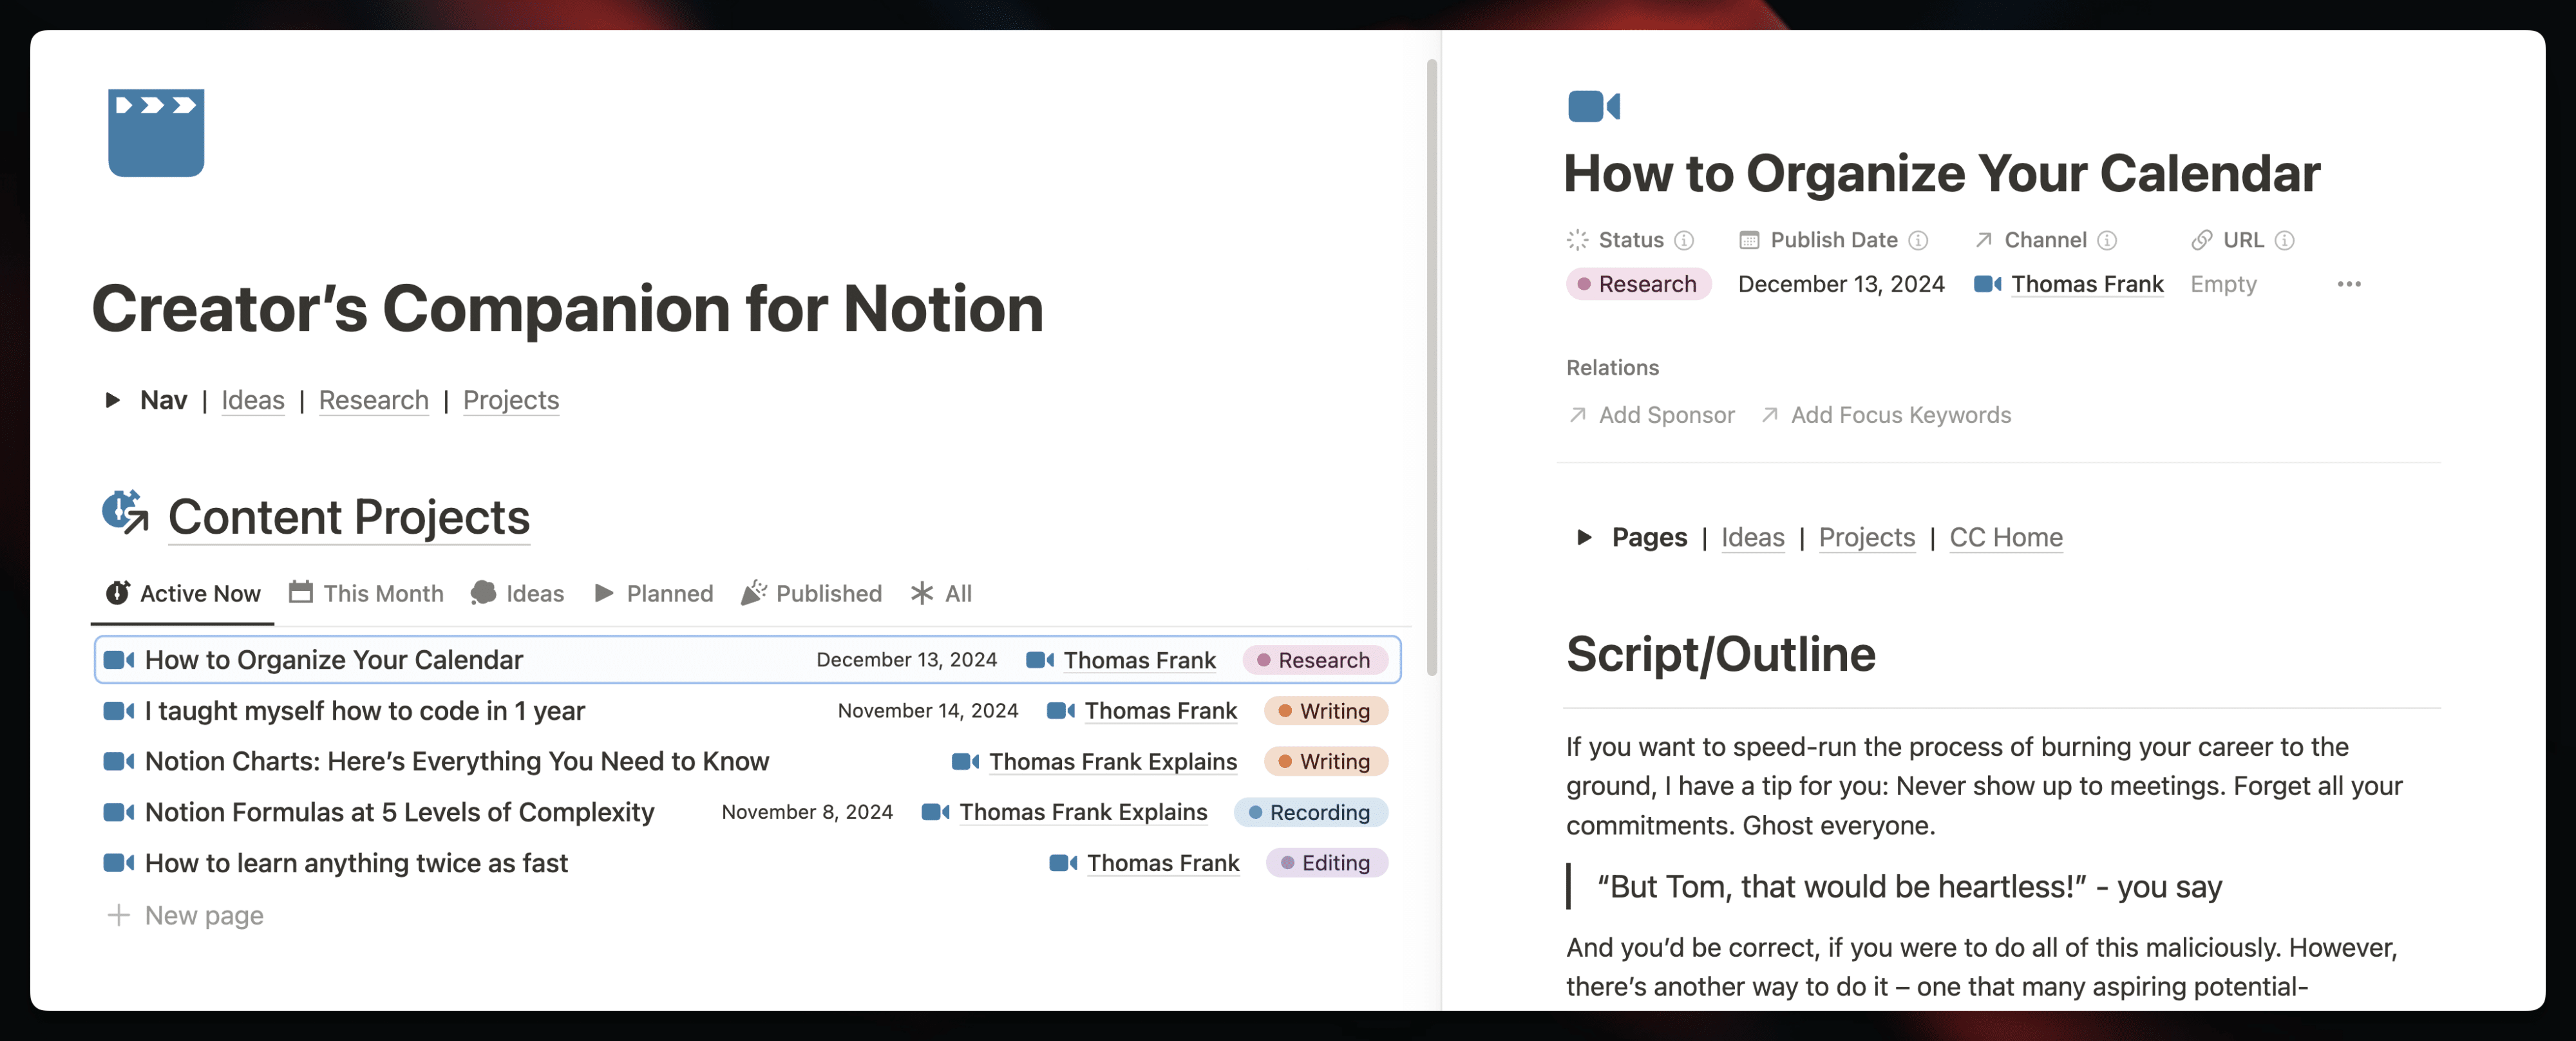
Want to jump into a video script and do some writing? You’ll find it in the default Active Projects tab, which shows everything from the Research stage all the way up to the Ready to Publish stage.
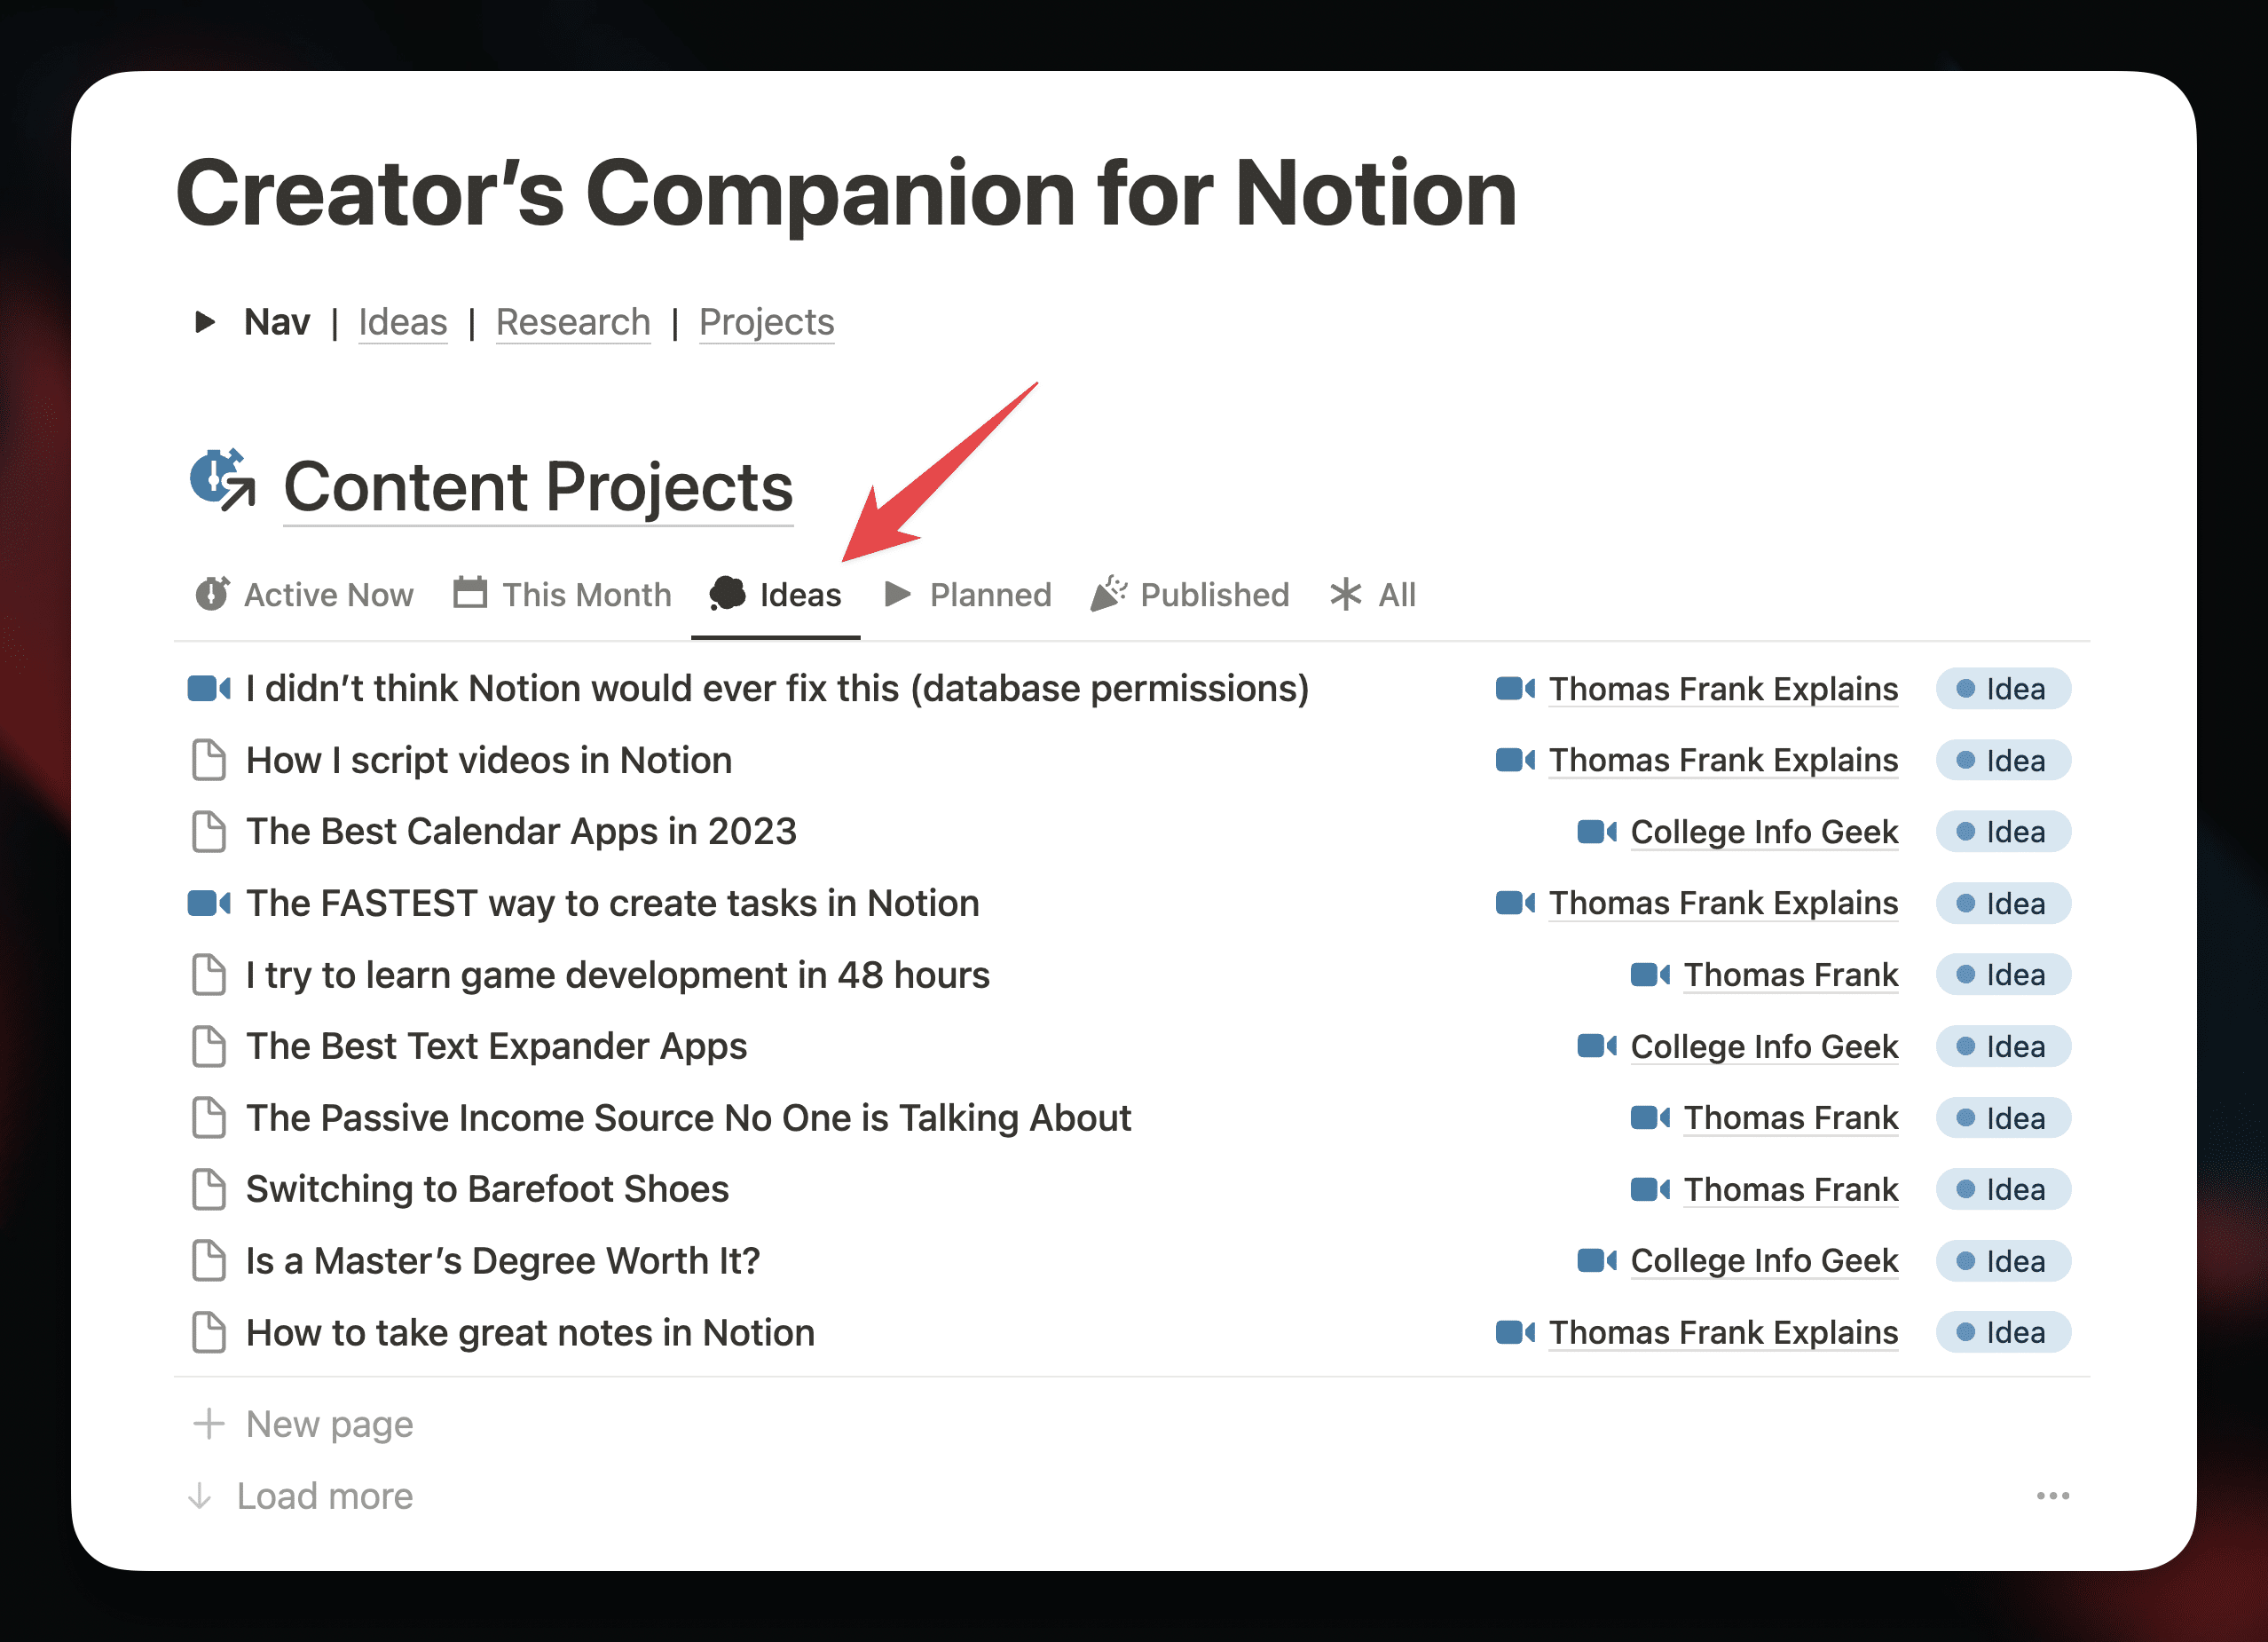
Need to quickly brain-dump an idea for a video? Head to the Ideas tab.
Want to reference the script from a video you already published? You’ll find all your previous content in the Published tab.
This is one of the major advantages of using Creator’s Companion for managing your content, by the way. It’s not just a project management tool for active projects; it also becomes an extremely useful archive for published projects as well.
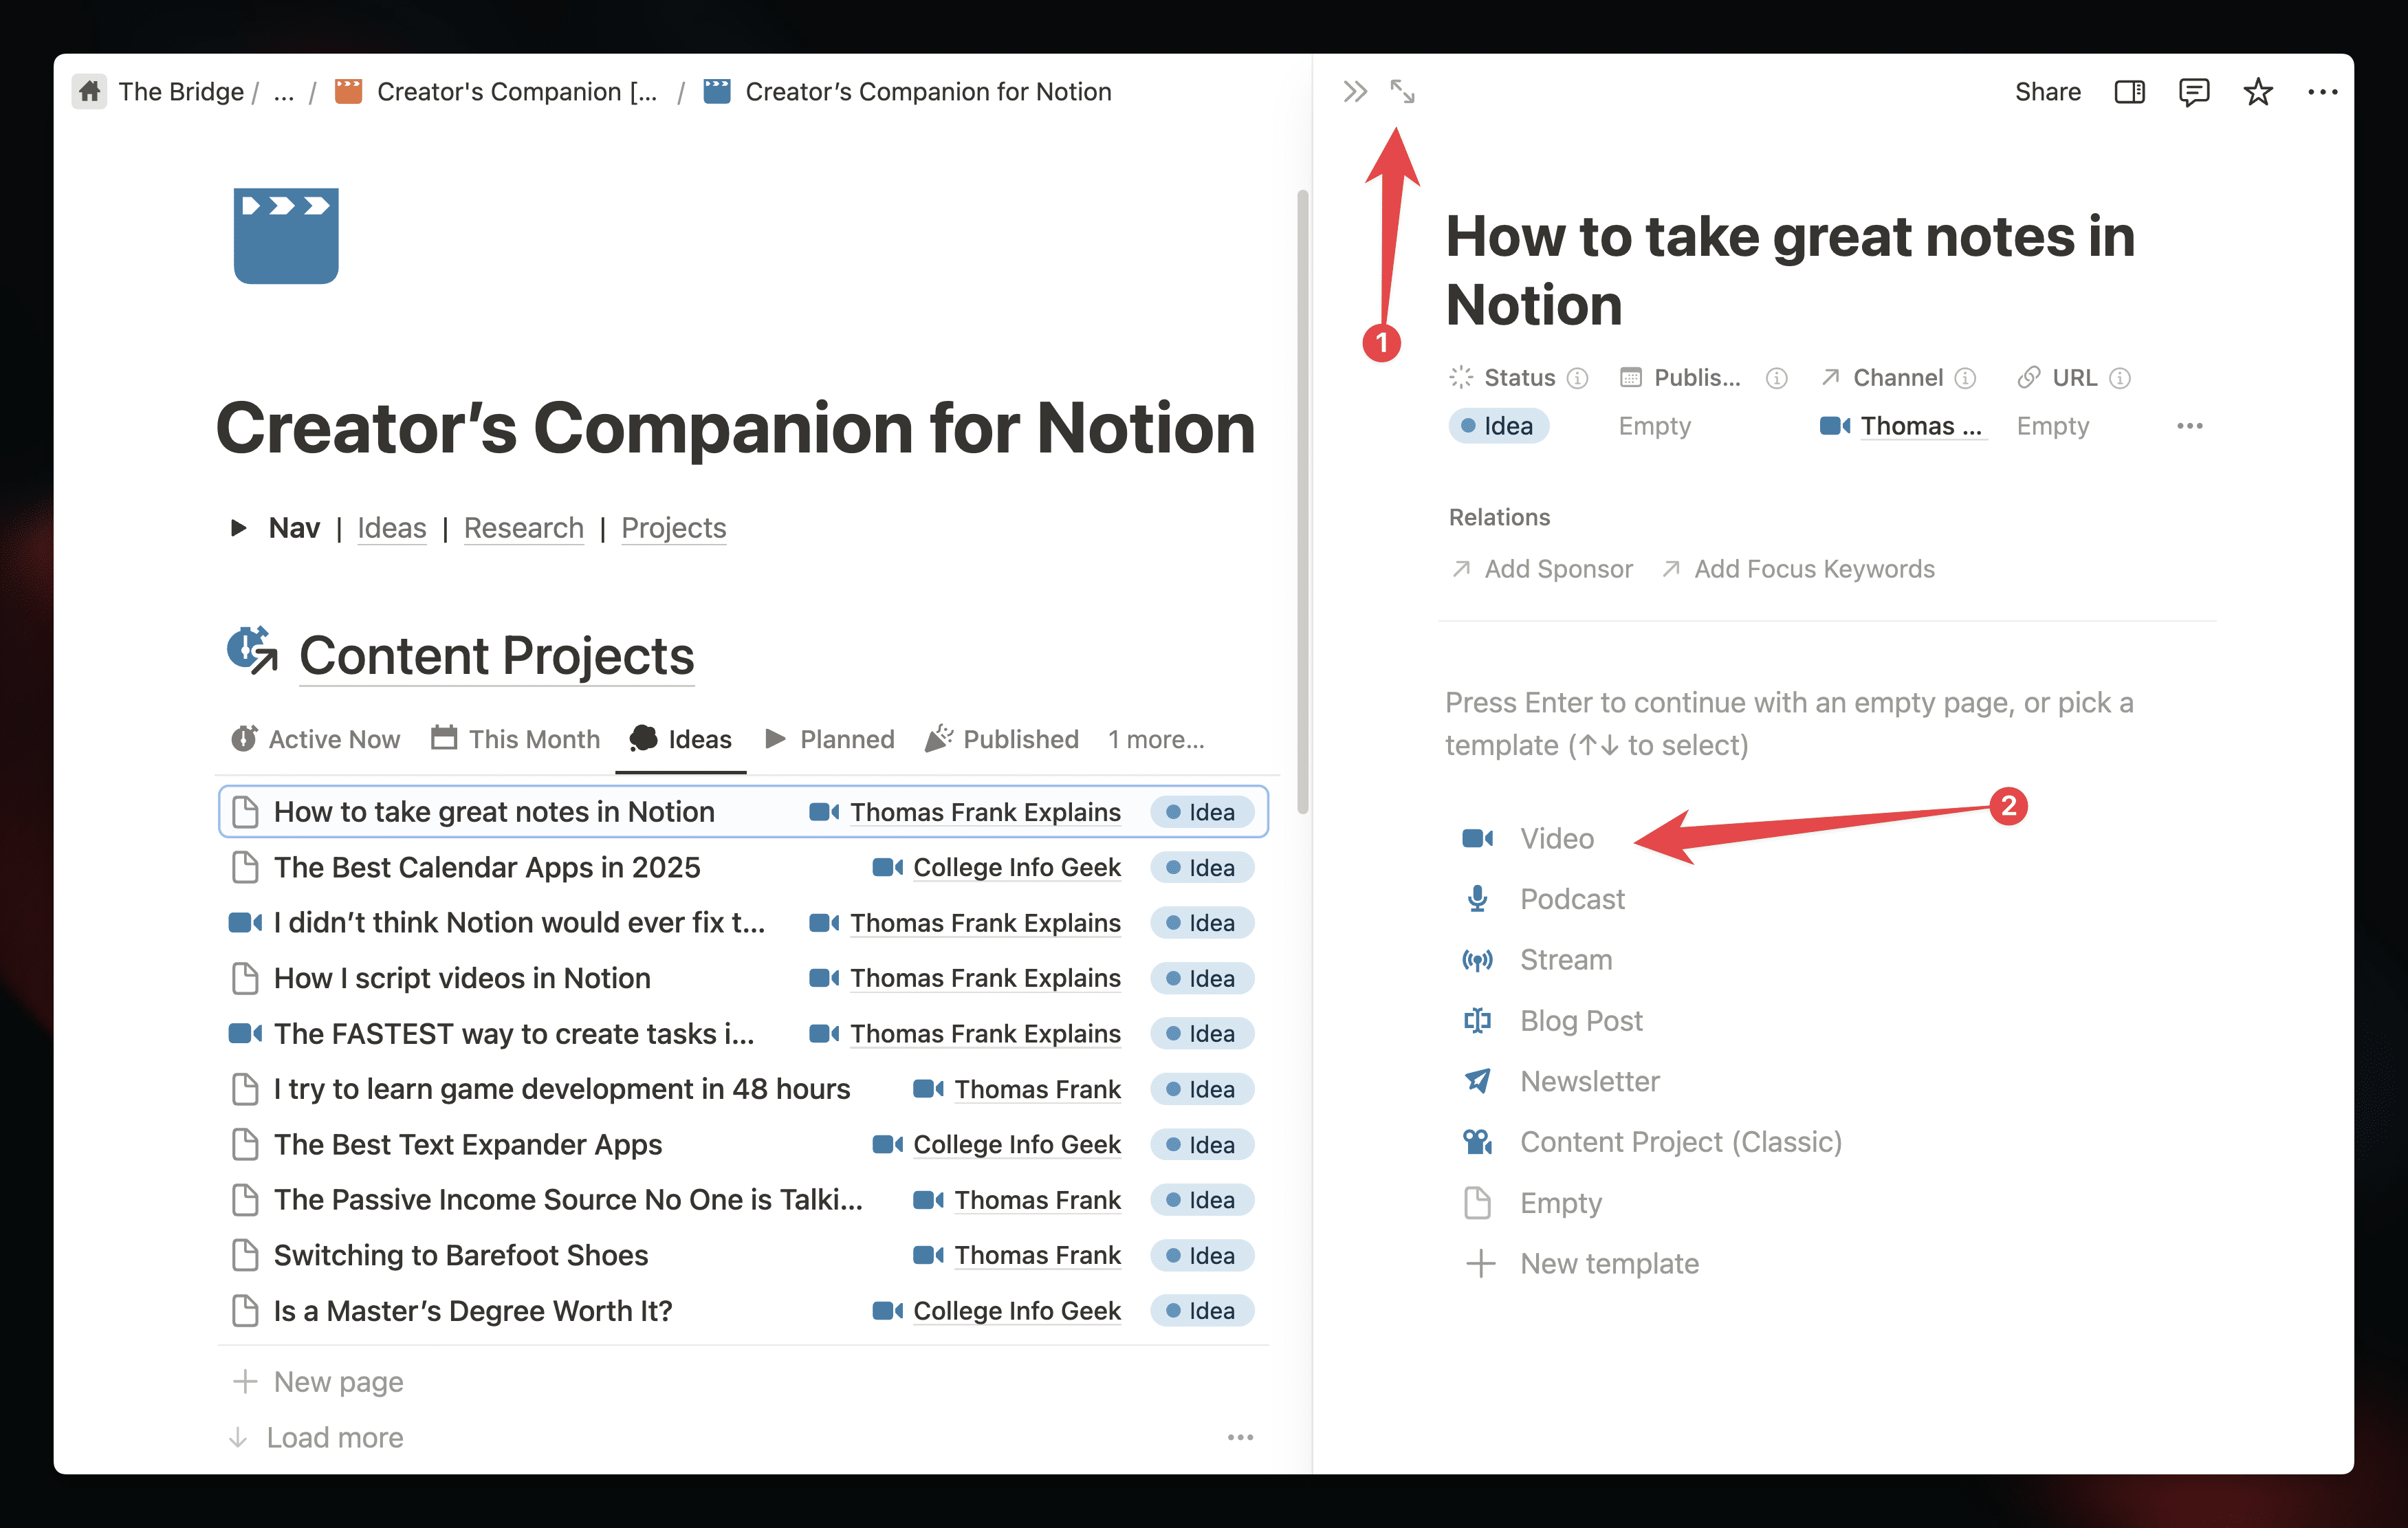
As you can see in the screenshot above, the Content Projects section is designed to work well with Notion’s Side Peek feature. This allows you to open up database pages in a handy side panel, which means you can quickly jump into a project without fully leaving the main dashboard.
Pro-tip: You can actually open any page in Side Peek. Just hold ⌥ or Alt when you click it!
You can also click the section header to go to the dedicated Content Projects dashboard, which contains more advanced views – including a kanban (Trello-style) view of your active projects, as well as a content calendar.
You’ll notice that this pattern applies to each other home page section as well. Each section gives you a high-level view of a more detailed dashboard. In your day-to-day, you’ll likely be able to 90% of your work directly from the home page – but you can jump into the other dashboards whenever you need.
Copy link to headingChannels & Courses
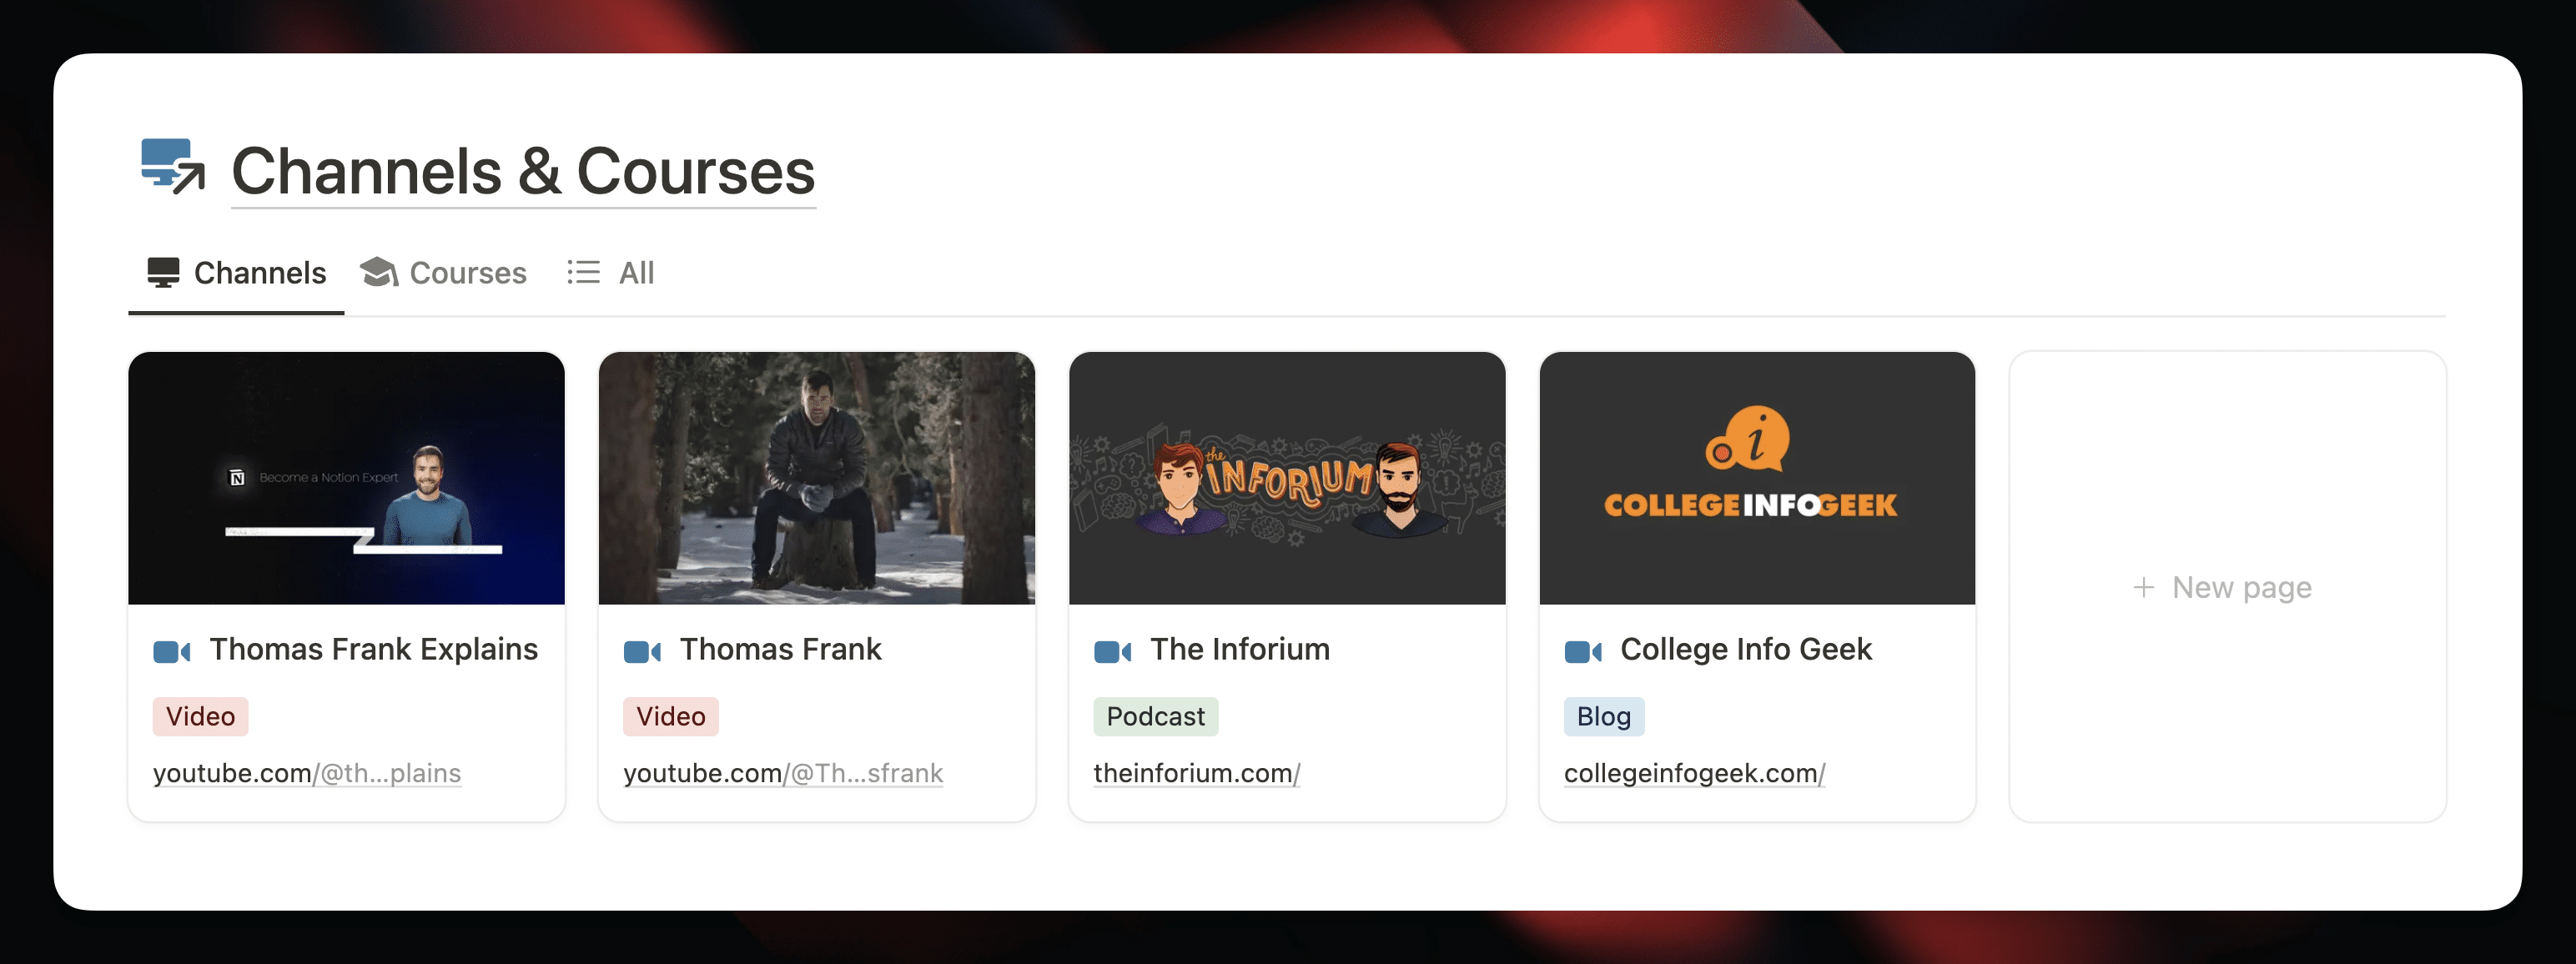
The Channels & Courses section lets you create and manage:
- Channels – any platform or channel where you create dedicated content. This can include YouTube channels, Instagram accounts, podcasts, blogs, etc.
- Courses – online courses filled with lessons.
Each of these pages is essentially a mini-Creator’s Companion dedicated to that Channel or Course. Open one up and you’ll see sections for Ideas, Active Projects, Completed Projects, and a Reference section that contains Channel-specific wiki items, research, and more.
Both Channels and Courses are pages in the central Channels database; each just has a specific type and template applied. Throughout these docs, I’ll typically use the term “Channel” to refer to any of these pages unless I’m specifically talking about Course pages.
Copy link to headingWiki
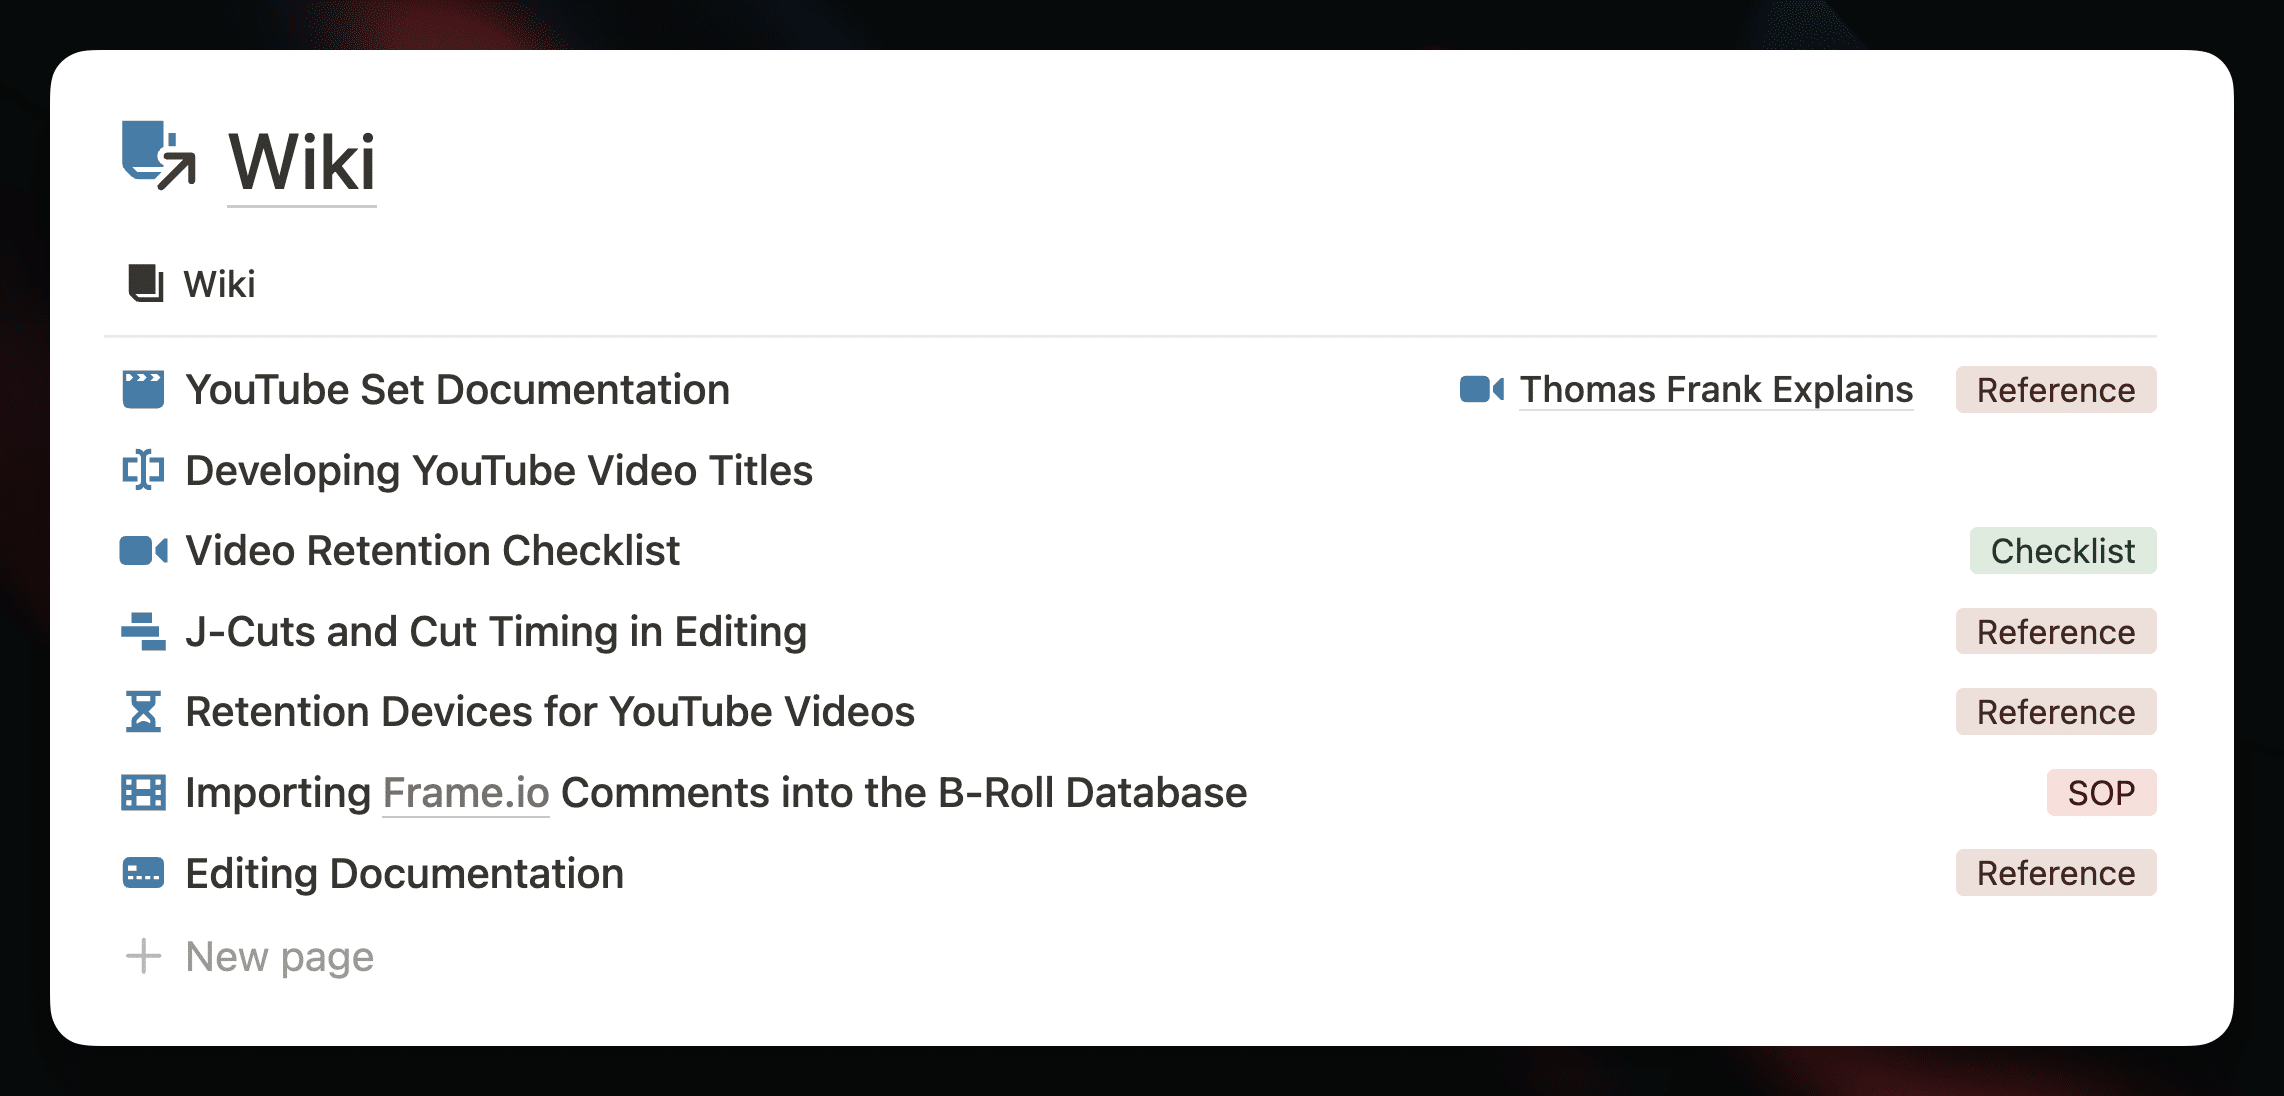
The Wiki section gives you a database where you can create useful documentation about your content creation process and setup. This can include reference docs, checklists, and Standard Operating Procedure (SOP) docs that explain tasks that need to be done on a regular basis.
Here are a few examples:
- Set and tech documentation – camera settings, light levels and positions, audio levels, OBS (screen recorder) settings, server/network drive info, etc.
- Lessons from top-performing content – winning title/thumbnail formulas, topics your audience loves, etc.
- Editing documentation – notes on your most-used keyboard shortcuts in After Effects, documentation on plugins you use, etc.
- Upload process checklist – a checklist of everything that needs to be done during the upload process (for example, we have to upload to Nebula in addition to YouTube, create captions, etc.)
Creating these Wiki entries can be useful if you’re a solo creator, but it’s invaluable if you’re working with a team. You can read more about this in our Creator’s Companion team use guide.
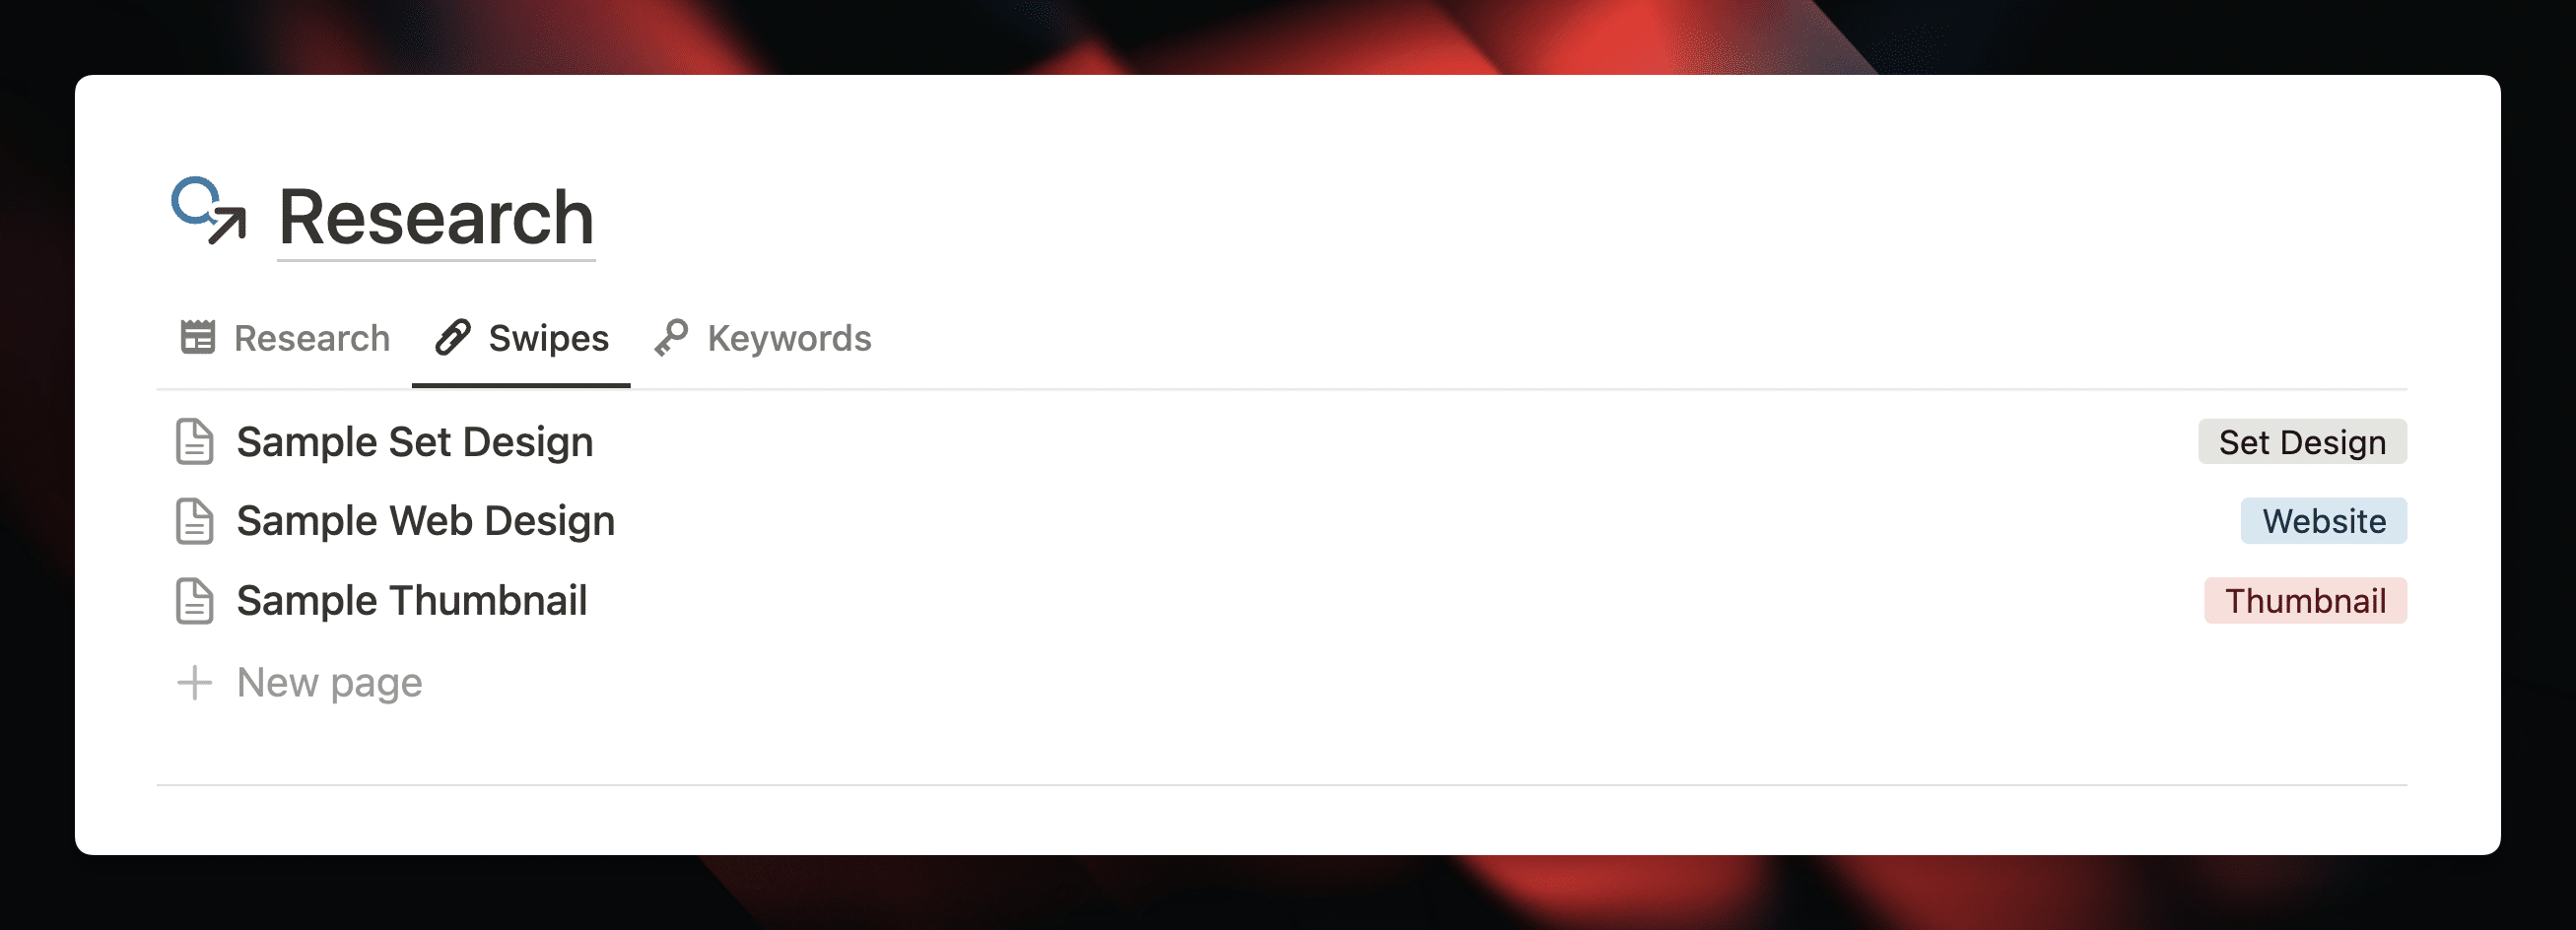
Copy link to headingResearch
The Research section gives you an at-a-glance view of three databases:
- Research – stores topical research (research directly related to content projects), outliers (high-performing content you can learn from), tools, creator advice, and other research items.
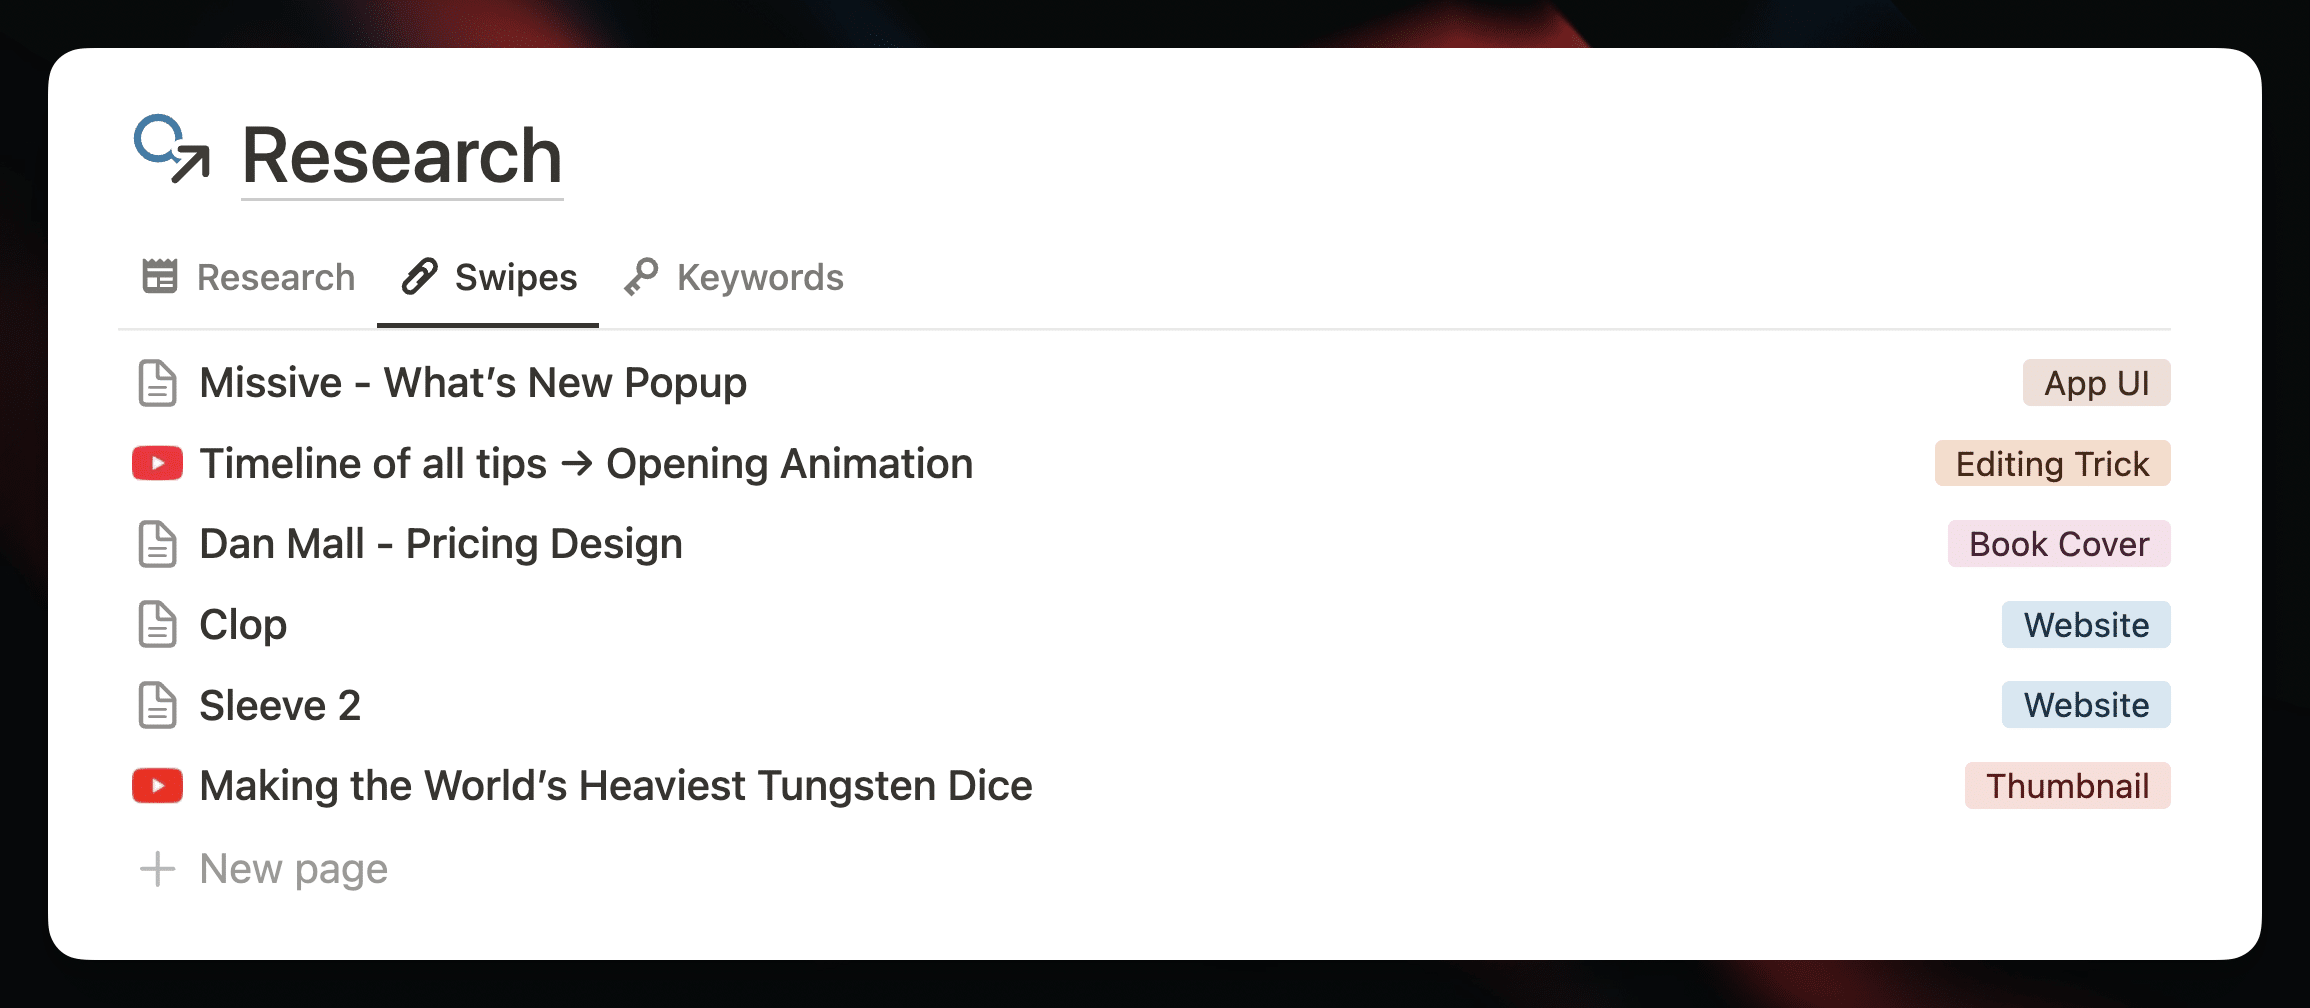
- Swipes – a dedicated database for capturing visual inspiration. This can include great YouTube thumbnails, web design elements, set design, memes, editing tricks, etc. Check out my public thumbnails database from my Creator Atlas for an example.
- Keywords – a database for tracking specific keywords. If you’re an SEO-focused creator, this database is for you.
The easiest way to capture new items to these databases is with Flylighter, our powerful Notion web clipper. It’ll let you instantly send full article, highlights, YouTube thumbnails, and more to Notion – directly from your browser. I’ll cover some example use cases in the Research and Inspiration section below.
Copy link to headingSet Up Your First Channel
While you can start creating Content Projects (videos, blog posts, etc) right away, it’s best to set up at least one Channel first.
In Creator’s Companion, every piece of content you create should be associated with a Channel, which is the primary place that piece of content will be posted. For example, this video project is associated with my Thomas Frank channel:
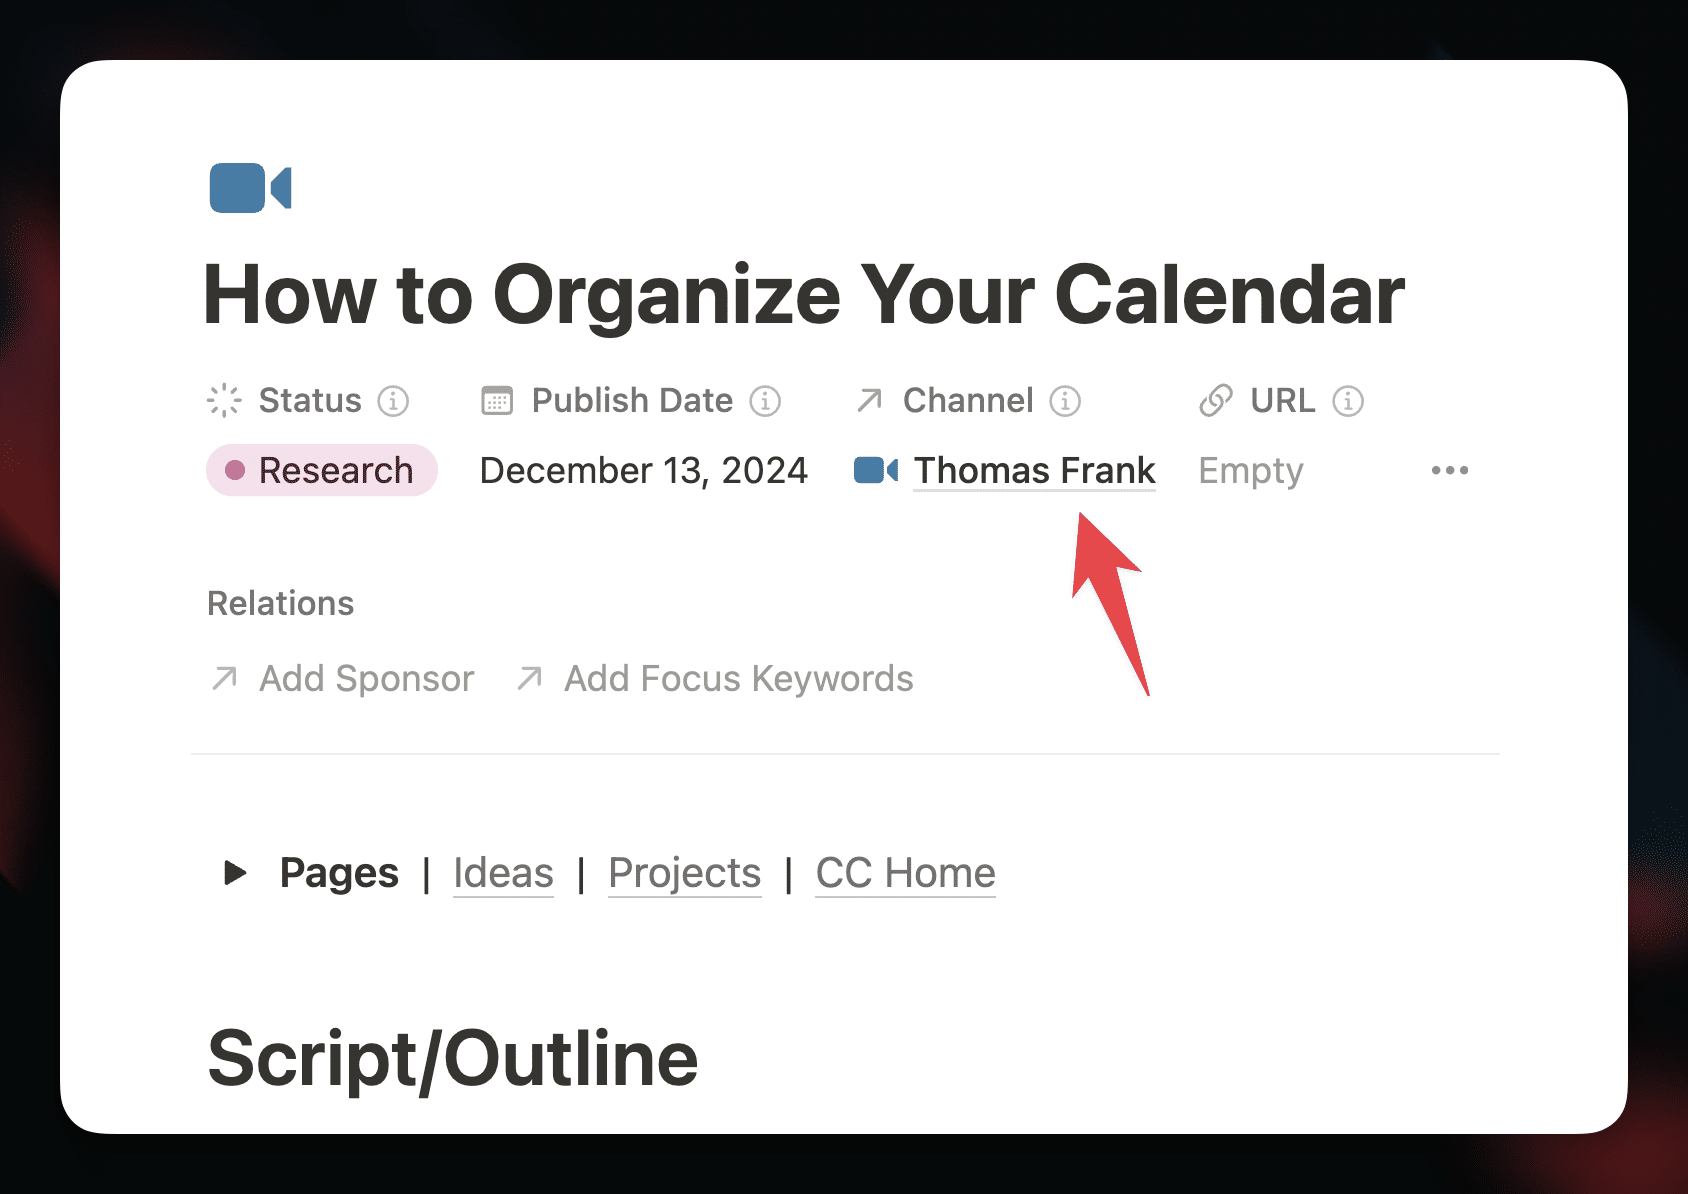
This project contains all of its important details – the script, research, rough notes, B-roll list for editing, URL, etc. I’ll cover all of that in more detail in the next section.
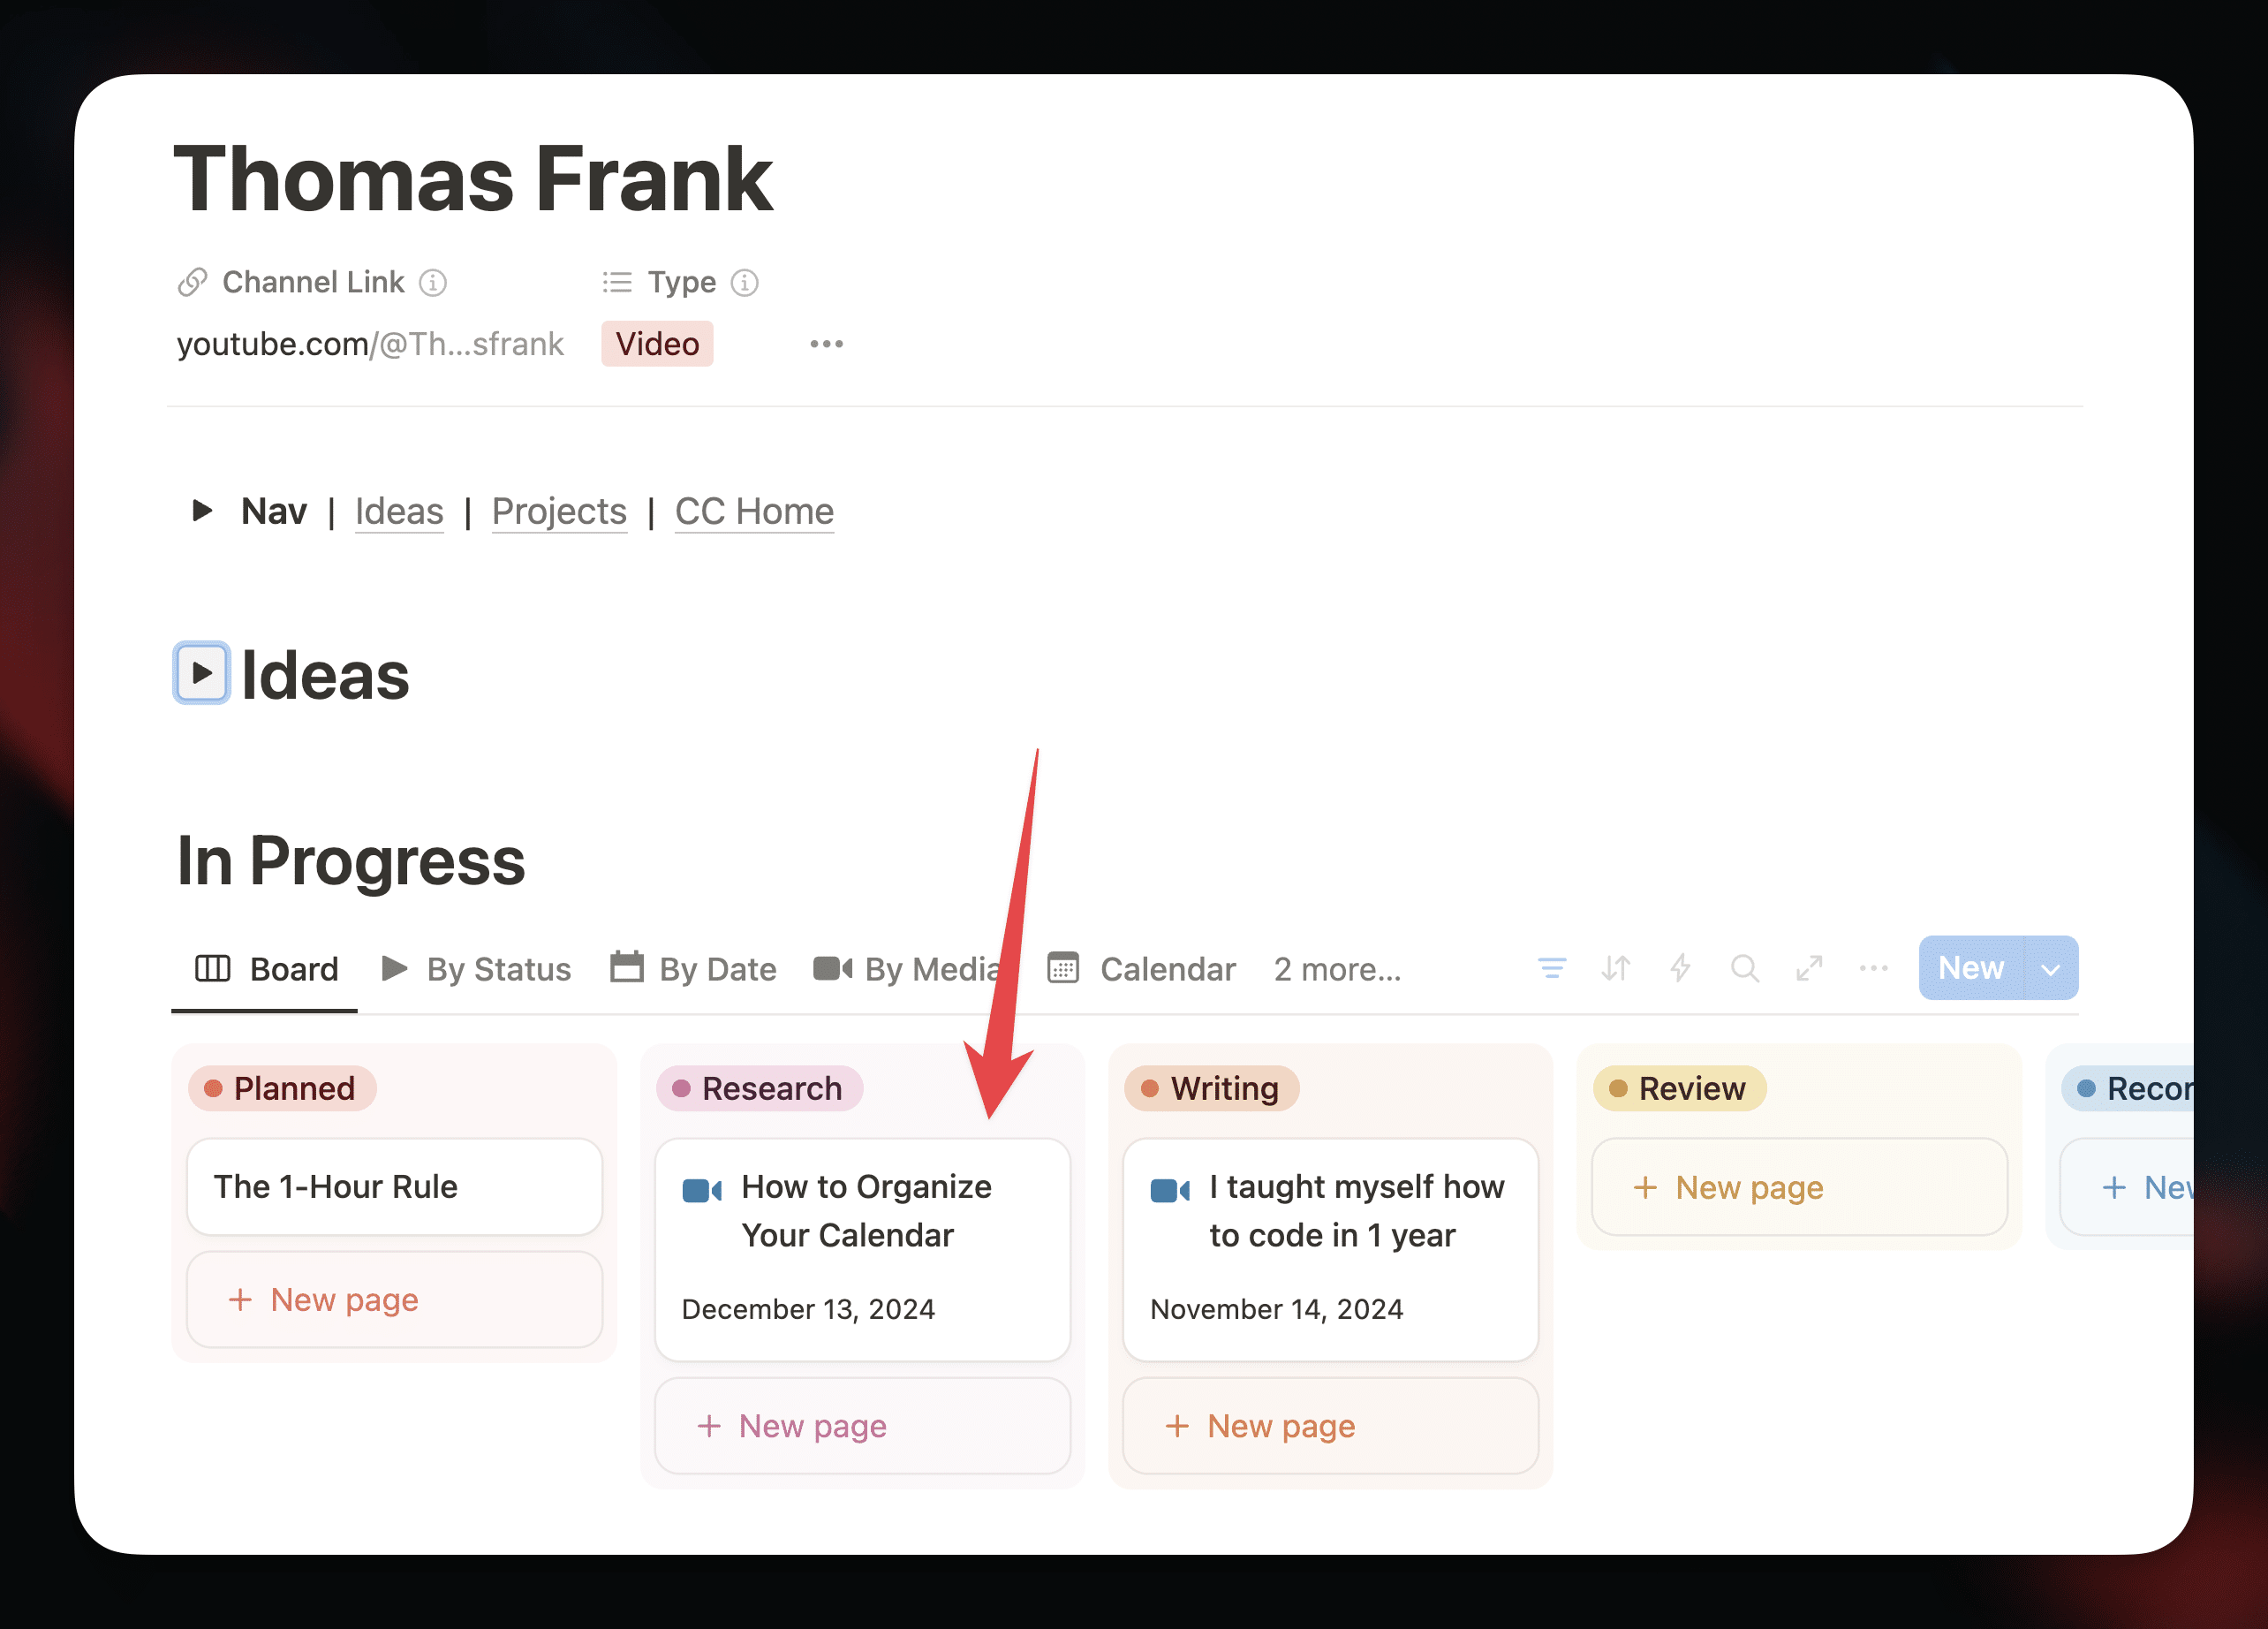
The Thomas Frank Channel page shows this project; you can see it in the Research column within the In Progress section.
Good to know: The Channel page does not “contain” any of the projects that are shown on it. Instead, the Channel is related to each of the displayed projects. Channels will typically be related to many projects – and if you wanted, you could relate multiple Channels to a single project. If this is confusing, you can read my guide on database relations in Notion.
Channel pages create a dedicated dashboard in Creator’s Companion for a single YouTube channel, podcast, blog, newsletter, etc.
Copy link to headingWhat is a Channel?
I recommend creating a Channel for any platform/account where you create content that requires significant effort. Personally, I have Channel pages for:
- Each of my YouTube channels
- Blogs
- My podcast
- My newsletter
I do not create Channel pages for my Twitter, Bluesky, or Instagram accounts. You certainly can, but I try to limit my Channels to the places where my content creation process needs to start in Notion.
When I create lower-effort content – e.g. tweets – I don’t bother to draft them in Notion. So I don’t both with a Channel for them, as that would add friction to my process.
Copy link to headingCreating a Channel
To get started, create a page in your Channels & Courses section. If you have the Channels tab active, the Channel template should be automatically applied, and you’ll see a page that looks very similar to the Thomas Frank Channel page below.
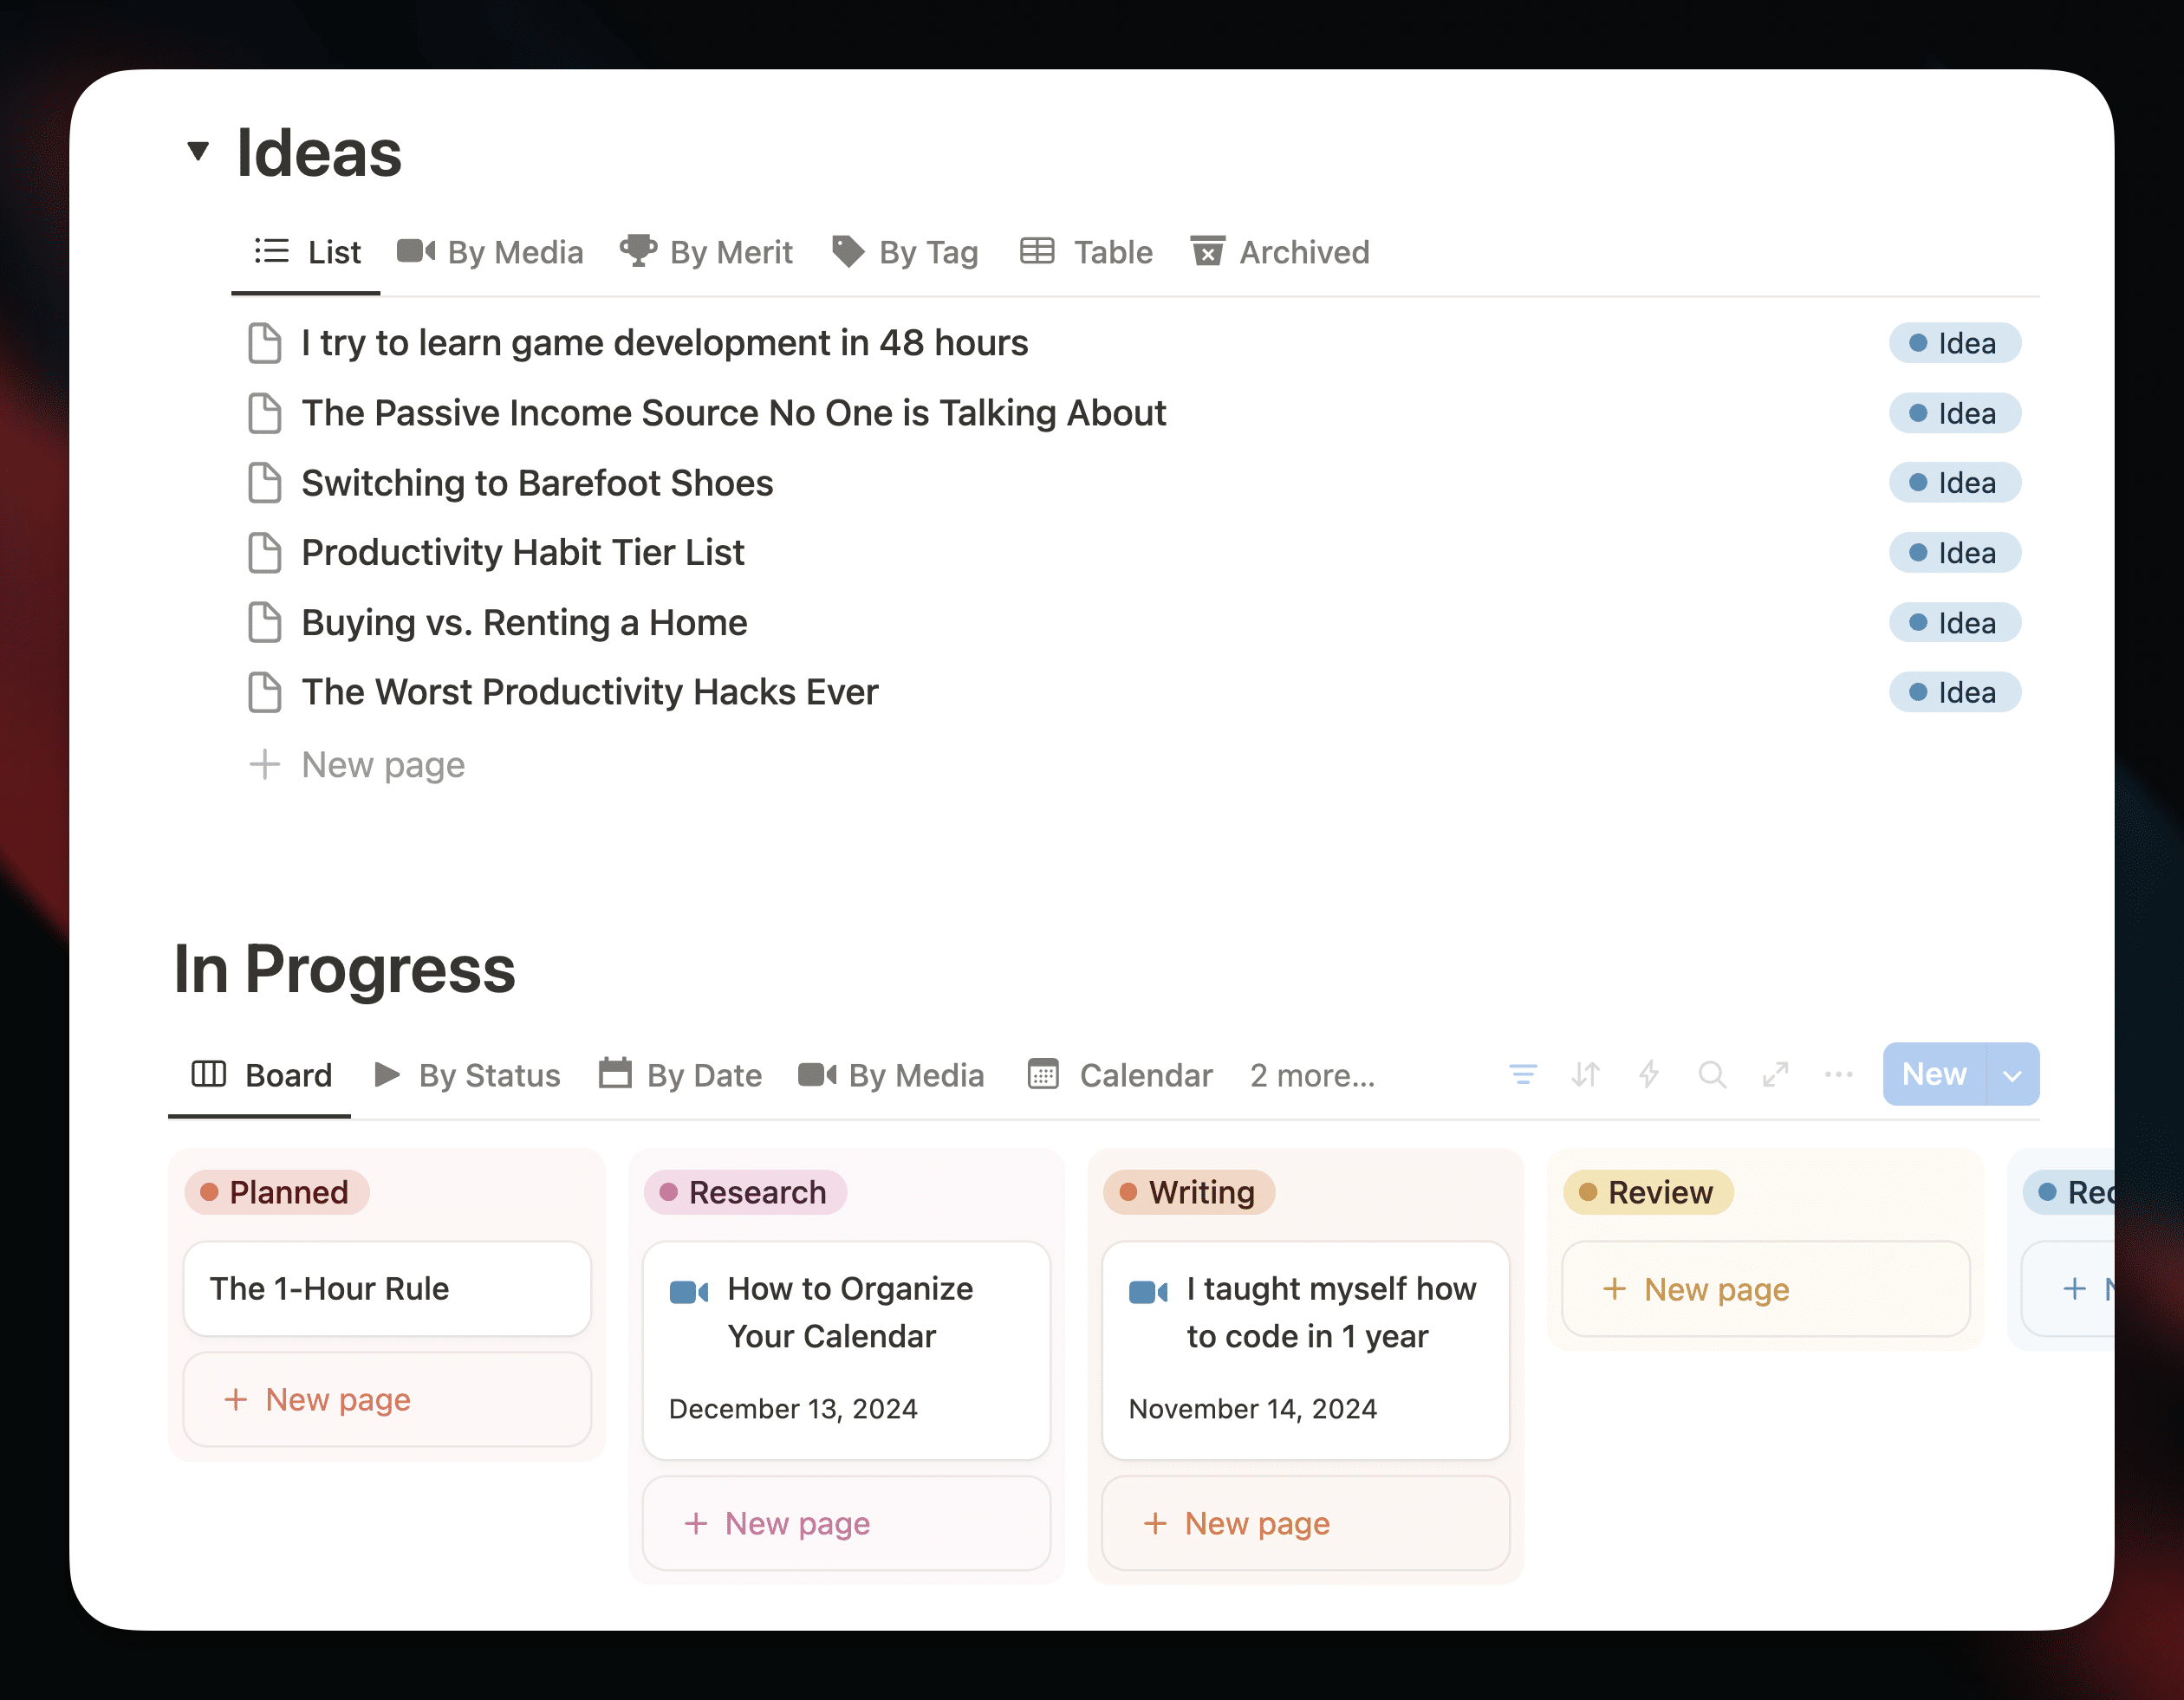
Your Channel page gives you a few main sections. First, there’s the Ideas section. Here you can brain-dump ideas for content you might want to create. When you create pages here, they’ll be given the Status value “Idea”, and they’ll stay within the Idea views throughout Creator’s Companion.
Ideas don’t show up in the Active/In-Progress views in Creator’s Companion. When a project has the Idea status, it’s not yet greenlit – meaning you haven’t yet decided that it’s a worthy use of your time and production resources.
Within the Ideas section, you can explore the different tabbed views – each one gives you a different way to organize your ideas. For example, the By Media tab lets you apply Media tags to your ideas, such as Long-Form or Short.
Once you’ve decided to take action on an idea, you can switch its Status to Planned. Once you do this, it’ll disappear from the Ideas section and appear in the In-Progress section.
This section lets you shepherd each active project through the stages of the production process. If you set a Publish Date for a project, you’ll also be able to see it on the Calendar view.
Pro-Tip: Click any project, and you’ll instantly see your Script or Outline! This is a major strength of Notion; you can take off your project-manager hat and put on your writer hat instantly, without needing to switch apps.
Once you’ve finished a project and changed its status to Completed, you’ll see it in the Completed section.
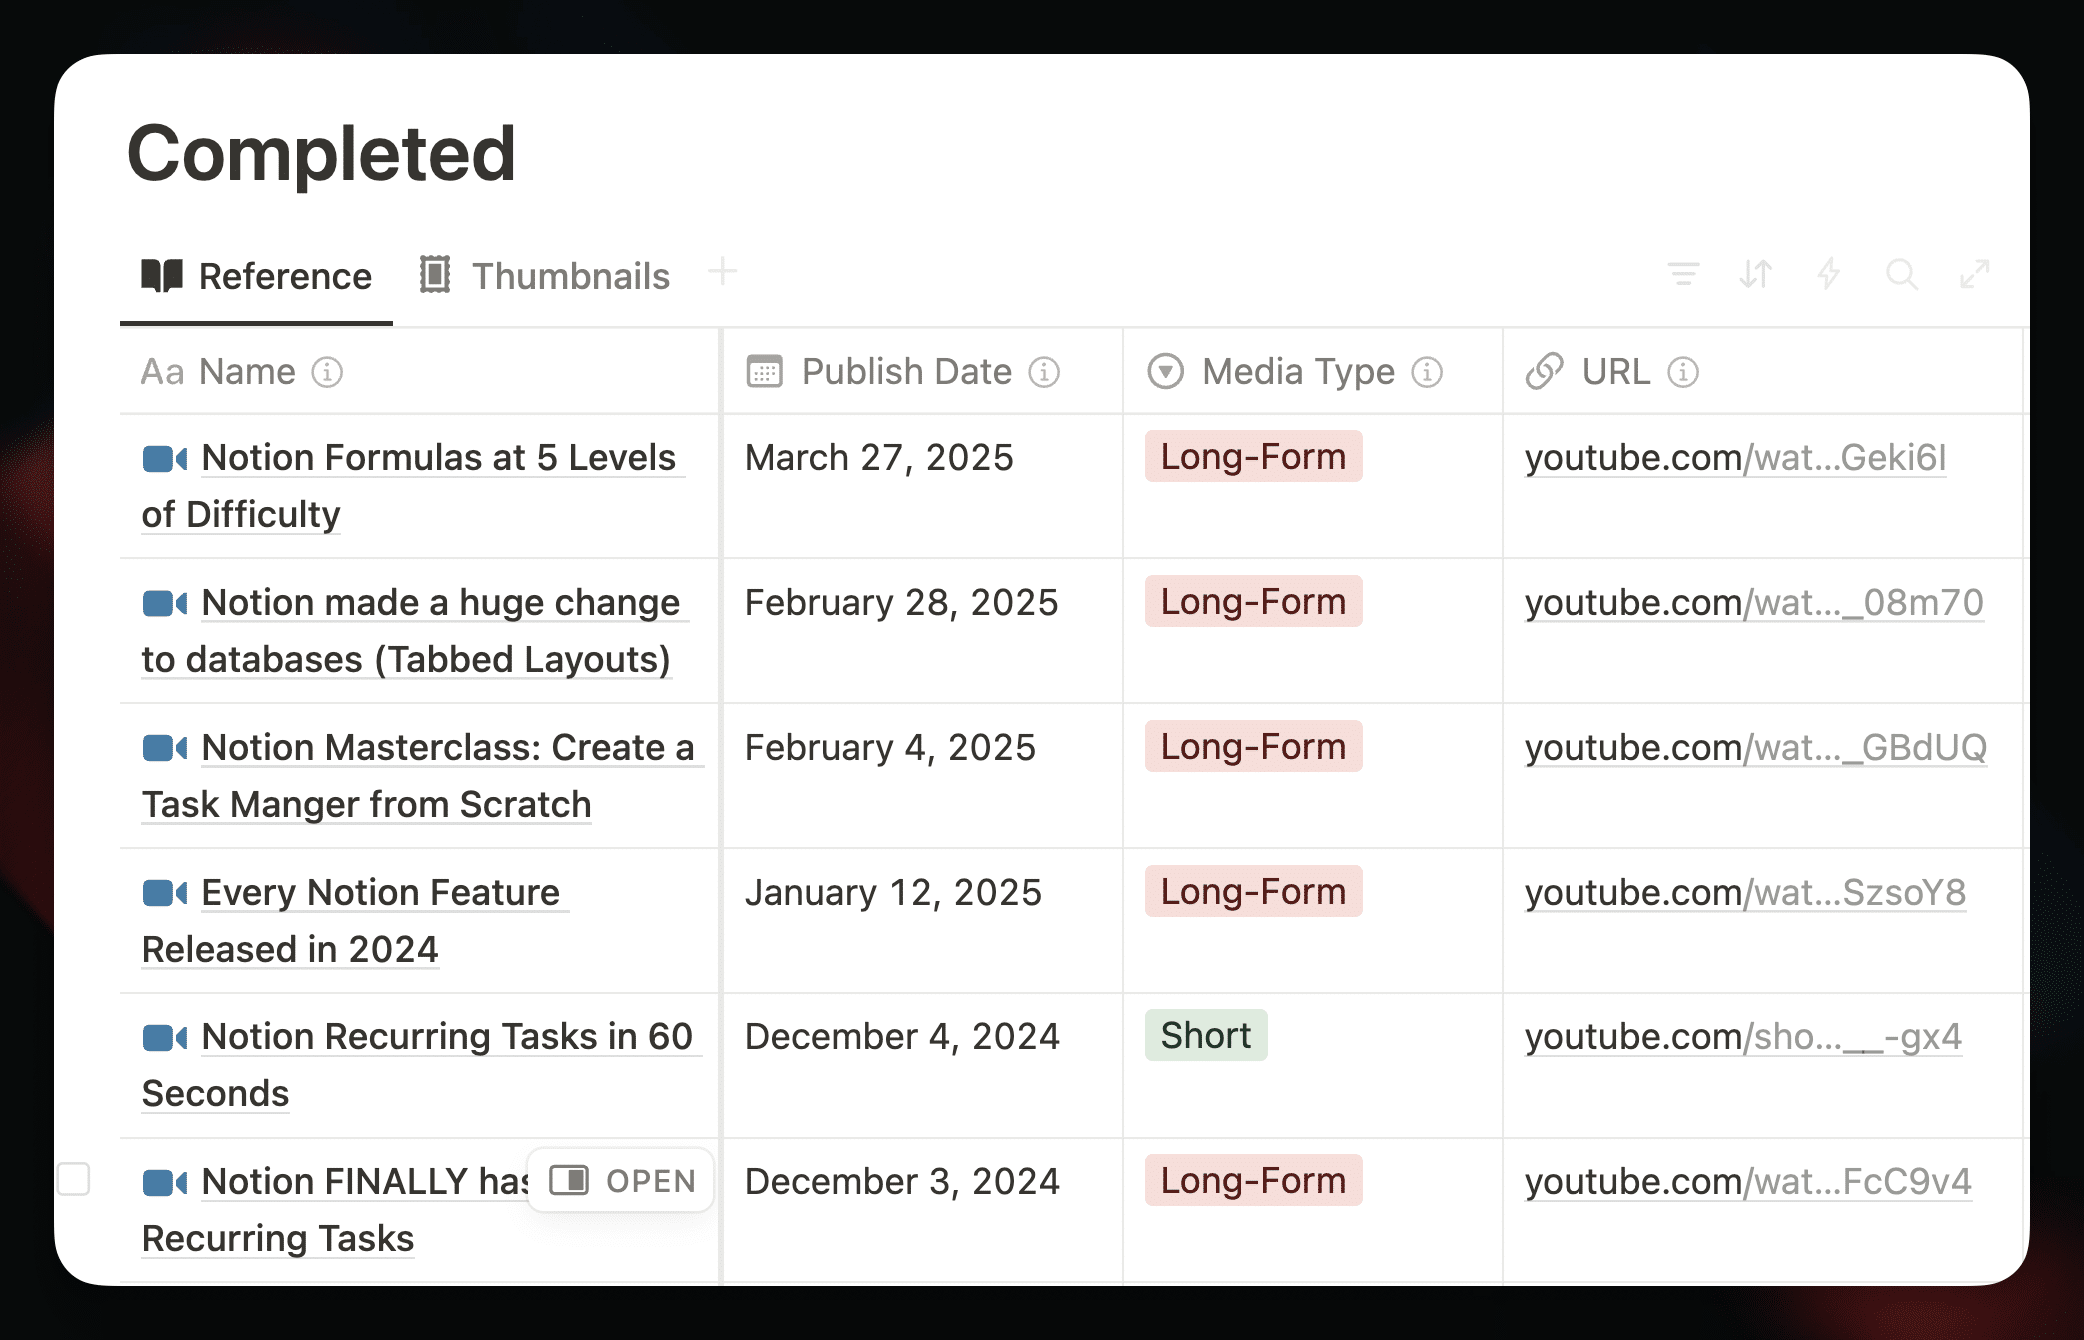
This section is a long-term reference for all of your published content on the Channel. You can use it to quickly jump to a piece of content, review its script or research, or grab visual assets you might want to reuse.
Finally, each Channel page has a Reference section at the bottom where you can create or capture Channel-specific Wiki pages, Research items, and other reference pages.
Copy link to headingCreating a Course
If you’re a course creator, you can also create and plan online courses in Creator’s Companion.
If you create a new page in the Channels & Courses section of the Creator’s Companion home page, you’ll automatically apply the Course template to that page.
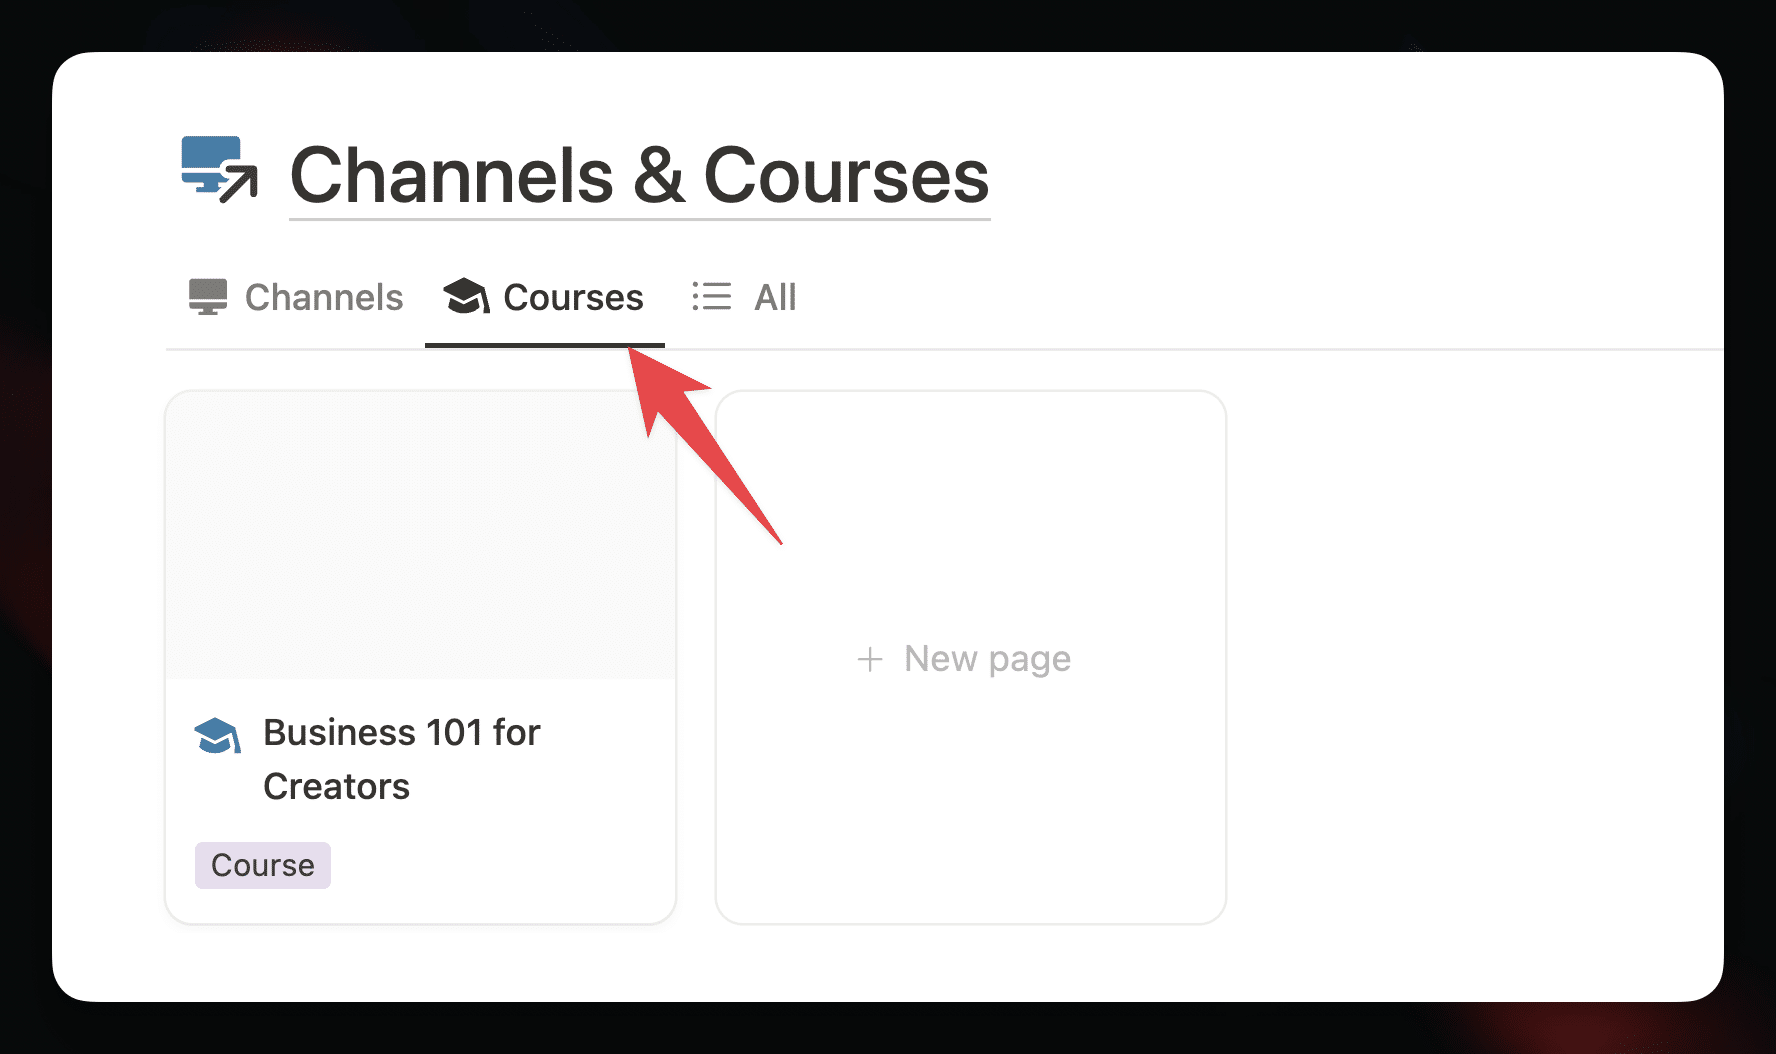
The Course template is similar to the Channel template, but it comes with a couple of course-specific pages:
- Course Outline
- Marketing Plan
The page sections have also been tailored for creating a course with a fixed number of lessons, rather than an ongoing stream of content.
Copy link to headingCreate a Content Project
Now that you’ve got a Channel set up, you can get some actual work done by creating a Content Project.
In Creator’s Companion, there’s a central Content database that contains a page for every piece of content you decide to create and track – no matter what form it takes. The Content database ships with pre-built templates for many different types of content:
- Video
- Podcast
- Stream
- Blog Post
- Newsletter
For this reason, I’ll use the term “content project” throughout these docs instead of something specific like “video”.
Copy link to headingHow to Create a Content Project
To create your first project, simply create a new page in any of the content views through Creator’s Companion. You could do this from a Channel page, or do what I typically do – create one directly from the home page.
If you’re sure you’re going to create this project, you can create it directly in the Active Now or Planned tabs. Otherwise, I recommend adding it in the Ideas tab. This is where I create nearly all of my content projects.
Once I’ve done some initial brain-dumping – along with some marketing research to determine if the idea is worth the effort – I’ll move it into an active stage. But since videos typically take me anywhere from 10-100 hours of work, most ideas stay ideas!
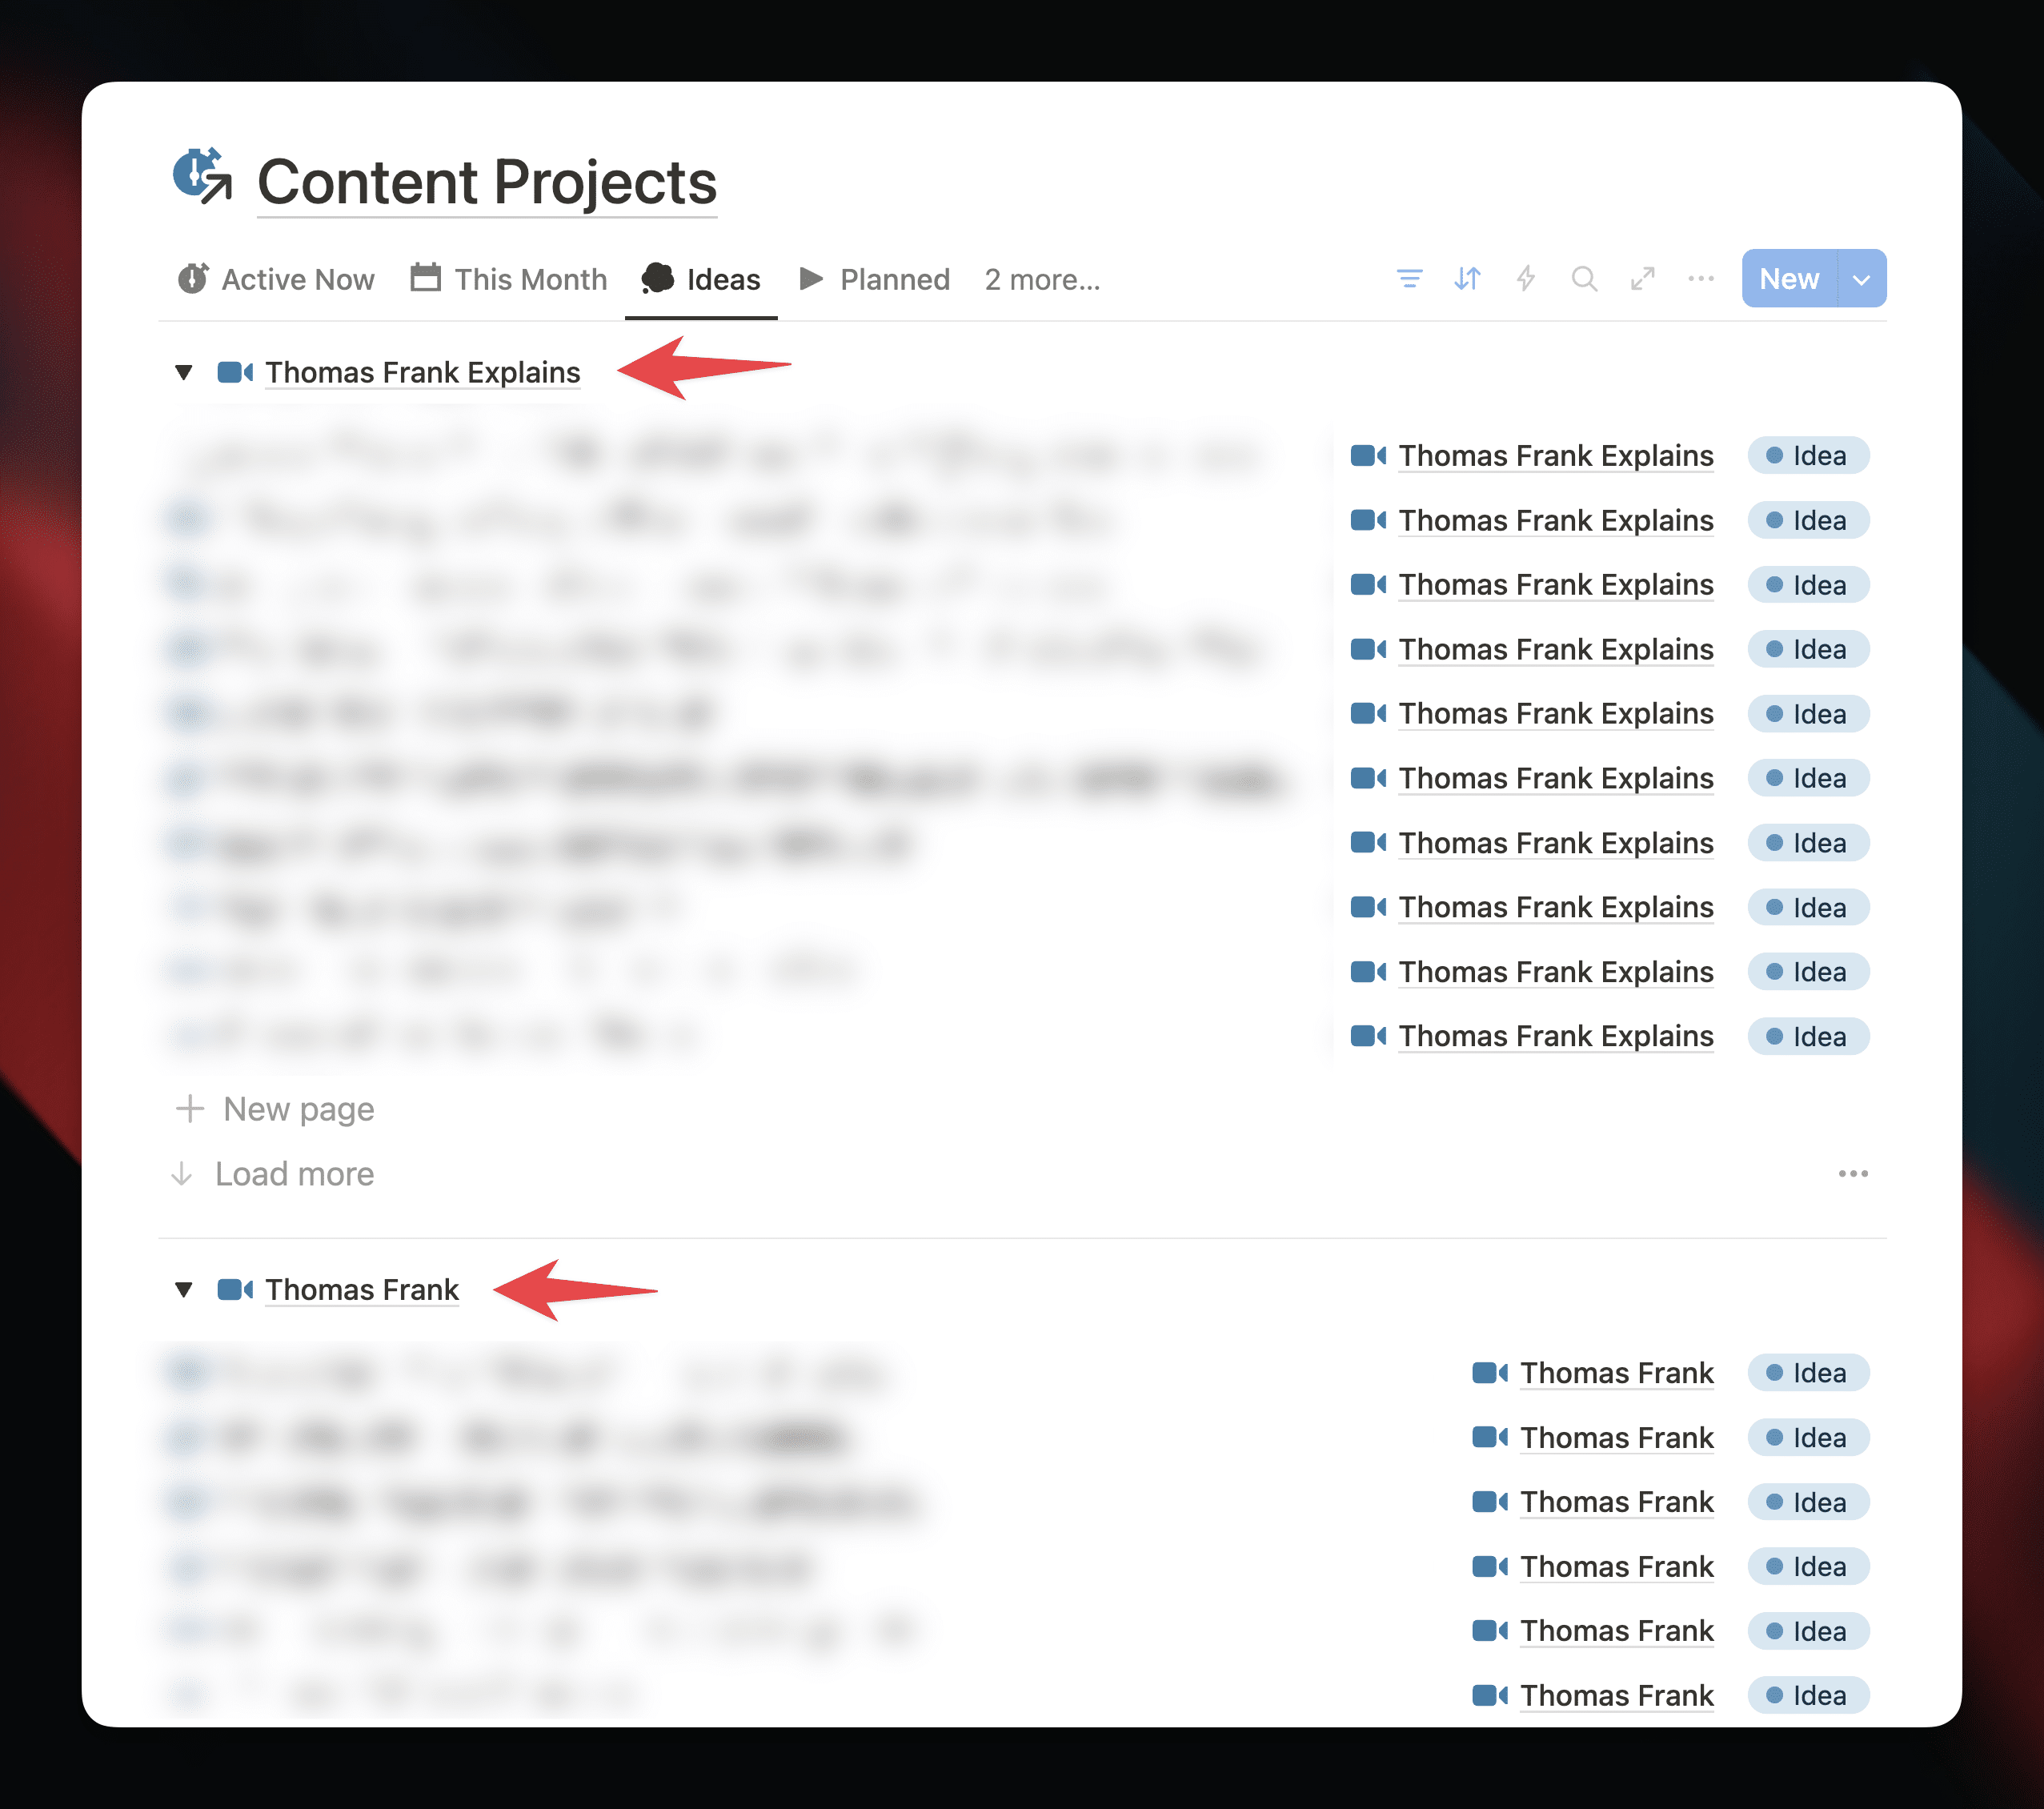
When I create a new project, I also set a Channel for it. If you create a project directly from a Channel page, it’ll be auto-applied.
But if you create it from the home page, you’ll need to apply it manually. However, you can skip this part by customizing your views with Groups! Once you have multiple Channels, you may want to do this – I’ve done it in our internal version of Creator’s Companion. Here’s my guide on Grouping in Notion databases.
Apply a Project Template
Once you’ve given your project a title and Channel, click it to open it up in Side Peek.
From here, you can click the Expand icon (1) if you’d like to open the page up fully, which will give you more room to work.
More importantly, you can choose one of the pre-built templates for your project, based on the type of media you’re creating. Most of the time, I use the Video template.
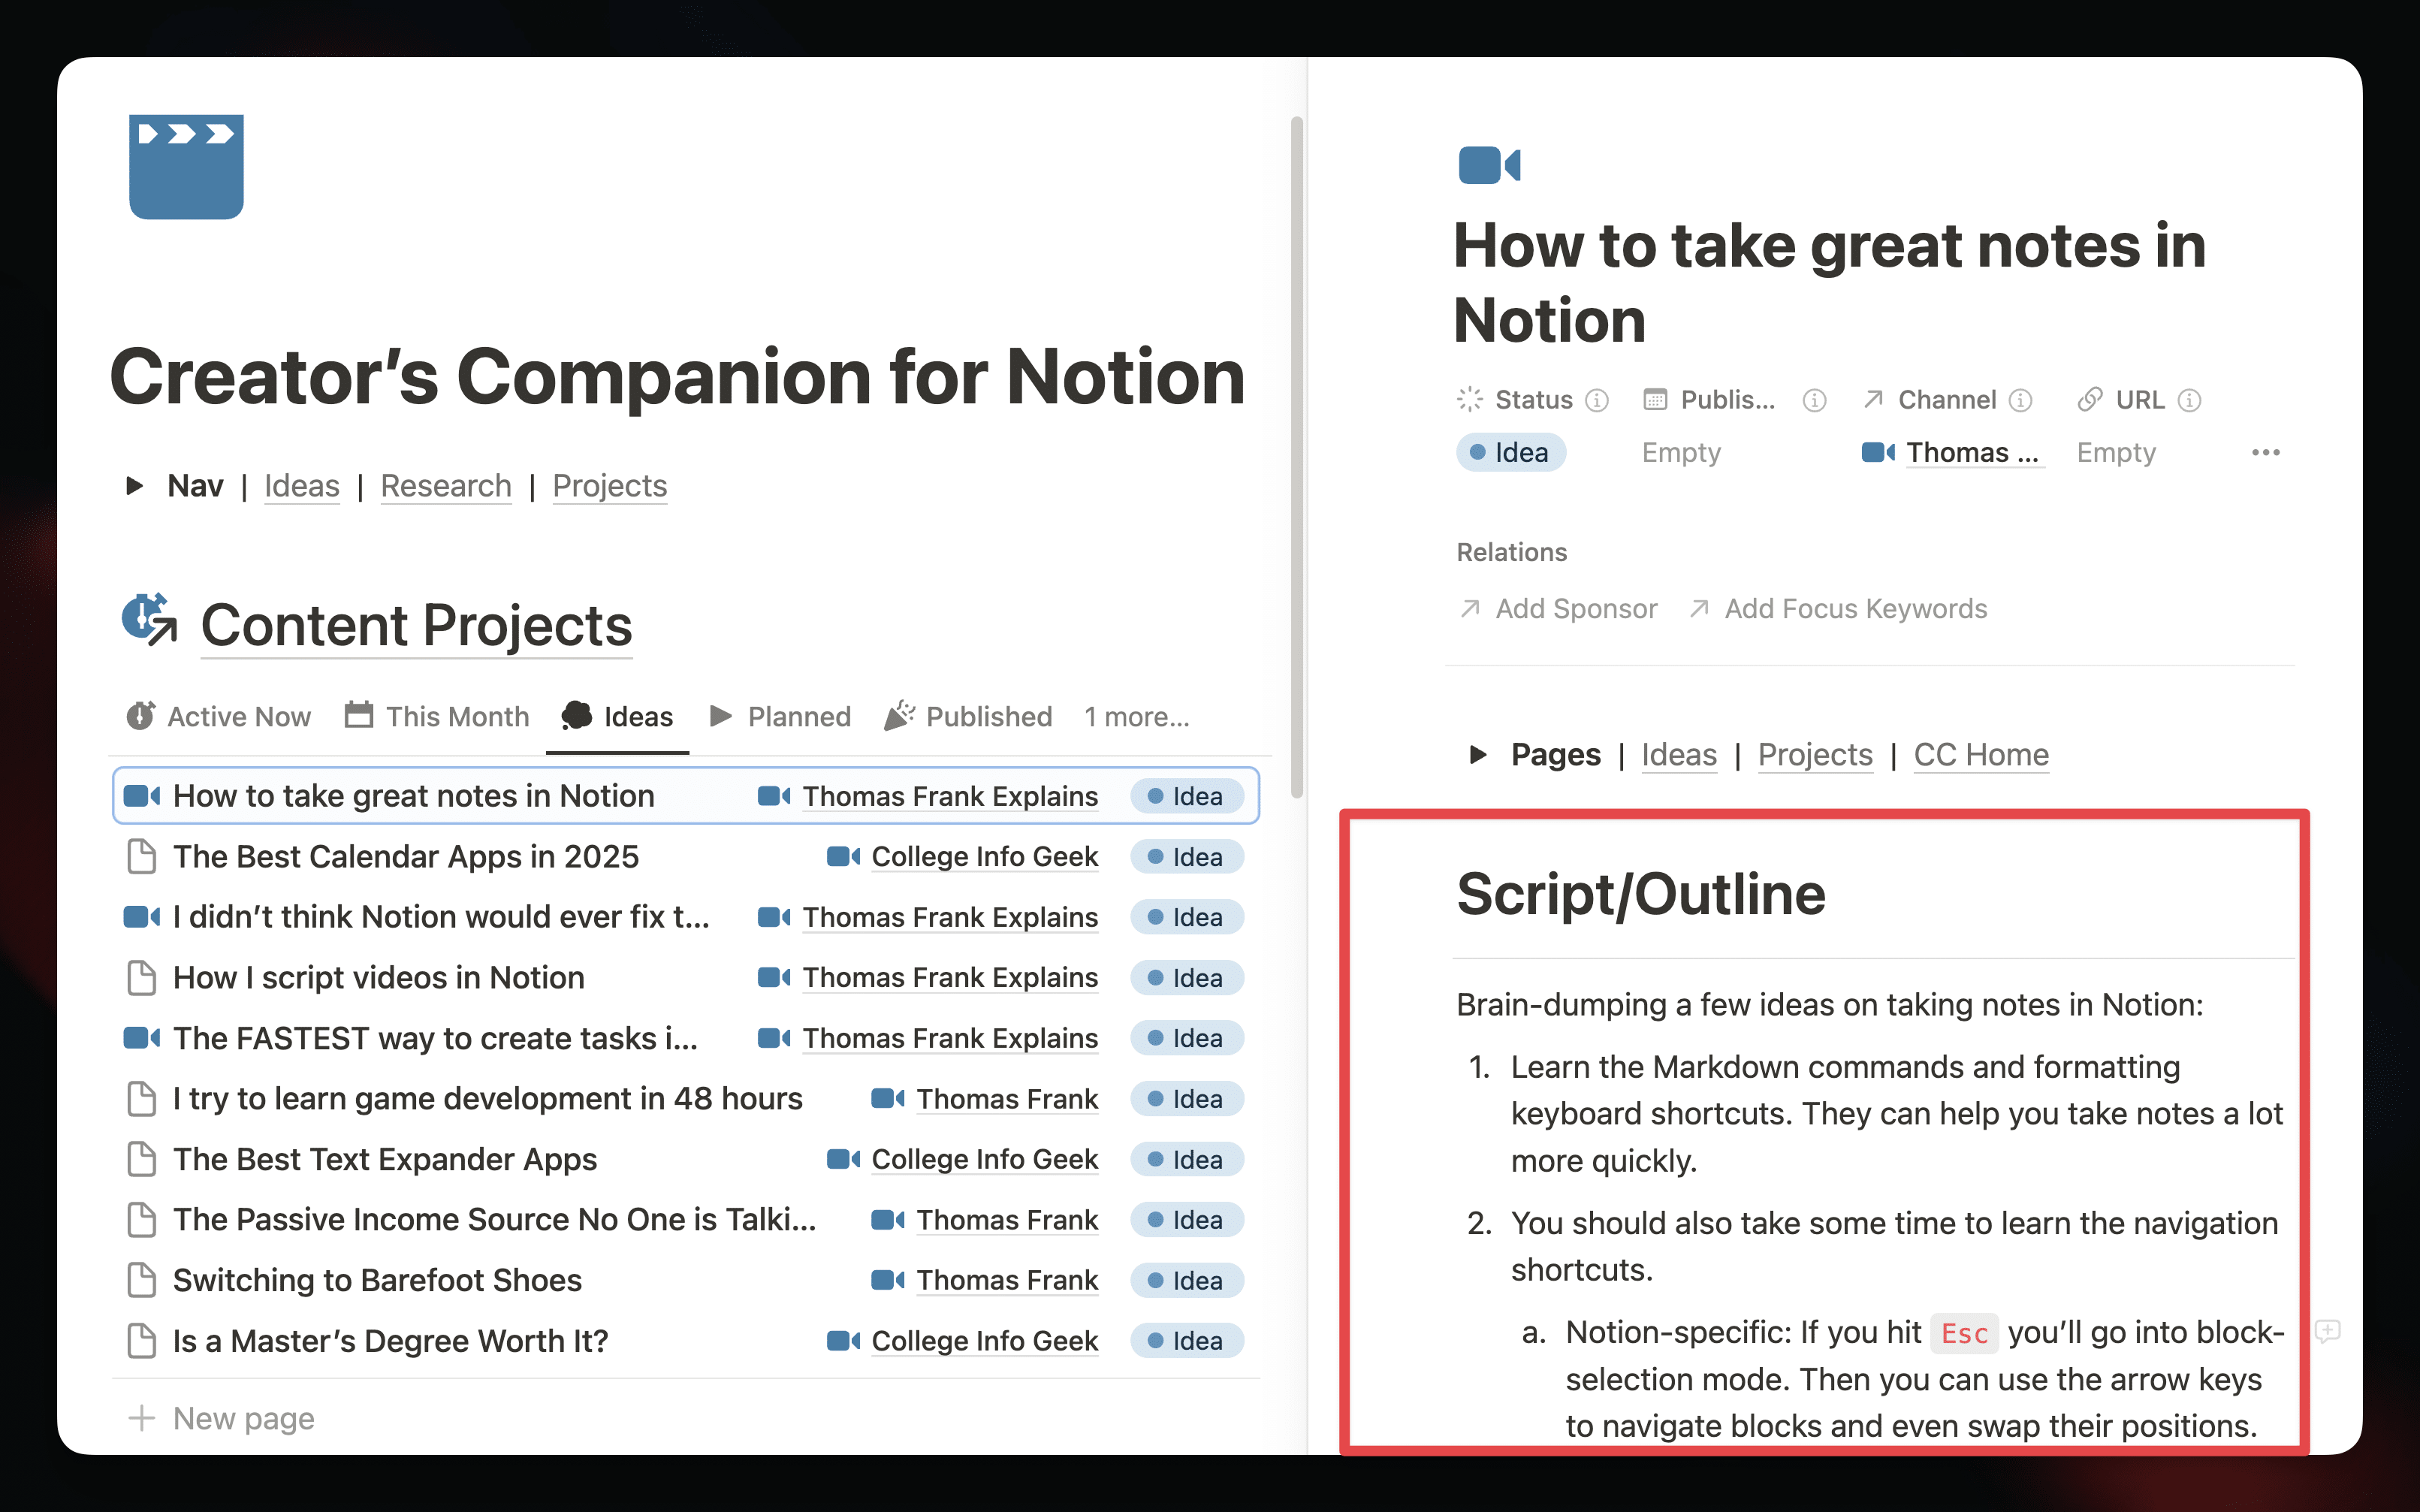
Once you’ve applied your template, you’ll immediately see a heading and an area beneath it where you can start writing.
This is a great place to do an initial brain-dump for content that needs additional polish and research. For quicker content, you can write your script or outline here right away.
That’s how quick things work in Creator’s Companion: Create a project → Apply a template → Start writing.
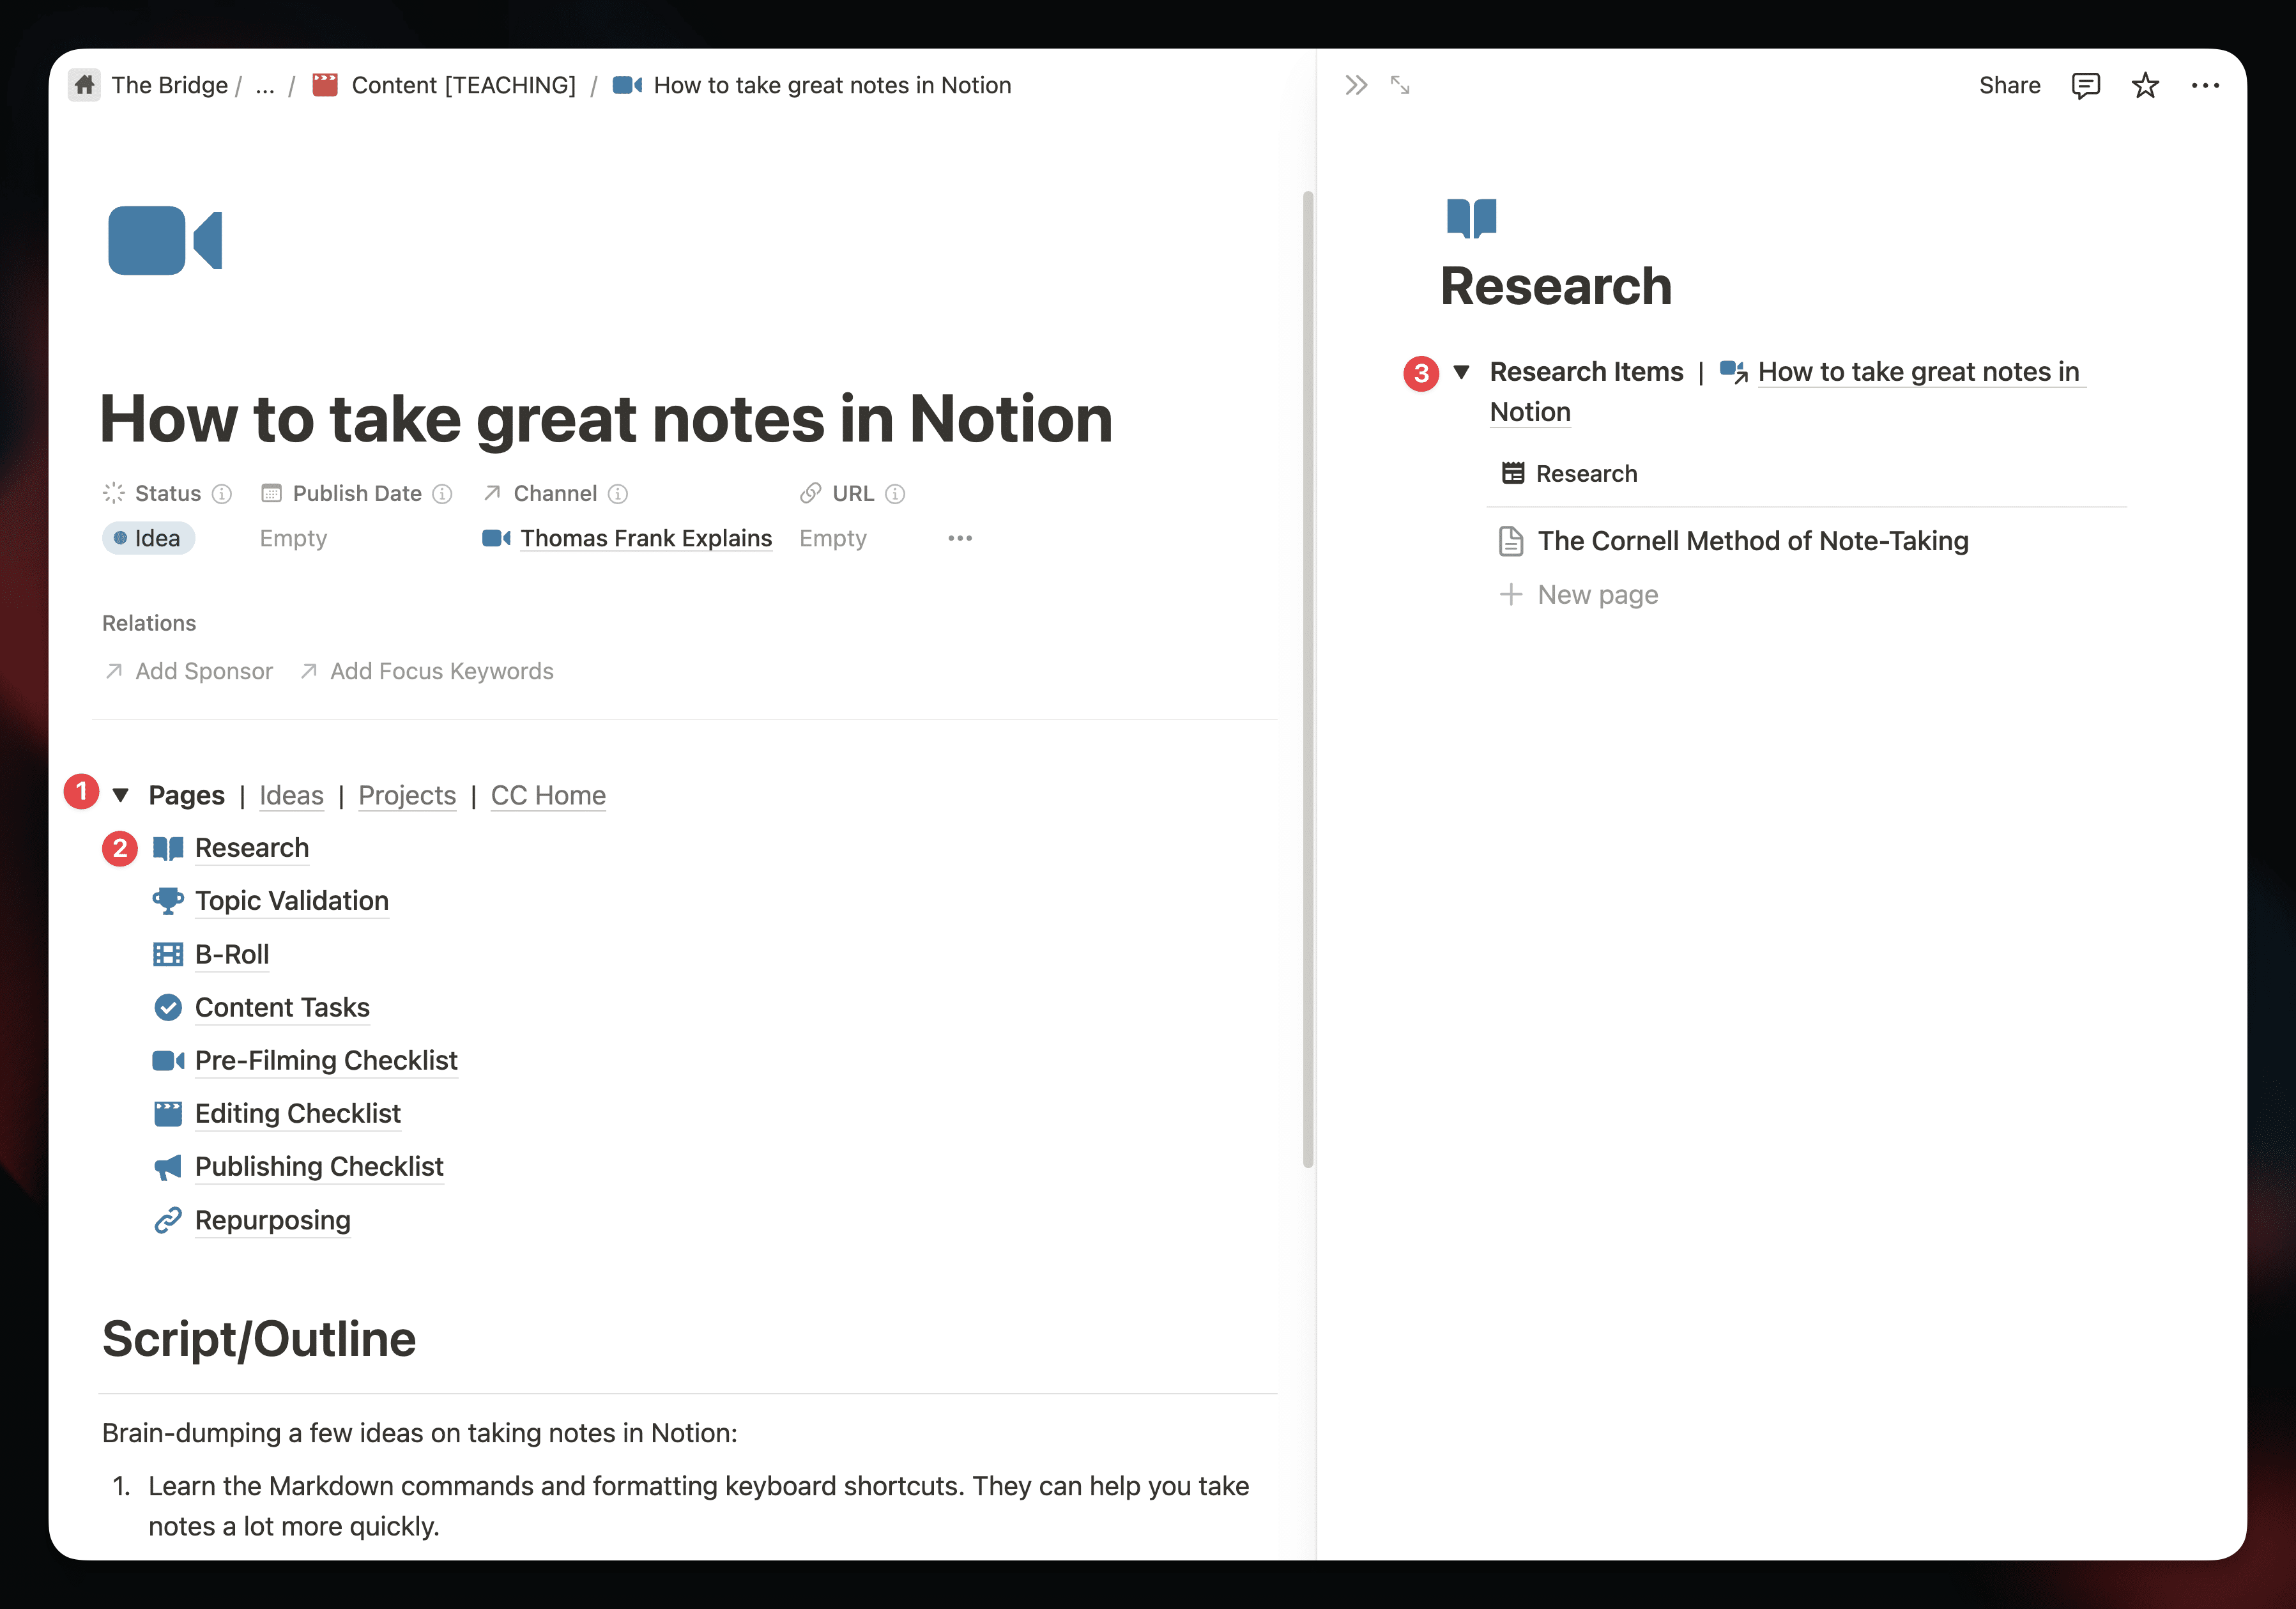
However, your project template doesn’t only give you a space to write.
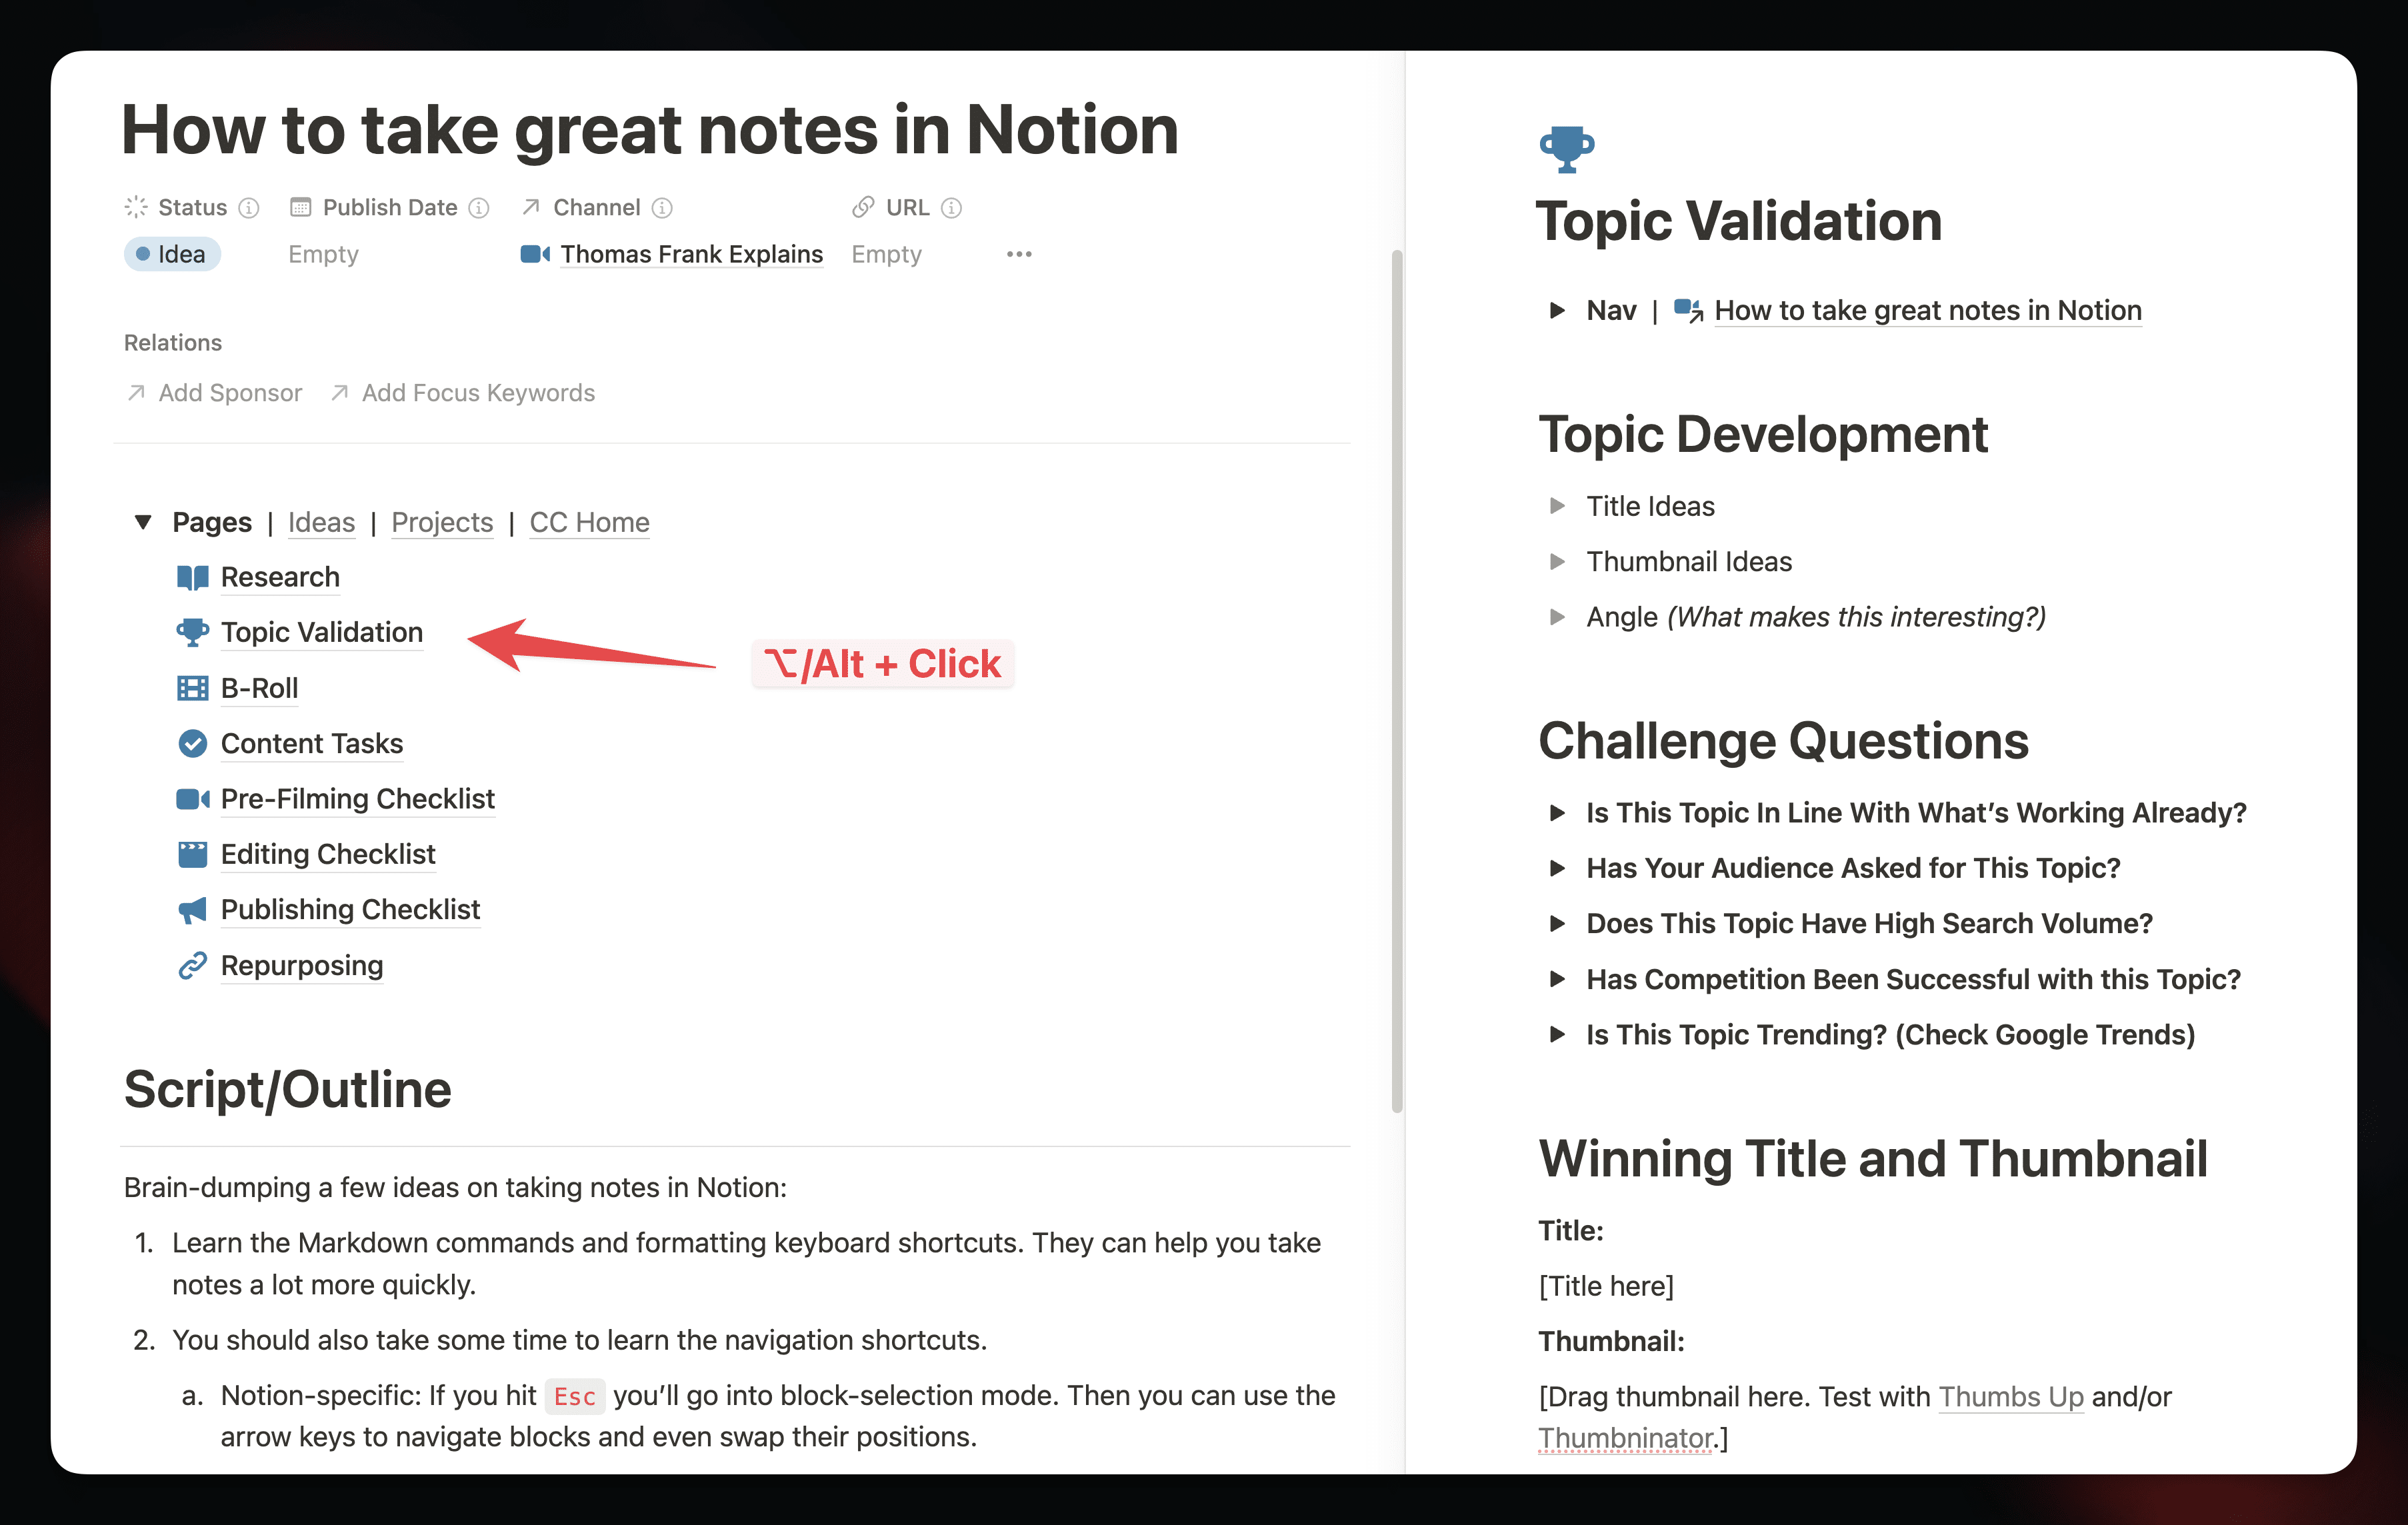
Instead, it’s a full command center for your project. Open up the Pages menu directly beneath the title and pinned properties, and you’ll see a list of sub-pages. These differ based the template you’ve chosen – for example, the Video template includes a B-Roll page, but the Blog Post template omits it.

Here’s one of my favorite tips: If you’re in full-page mode on the content project, and you hold ⌥ or Alt when you click these pages, they’ll open in Side Peek!
If your screen is wide enough, you’ll be able to view the contents of these pages while still seeing your whole script/outline on the main page.
You can also right-click one of these pages and choose Open in New Window, which will allow you to place the windows side-by-side. Either of these methods is fantastic for when you need to reference your research materials while writing.
Here’s an at-a-glance look at the sub-pages that you’ll find in the Video template. The sub-pages in the other templates are similar, but have some media-specific differences.
- Research – a dedicated page for pasting in links, highlights, and notes. You’ll also find a linked view of the Research database, where you can create and view actual research items. Use this for larger projects.
- Topic Validation – a handy worksheet where you can brainstorm title and thumbnail ideas, as well as critically analyze your idea’s likelihood of performing well with your audience. Spending a few minutes here can massively improve your content’s chances of success. Read my guide on Video Packaging to learn more.
- B-Roll – a view of the central B-Roll database, filtered to this content project. Here you can create or import a list of shots, animations, images, fixes, etc. It’s possible to import this list from Premiere Pro or Frame.io, which can help to speed up your editing process.
- Content Tasks – a simple checklist you can use to track tasks related to this project. If you have the Ultimate Tasks or Ultimate Brain version of Creator’s Companion, this page will contain a full view of the Task Manager.
- Checklists – the Pre-Filming, Editing, and Publishing checklist pages give you a sample checklist you can follow (and tweak) in order to speed up your production process and avoid mistakes.
- Repurposing – use this page to plan related content for this project. For example, if you’re planning a long-form video, you can use this page to plan multiple Shorts that cover the same topic.
If you want to make changes to a template, check out our guide to editing database templates in the Ultimate Brain docs. The process is identical for Creator’s Companion.
Copy link to headingContent Project Properties
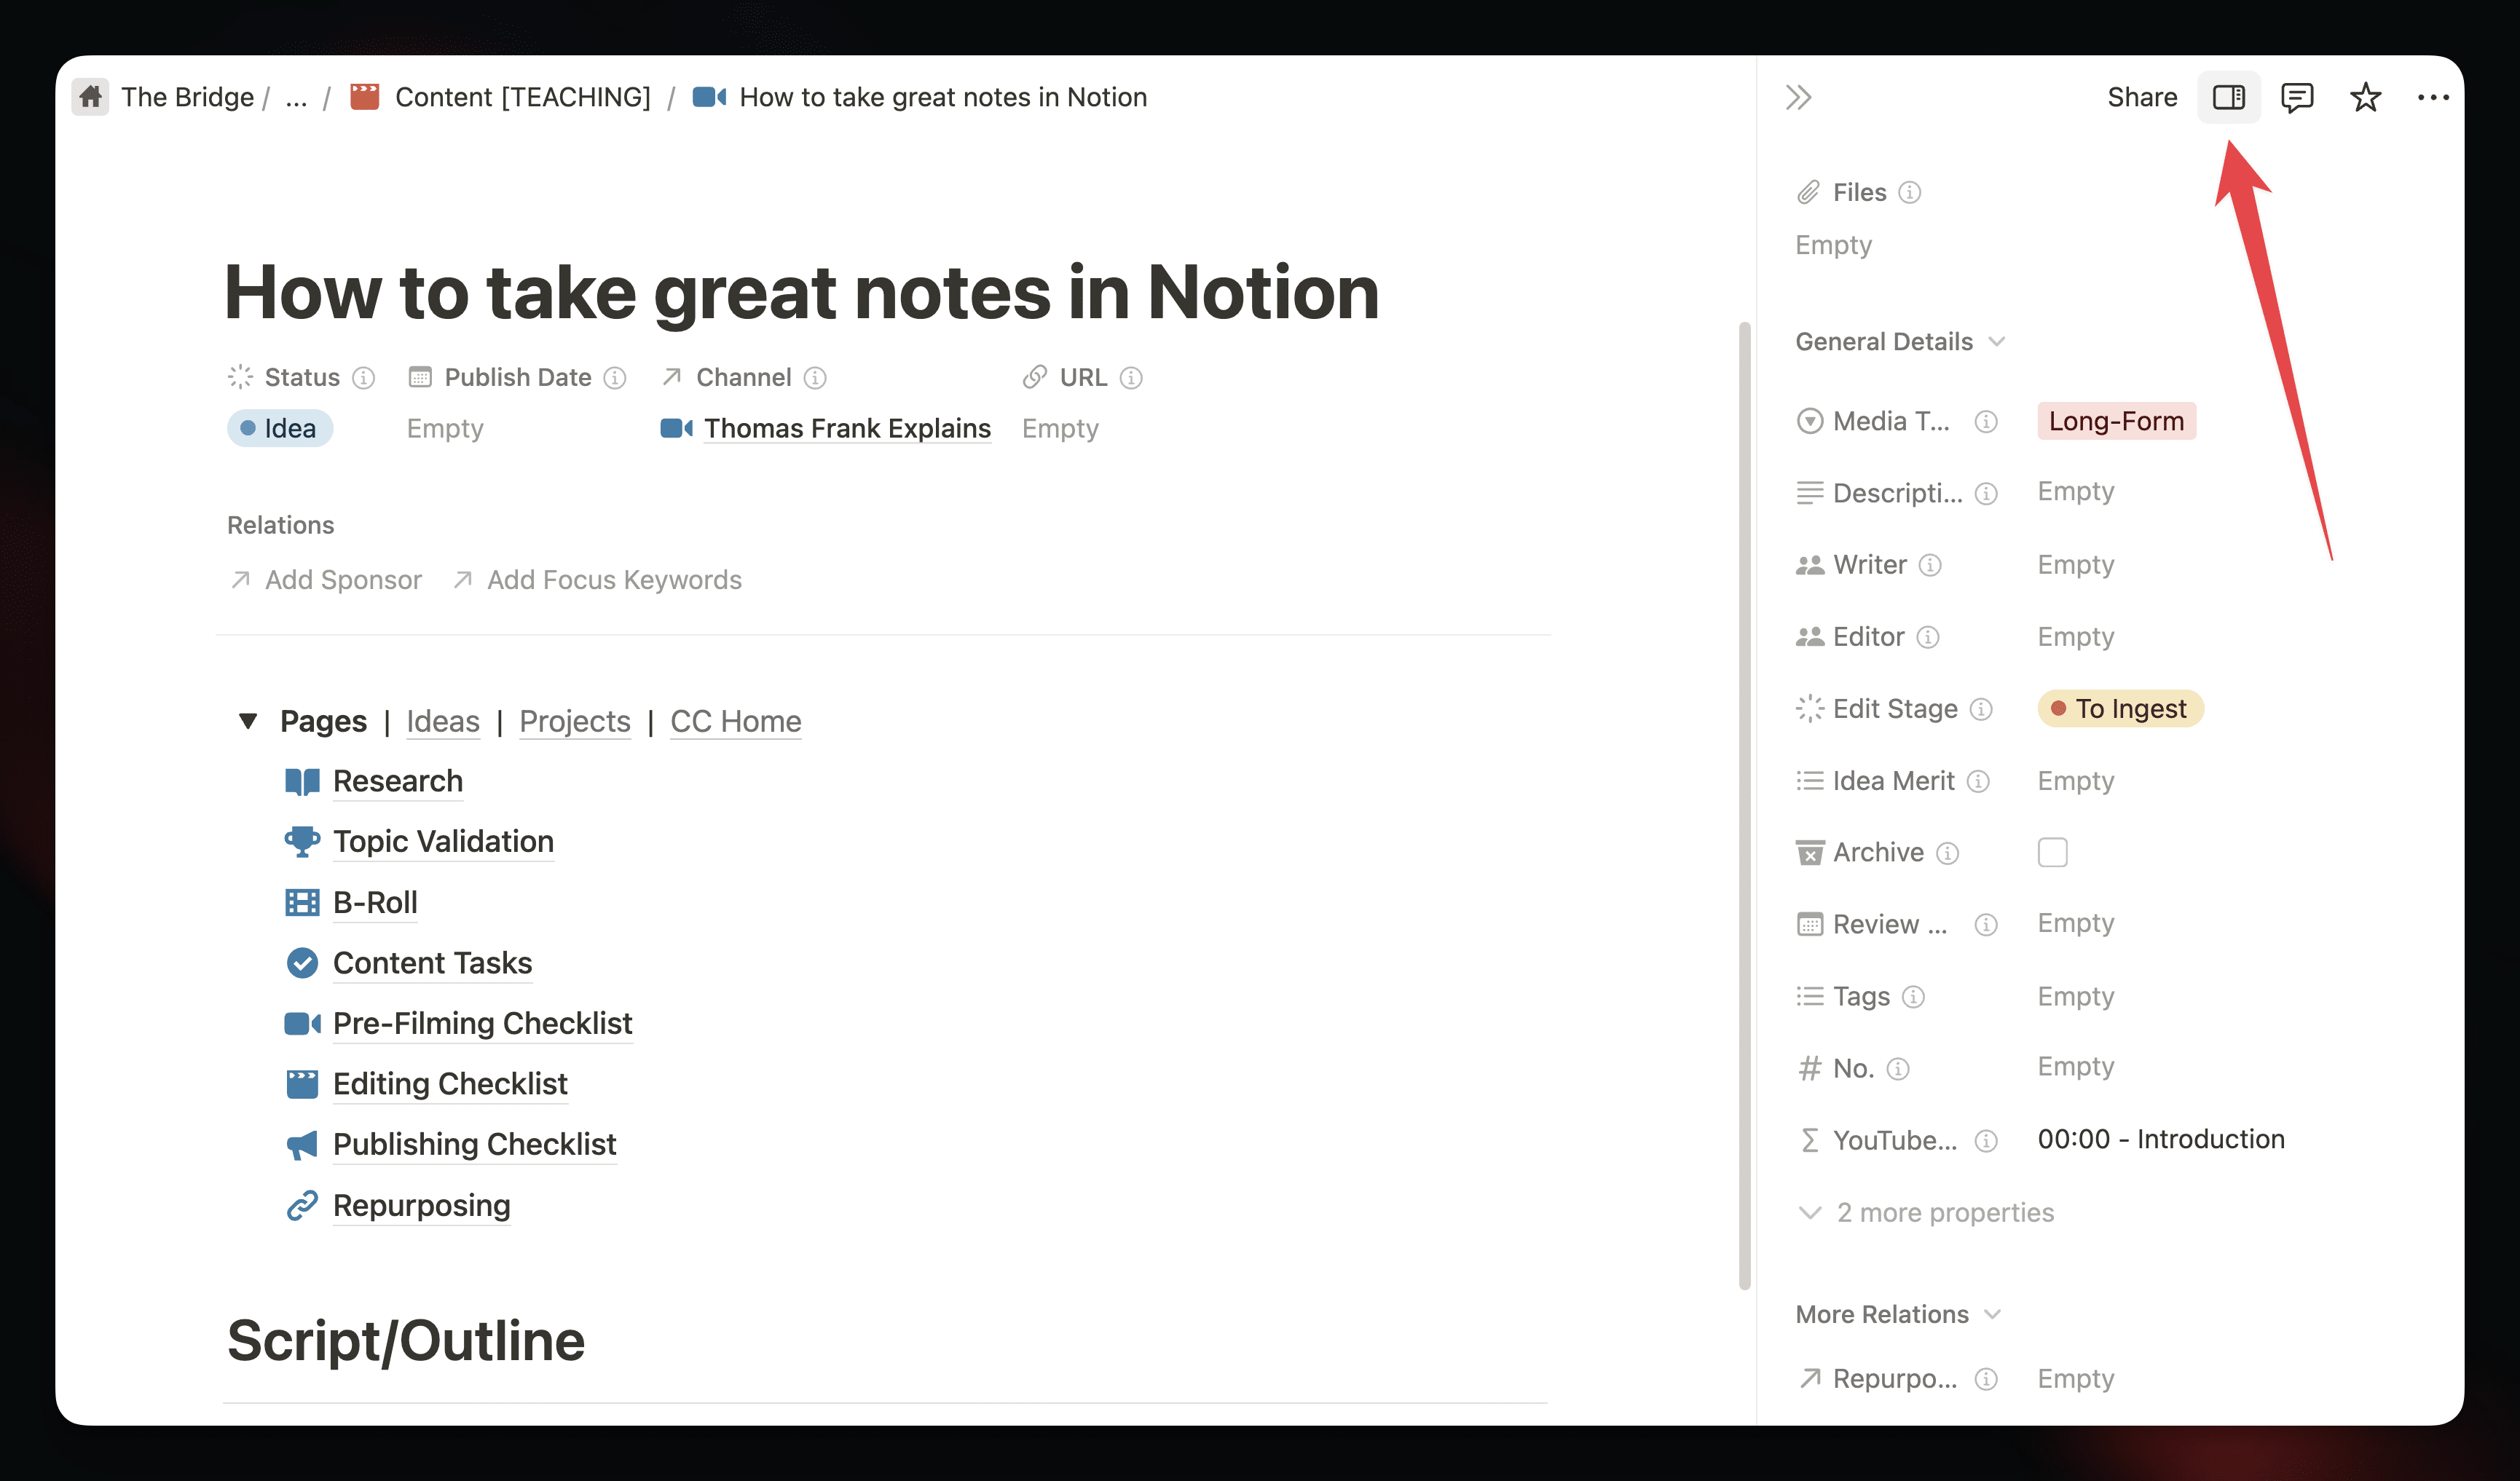
In addition to the sub-pages created by your chosen template, each content project contains all of the database properties from the Content database. Some of these are pinned, so you’ll see them directly beneath the page title.
To see all the rest, you can hit the View Details button. Here you can set the Media Type, Writer, Editor, Description, and many other properties. Check out the Content database reference for a full property list.
Produce and Publish Your Project
As you work on your project, you can update its Status value to reflect its current stage.
You can do this directly from the project itself, but you can also head to the central Content Projects page (accessible via the Content Projects link on the home page), where you’ll find a handy Board view to track all of your projects at once:
This view shows you every project across all of your Channels. As you’ve already seen above, you can go into a Channel page to see a similar Board view just for that Channel’s projects.
To actually execute on a project, I recommend keeping things simple to start. Write your script, shoot your video, get it published. Use Creator’s Companion as a project management tool so you stay on top of each project you’ve got cooking.
Once you’re ready to take things up a notch, I recommend doing one or more of the following:
- Use the Topic Validation page within each content project template to brainstorm multiple titles, thumbnails, and angles for your content. Spend some time researching what has already worked for similar topics, and think deeply about packaging.
- For videos, use the B-Roll page to create a shotlist that you (or your editor) can work off of. You can make this more efficient by creating markers in Premiere Pro or comments in Frame.io, then importing them into Creator’s Companion.
- Use the Repurposing page in each content project template to plan related content – e.g. Shorts or LinkedIn posts. You don’t have to plan these at the same time you’re producing the main piece of content – it may be better to plan related content on your most successful long-form content from the past!
Capture Research and Inspiration
As a creator, I spend a lot of time doing research and collecting things that inspire me, which I use to make better, more creative videos. You probably do the same.
Fittingly, Creator’s Companion is set up to help you easily collect research and connect it to your projects or Channels. It comes with a central Research database built to collect these items, which can include:
- Topical Research – articles, papers, and other sources you’ll use to craft and inform a specific piece of content you’re creating.
- Outlier Content – high-performing content you can learn from (see my article on Video Packaging to learn why this is important)
- Tools – useful tools you might want to try out
- Creator Tips – articles and videos that teach you useful creator skills (like my Creator Atlas). I’ve been collecting videos of this sort in a playlist for years, but collecting them in Notion means you can also save articles from other sites (and take notes on them).
Separately, Creator’s Companion comes with a Swipes database. Swipes are pieces of visual media that you can use for inspiration, or even for remixing in your own content. These can include:
- Thumbnails – great YouTube video thumbnails
- Web Design – beautiful websites, or UI elements that inspire you
- Set Design – I’m a nerd for good set dec, so I’m constantly saving it when I find it
- Memes – the all-important “meme folder”
- Editing Tricks – when I find really clever editing tricks, I save these too
I believe that we become better artists and creators when we explore widely and study other great art. When we expose ourselves to a wide array of work from lots of talented people, we pick up tricks and inspiration that we can apply to our own work.
Einstein called this combinatory play, and Steve Jobs believed in it, too:
“”Creativity is just connecting things. When you ask creative people how they did something, they feel a little guilty because they didn’t really do it, they just saw something. It seemed obvious to them after a while. That’s because they were able to connect experiences they’ve had and synthesize new things.”
I based one my favorite videos I’ve ever made on this idea:

In short, I think it’s crucial to have tools that allow you to easily capture, organize, and draw from a wide variety of research and inspiring art.
If you have these tools, and you make a habit of exploring widely with them in hand, you’ll grow as a creator.
Copy link to headingCreating Research Items in Notion
Creator’s Companion makes it easy to collect the Research and Swipe items. On the home page, you’ll find tabs for each in the Research section:
You can also easily add Research items directly within a content project:
- Open the Pages toggle menu in the project’s main page
- Click the Research page (or ⌥/Alt + click it to open the page in Side Peek, as shown below)
- Open the Research Items toggle to find a view of the Research database
Capturing Research from the Web
While you can create research items manually, in many cases you’ll want to capture it directly from the web.
Luckily, we’ve got you covered there as well. In addition to our Notion templates, my team built a powerful (and free) web clipper and quick-capture tool called Flylighter, which you can use to capture:
- Web pages
- Full articles
- Highlights
- Notes
- YouTube Thumbnails
…and much more, directly from your web browser. Your captures go instantly to the Notion database of your choice – for example, the Research or Swipes database!
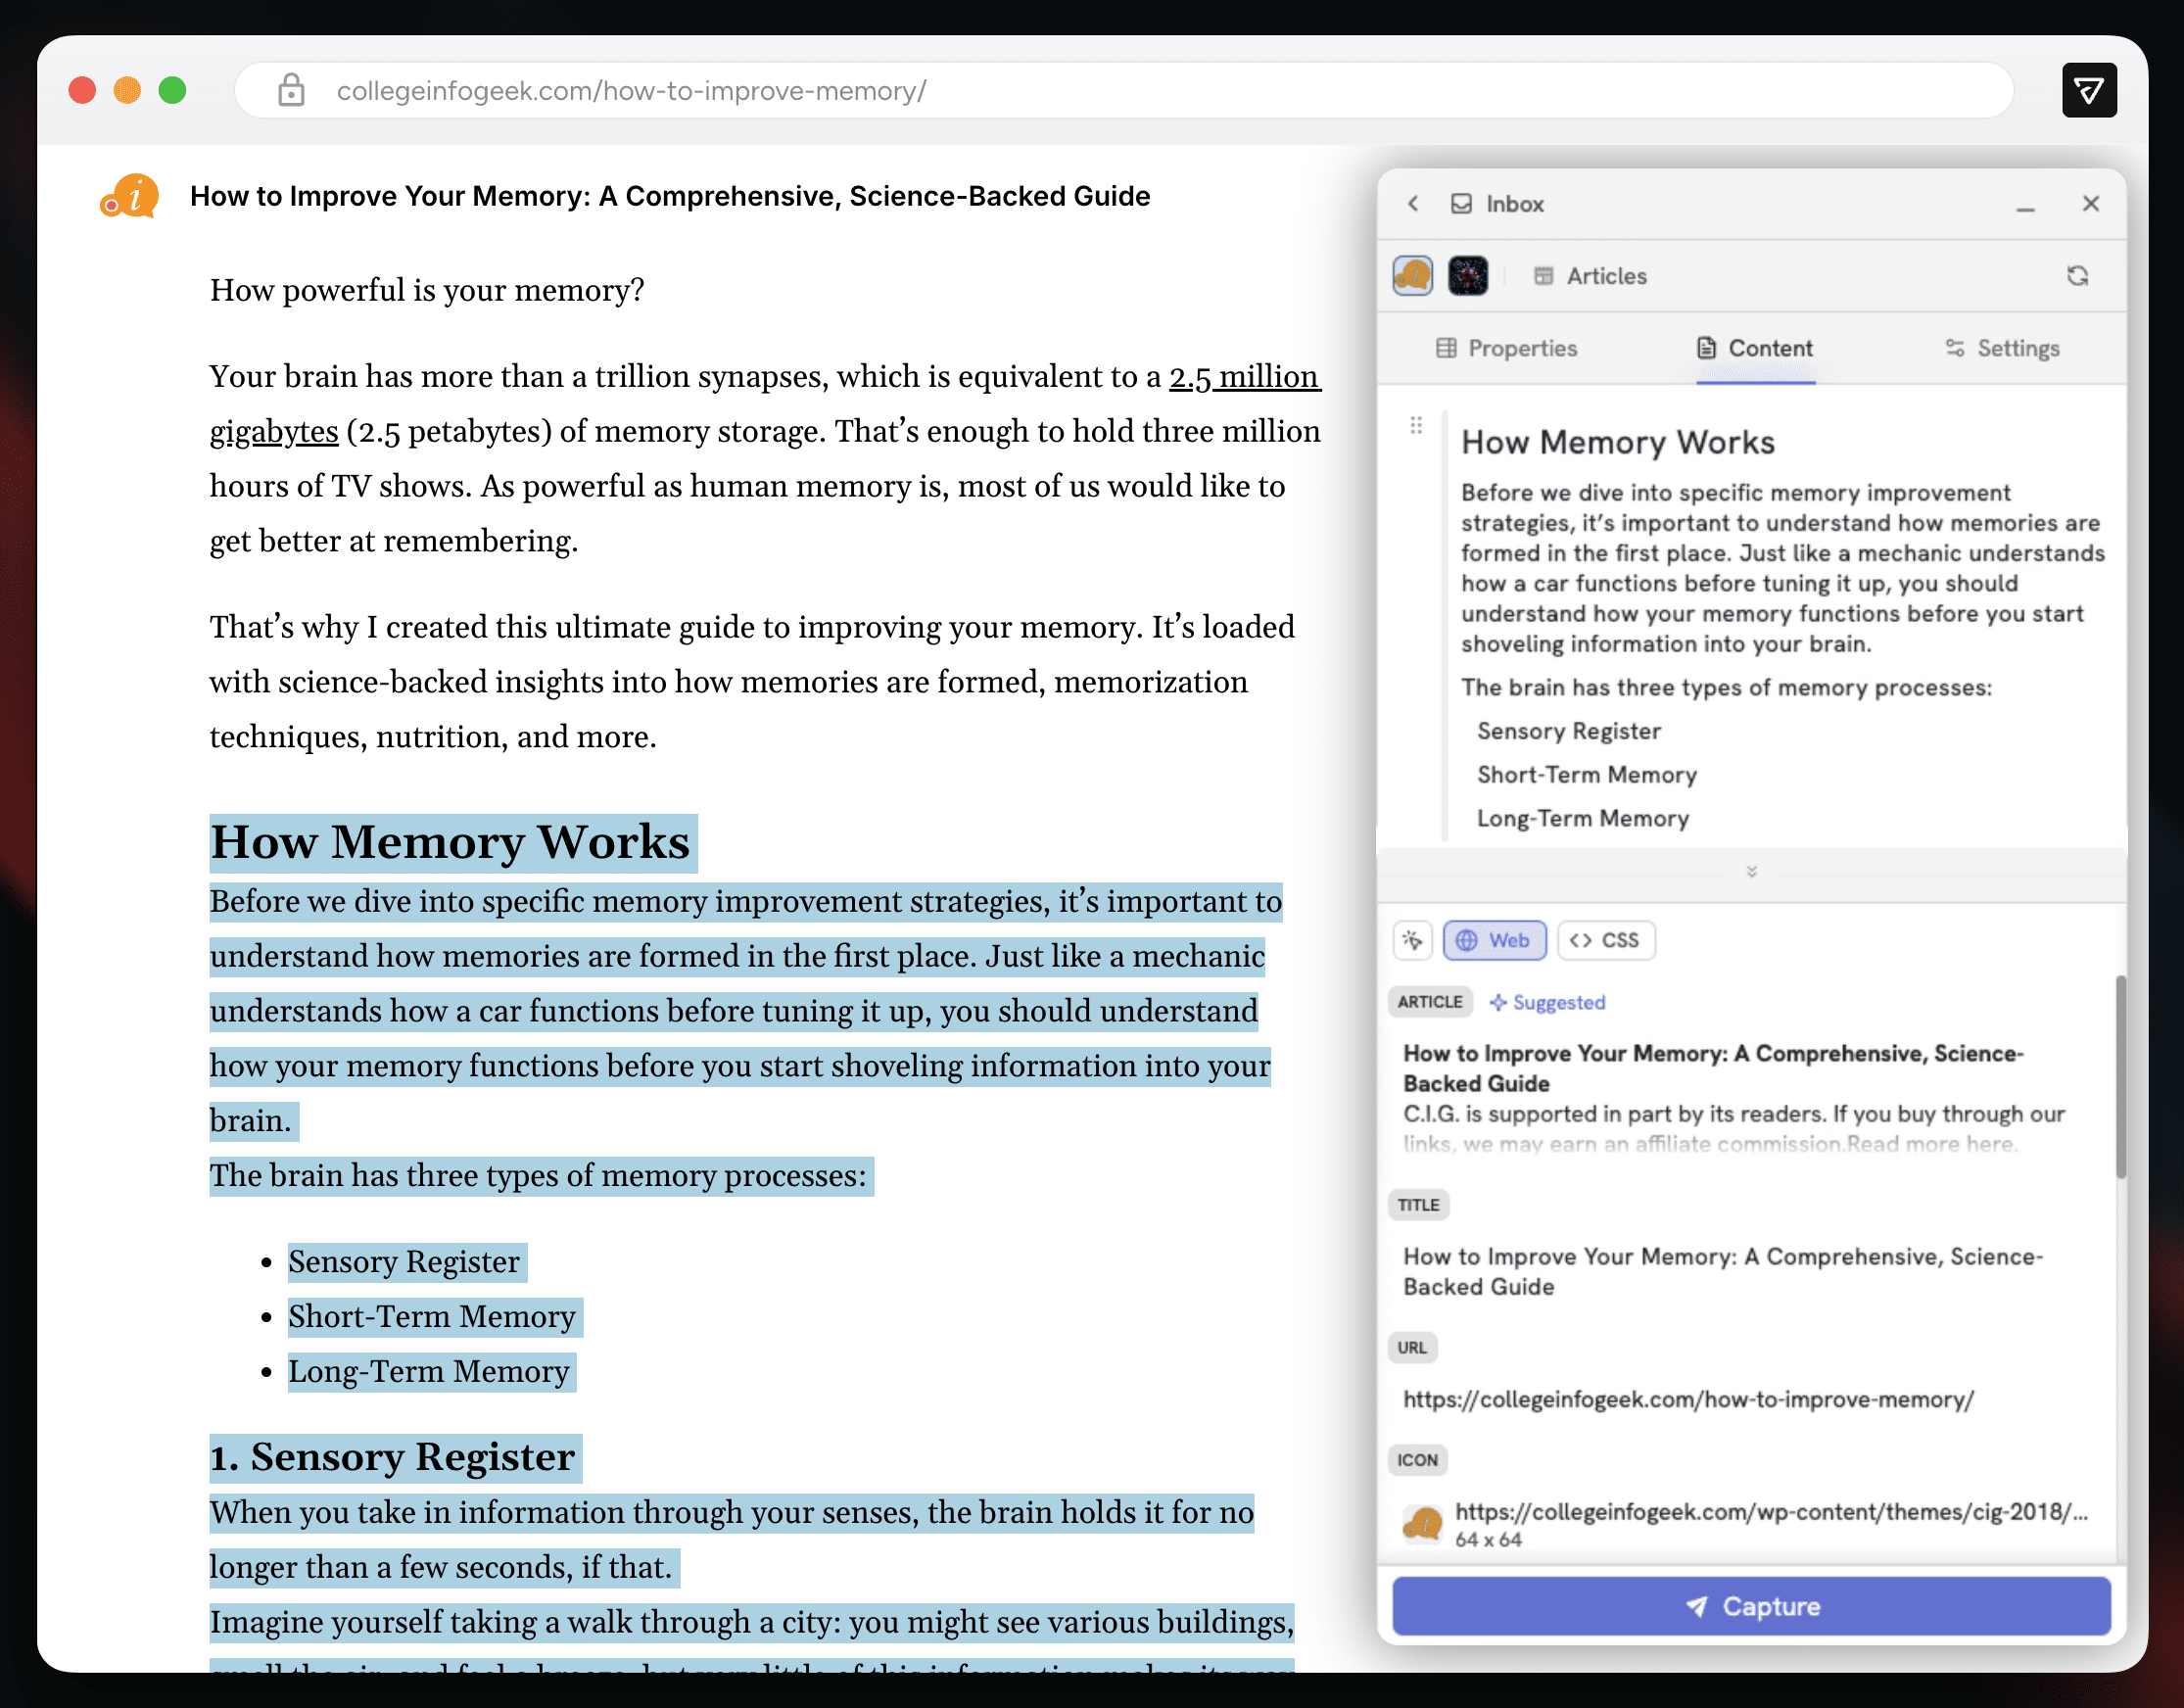
You can even related a captured page to a content project you’re working on directly from Flylighter. Here’s a quick video guide that will show you exactly how to capture both research articles and Swipes to Creator’s Companion.
Copy link to headingAvoiding Overwhelm
If you’ve made it this far in the guide, congrats! You’re now equipped with the all the knowledge you need to create and manage content in Creator’s Companion.
If you explore the template further, you’ll find a whole bunch of more advanced tools, such as:
- The powerful B-Roll page in the Video content project template
- The Sponsors dashboard, which you can use to manage brand deals and sponsorships
- The Keywords dashboard, which is great for SEO-focused creators
- The Analysis dashboard, where you can keep notes on the performance of each piece of content
Each of these tools has proven useful to many of the creators who use Creator’s Companion. However, there are also many who don’t use them!
I’m noting this because you may not need every tool that comes with your new template. Some tools may become useful to you down the road, while others may never been needed. And that’s totally ok.
The best piece of advice I can give you – for using any tool – is to let your tools follow your workflow, not the other way around. This, in my opinion, is the entire point of Notion. More than perhaps any other tool, we can mold Notion to our needs.
The same applied to Creator’s Companion. It gives you a starting point, but you don’t have to use everything – and everything is open for customization.
Happy creating!