Ultimate Brain equips you with nearly every tool you need to build a digital productivity system. You might also call it a “second brain”.
In a single Notion template, you get task management, note-taking, project management, goal-tracking, a CRM, recipe tracker, book tracker, PARA organization tools, and more.
But, as Uncle Ben once almost said:
“With great power comes great complexity.”
…I may have taken some liberties with that quote. In fairness, it doesn’t have to be true.
In this guide, I’m going to show you how to start using Ultimate Brain the simple way. I’ll also suggest a couple of additional tools you may want to pair it with.
I’ll assume you’ve already added Ultimate Brain to your Notion workspace. Check out my guide on Adding Ultimate Brain to Notion if you haven’t done that already!
Copy link to headingSetting a Baseline
This section covers some productivity philosophy. I think it’s useful, but you can skip to the next section if you just want to start using Ultimate Brain right now.
Your goal with Ultimate Brain – and any productivity tool, for that matter – shouldn’t be to use every feature of the tool. Instead, the tool should simply help you stay organized and work more effectively.
How often do you feel like your life is more chaotic than it should be?
How many times a week do you find yourself saying, “I feel busy, but I don’t know exactly what I should do next”?
If you can solve these issues, that’s a huge win. Let’s focus on those before getting fancy.
Note: If one of your goals is to also learn Notion, I still think it’s worth starting simple with Ultimate Brain. However, once you’ve established a good baseline, you can try out some of my pro-tips or try the projects in the Customization section of these docs. Both will teach you a ton about Notion.
To start, I’d like to help you set up Ultimate Brain so it acts as a trusted, external system that makes it easy for you to:
- Capture ideas, tasks, and other information
- Prioritize what you need to do each day
- Easily retrieve information when you need it
- Calm the sense of overwhelm that most of us feel
In short, your system should help ensure nothing ever slips through the cracks in your life. It should allow you to (calmly) capture, plan, and execute – both in your professional work, and in your personal life.
I think of this as establishing a baseline for my day-to-day work and habits. For me, that baseline is met if I can truthfully say:
- “When new info comes into my life, I know where to put it.”
- “Each day, I know what’s on my schedule, and I don’t feel surprised or rushed by it.”
- “When I’m working, I know exactly what my next action is, and why I’m doing it.”
- “I’m keeping up with my habits – including daily movement, regular learning, and quality time with my family and friends.”
I know I can’t say all of these 100% of the time, since life often throws curveballs. But when my tools are set up to let me easily capture, plan, and execute, I can say them truthfully more often than I otherwise would.
So, with the goal of establishing a baseline in mind, let’s cover how you can set Ultimate Brain up to assist you with it.
Copy link to headingOne Page to Rule Them All
Above all else, Ultimate Brain brings everything you need to manage your life into Notion – tasks, notes, projects, and more.
Fittingly, you can manage it all directly from Ultimate Brain’s home page – and I recommend starting out that way! The home page contains default sections for:
- Tasks
- Notes
- Projects
- Tags
These sections allows you to organize your entire life from a single Notion page if you want. Each contains multiple views that show useful information. For example, the Tasks section has views to show your Inbox, Tasks Due Today, Recurring Tasks, etc.
Each of these sections also has a dedicated page in Ultimate Brain, often with additional views and advanced features. There are also several other pages – My Day, Books, Recipes, etc. Feel free to explore these at your leisure.
Some of them also have Dashboard Components you can copy and paste onto your home page if you want – check out the Dashboard Component Library linked near the bottom of the home page to find them.
Below, you’ll find a section that will teach you the easiest way to get started with each of the default sections.
Copy link to headingTask Management
Perhaps the most important job a productivity system can do for you is helping you manage the stuff you need to do.
Ultimate Brain contains the single best task manager you will find for Notion. It’s easy to use, but contains powerful features under the hood – like automated recurring tasks, sub-tasks, projects
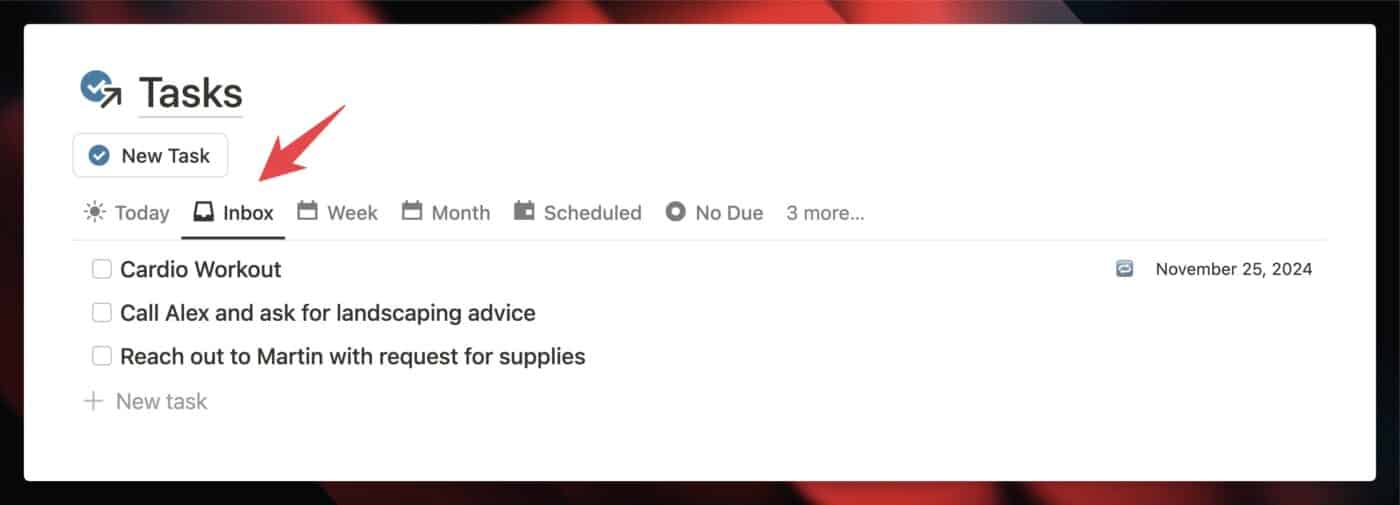
It’s also the first thing you see when you enter Ultimate Brain. The Tasks section of the home page contains tabbed views that allow you to do nearly all of your task management from a single page.
To manage your tasks in Notion, I recommend just using this Tasks view at first, and adopting three habits:
- Capture new tasks to the Inbox
- Set Projects and Due Dates
- Do a Daily Review
Capture Tasks to the Inbox
The Inbox tab gives you a default place to quickly capture any task that comes into your life. While you can always add a task directly to a Project or to your calendar, consider the Inbox your default destination for new tasks, and commit to using it.
When you have an obvious default in mind, you’ll be more likely to add tasks to your second brain when you’re busy, stressed, or on-the-go. If you don’t, you’ll be tempted to tell yourself that you’ll just remember it.
Copy link to headingSet Projects and Due Dates
The easiest way to keep your task system organized is to give tasks a project and/or a due date.
Projects are pages that organize tasks that all contribute to a common goal. We’ll cover them in detail later on this page, but to get started, you can open a task’s page, click the Project field, and create a new project for each task that needs one. Tasks leave the Inbox once they get a Project.
You can also click the View Details button to explore all of the other properties in the Tasks database. Hint: Try doing the same while viewing pages in any other Ultimate Brain database!
Of course, if you’re in less of a hurry, you can also add tasks directly to the Tasks view on a project’s page, which will automatically relate it to that project.
Due dates help you commit to getting a task done at a later date if you can’t do it now. Setting a Due date won’t make a task leave the Inbox, but it will make the task show up on the Week, Month, and Scheduled views.
If your brain doesn’t like due dates, fear not. Ultimate Brain supports other ways of working, such as GTD’s “Next Actions” workflow, as well as the My Day page, which I personally love.
Copy link to headingDo a Daily Review
Once a day, sit down and check over your Tasks section. This habit is crucial – it’ll help you keep your system in order, which will make it easier to trust and use it long-term.
95% of the reason people stop using to-do apps is because they get overloaded with old, irrrelevant data. But if you can do a quick daily review, you’ll avoid this problem.
It’s easy, too. Just do the following:
First, check the Today tab for any overdue tasks. If you find any, give them a new due date. Alternatively, do them now if you can – or delete them if they’re not revelant anymore!
Next, check the Inbox and process any tasks you find there, setting due dates and Projects as needed.
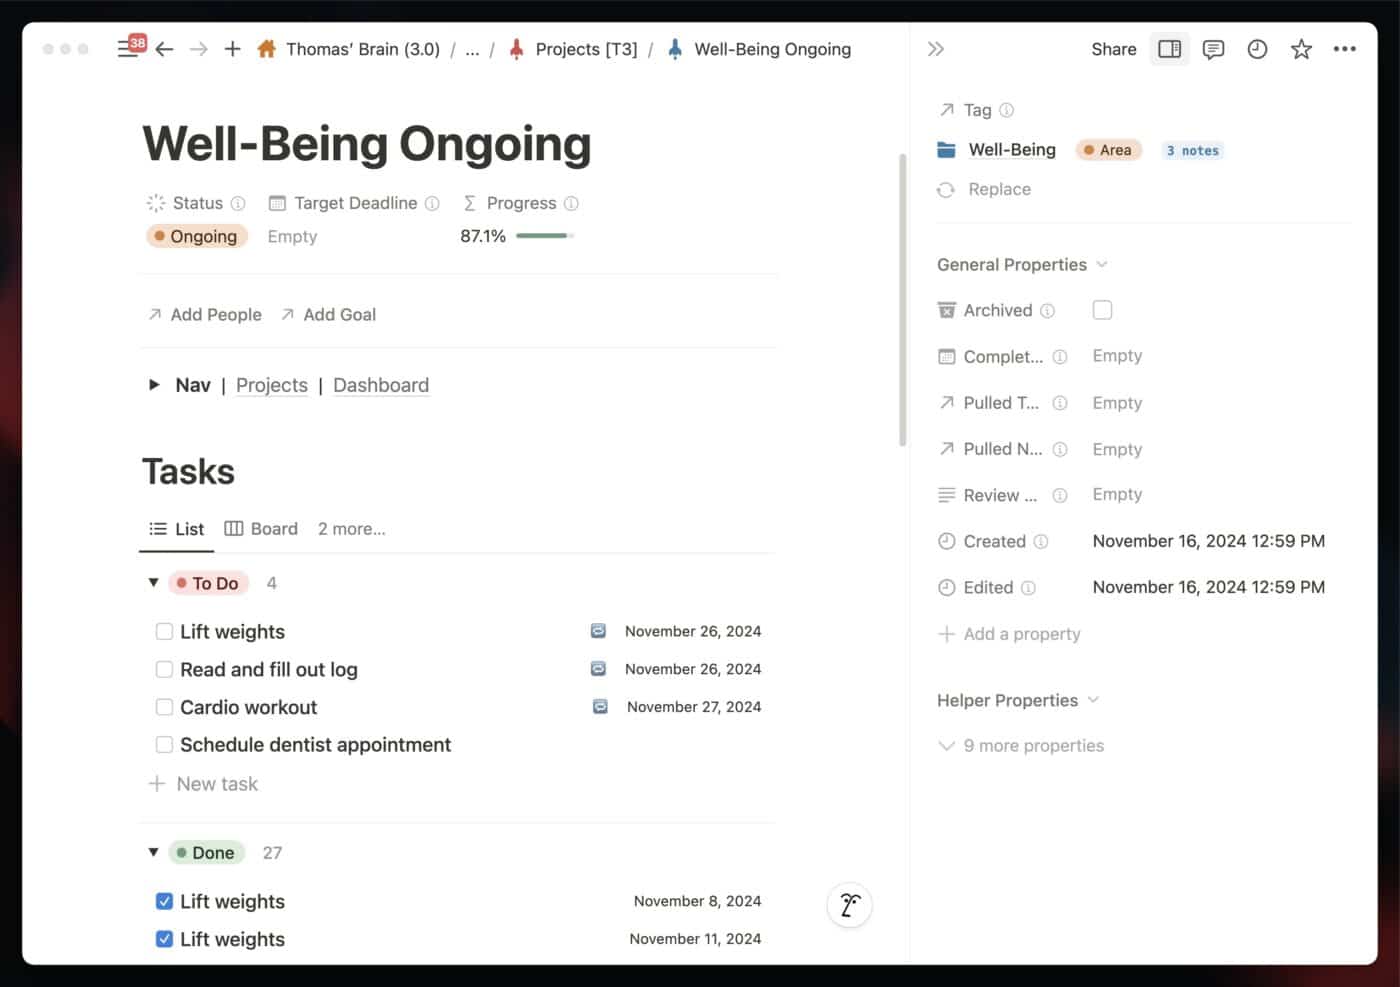
If you have a task that doesn’t seem to fit a defined project, create an “Ongoing” Project for it.
Example: I have a few recurring tasks related to self-improvement, like “Lift Weights” and “Read Book and Fill Out Reading Log”. These each live in a Project called Well-Being Ongoing.
In most cases, those three habits are all you need. Don’t overthink it!
If you can reliably capture tasks to your second brain, organize them with projects and dates, and review your system each day, you’ll make your Tasks system a well-oiled machine – and you’ll ensure nothing slips through the cracks in your life.
If you’d like to take things one step further, you can try using the daily planning guide, which will teach you how to use the My Day page. This is the how I manage my tasks, and it’s the page I actually use the most in Ultimate Brain.
You can also explore the full Tasks page, which contains specialized sub-pages. Each gives you a more detailed look at your task management system. Check out the Manage Your Tasks guide for a full rundown on all of these pages.
You can also take things further with these level-up paths:
- Set up recurring tasks (easy)
- Capture tasks with your voice (advanced)
Notes
Ultimate Brain’s Notes dashboard gives you a full-featured note-taking system in Notion.
As with the Tasks feature, Notes is powerful. There are templates for meeting notes and journal entries, Tags and Types for organization, and even a date-based review system.
You can also upgrade the Notes system with tools my team and I have built, like Flylighter (our Notion web clipper) and Notion Voice Notes (my workflow for taking notes with my voice).
Here are four simple ways to get the most out of the Notes system while keeping things simple:
Copy link to headingCapture New Notes to the Inbox
The Inbox tab gives you a default destination in which to capture new notes. I recommend creating notes here anytime you’re in a hurry and don’t want to spend time navigating to a specific Tag or Project first.
By default, notes will stay in the Inbox until you give them a:
- Tag
- Project
- Person
Once you set one of these Relation values, the note will leave the Inbox. Applying certain Types to a note can also make it leave the Inbox, such as Journal or Meeting.
If you clip a lot of stuff from the web, it’s also useful to create way to capture clips directly to the Inbox so you can process them later. See the Save Stuff from the Web section below for more on how to do that.
Copy link to headingAdd Tags or Projects to Notes
Just like your Task Inbox, the Note Inbox is designed to be cleared out on a regular basis. The best way to do that is to add Tag or Project relations to each note:
- Tags can have specific types, including Area and Resource. These tag types are used in the PARA Method to organize notes by topical intestest (Resource) or large area of your life (Area).
- Projects are collections of tasks and notes that all pertain to a larger end goal.
Check out the Tag and Project sections later on this page to learn more about each one.
Not sure which one to start with? Tags with the Resource type are your best bet. They’re like topic-based folders/notebooks in other apps like Apple Notes or Evernote.
You’ll see Tag and Project values directly in each List view that shows your notes, but you can also open up a note’s page and see/set the values there.
When you do, you’ll also find the Add People button, which will allow you to relate notes to People records in Ultimate Brain’s built-in CRM. Don’t feel any pressure to use this if you don’t have an immediate need, though. In general, most notes will do just fine with a Tag or a Project.
Copy link to headingSave Stuff from the Web
If you’re anything like me, you probably run across a lot of stuff on the web that you want to save. I’m constantly coming across articles I want to highlight, apps I want to try out, YouTube thumbnails I want to save for inspiration, and more.
I designed Ultimate Brain to help me save these web clips, as well as to keep them separate from normal notes.
In the main Notes view (and in most Notes pages), you’ll see a Clips tab. This contains your web clips, which are:
- Pages where the Type is Web Clip
- Pages where the URL property is not empty
One exception: Pages with a URL property value and a type of Voice Note aren’t considered clips. These pages are usually created through my Notion Voice Notes workflow, and they’re considered normal notes.
This setup makes organizing web clips easier, but what about actually capturing them faster?
For that, we built Flylighter.
Flylighter is a super-powerful Notion web clipper, and with it, you can easily create flows that instantly capture web clips, highlights, and even full articles directly to Ultimate Brain.
I use Flylighter every day to capture ideas, articles, and other resources to my own copy of Ultimate Brain. I think you’ll find it to be a fantastic companion to your own copy of Ultimate Brain – and it’s free!
To get started, check out our tutorial on using Flylighter with Ultimate Brain.
We’re currently in an open beta; you’re welcome to visit the website and join the waitlist for our full launch. Or, if you’re an adventurer and you’re willing to report any bugs if you find them, you can join our Discord and start using Flylighter today.
Copy link to headingUse the Notes and Clips Views
The last thing I’ll recommend here is to make use of the Notes and Clips tabs right in the Notes section on the home page.
These views are sorted to show your most-recently-edited notes first, which means you’re usually going to find what you’re looking for in them quickly.
Of course, you can also browse through the Notes views on your Tag or Project pages to see the notes you’ve related to them – but 9/10 times, I find that it’s faster to just use the plain old Notes view to find what I’m looking for.
That’s pretty much all you need to know about note-taking in Ultimate Brain for now! Next, I recommend perusing the Projects and Tags section below so you can understand how they work with your notes.
If you’d like to improve your system even further, here’s a level-up path:
Copy link to headingProjects
A project is essentially a “home base” for task and notes that all pertain to a common goal. Ultimate Brain’s Project section is a great place to track these.
Projects can have one of five statuses:
- Planned – projects that are planned, but not yet started.
- Doing – projects you’re currently working on, which have a defined end goal.
- Done – finished projects.
- Ongoing – collection of tasks that maintain a certain area of your life.
- On Hold – projects that were active, but are paused.
You’ll notice that Doing and Ongoing are bolded above – these are the most important statuses, as they’ll contain all the projects that are currently occupying your attention.
Fittingly, on the Ultimate Brain home page, the first Project view you’ll see is called Active. It shows only projects that are in the Doing and Ongoing status.
The Planned view is useful for planning new projects that aren’t ready to be started yet, and finally the Board view will show you all projects in all statuses.
Ultimate Brain isn’t about hyper-complex project management. You hear me talking about scrum masters or burndown charts in this guide. However, there are a couple simple habits that will help you get the most out of your projects:
Copy link to headingSet Projects on Tasks and Notes
When you have a project you need to complete in your job or personal life, create a project in the Projects section.
By default, new project pages will apply the simple Project template, creating a view for Tasks and a view for Notes in that project page. In these views, you can easily plan out the tasks you need to accomplish to finish the project,
Copy link to headingUse Ongoing Projects for Maintenance Tasks
Instead of cluttering your Inbox with mainenance tasks, I recommend creating ongoing projects to organize them.
In my own copy of Ultimate Brain, I have several of these:
- Work Ongoing
- Well-Being Ongoing
- Home Ongoing
Each ongoing project contains both recurring tasks and one-time tasks that help me to maintain that area of my life. For example, my Work Ongoing project has tasks like “Clear Email” (recurring on weekdays) as well as “Reach out to Framer about Discount” (one-time, scheduled).
This strategy is also how you can associate tasks with Areas if you practice the PARA method.
In Ultimate Brain, the Tags database lets you create tags with the Area type; however, you can’t directly relate tasks to tags by default. Instead, you relate each Ongoing project with its Area tag – for example, my Home tag contains my Home Ongoing project.
If you want to get your hands dirty, you can directly relate the Tasks and Tags database in order to directly relate tasks to their Area tags. I don’t ship Ultimate Brain with this feature by default because I feel it adds too much clutter when actually processing tasks in the inbox.
If you want to dig deeper into project management in Ultimate Brain, check out the full video tour in the Managing Tasks page.
Copy link to headingTags
Ultimate Brain has a useful Tags database that allows you to keep tasks and notes more organized. It can also help you organize Goals and even People records, but we’ll cover those in later guides.
Hint: If you’re coming from an earlier version of Ultimate Brain, the Tags database used to be called Areas/Resources.
Ultimate Brain is loosely designed around the PARA Method, a system for organizing your digital life designed by Tiago Forte. In PARA, everything that comes into your digital life – tasks, notes, documents, etc – goes into one of four “folders”:
- Projects – collections of tasks that serve a defined, near-term goal.
- Areas – long-term areas of responsibility. I often think of these as “life buckets” – e.g. Home, Work, Health, etc.
- Resources – topical interests that you have, e.g. Guitar, Live Streaming, Cooking, Tabletop Gaming.
- Archive – inactive items from the other three folders that are not relevant to you now.
The PARA folders are ordered by actionability; Projects are very actionable, while anything in the Archive is totally irrelevant to your life right now.
In Ultimate Brain, the Projects database and section we covered above handles all of your projects. Ultimate Brain also makes archiving irrelevant information easy – you can check the Archive checkbox property on any note, project, tag, or goal, and it’ll go to the Archive page.
The Tags database and section takes care of the other two – Areas and Resources. (There are specific reasons why Projects are split into their own database.)
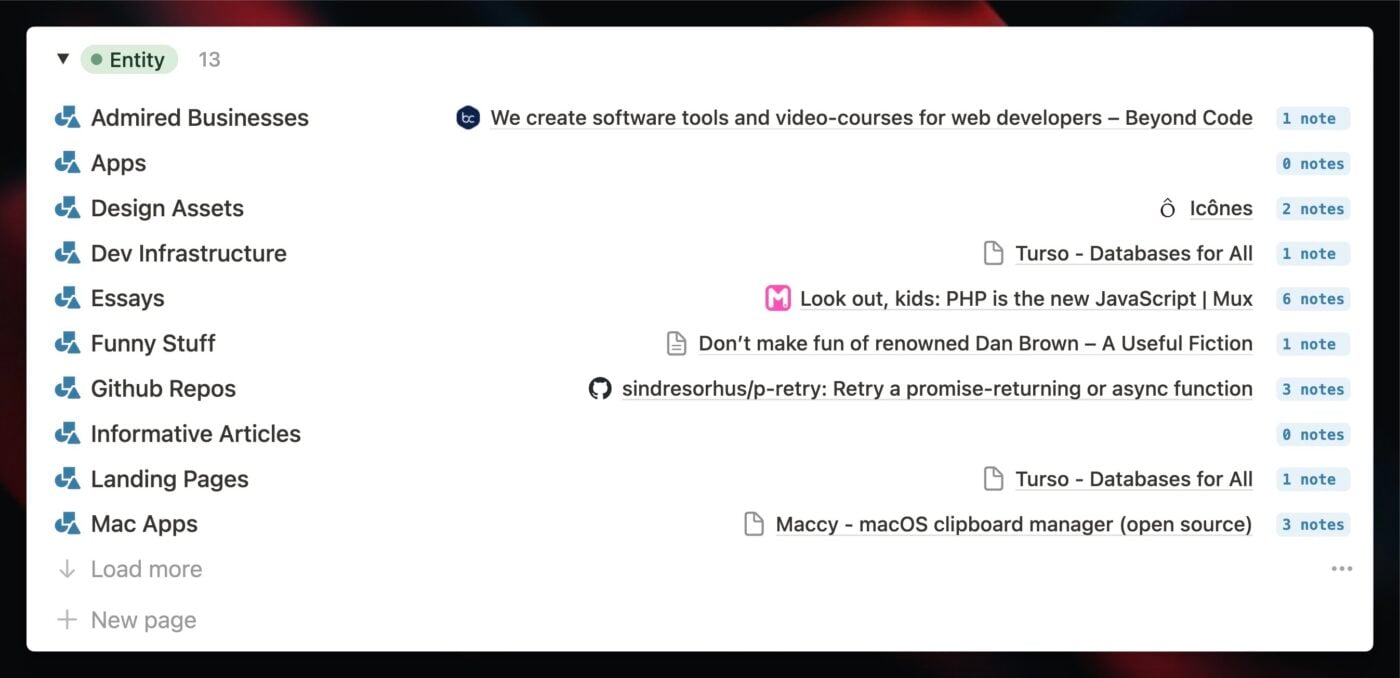
In addition, there’s a third type of Tag called Entity, which can help you organize information by its “shape”. Where Resources are typically topic-based – e.g Gardening or Programming – Entities describe what a piece of information actually is – e.g. Apps or Essays.
I’ll cover Entities in more detail in other sections of these docs. They’re an expression of how Notion’s database-centric design allows us to do things that are impossible in other, more traditional productivity apps (hence why PARA is so focused on “folders”, since it attempts to provide a model that works in any app).
For now, I think it makes sense to simply establish a few Areas and Resources that you can use to start organizing notes.
When you create a new Tag page, you can choose either one from the list of page templates. This will set the page’s Type, and it’ll also bring in a set of useful views.
Copy link to headingCreate Areas to Manage Your Life
I recommend creating a few Area-type Tags to represent the larger areas of your life. These Areas can create “home bases” for projects, notes, and other things that pertain to them.
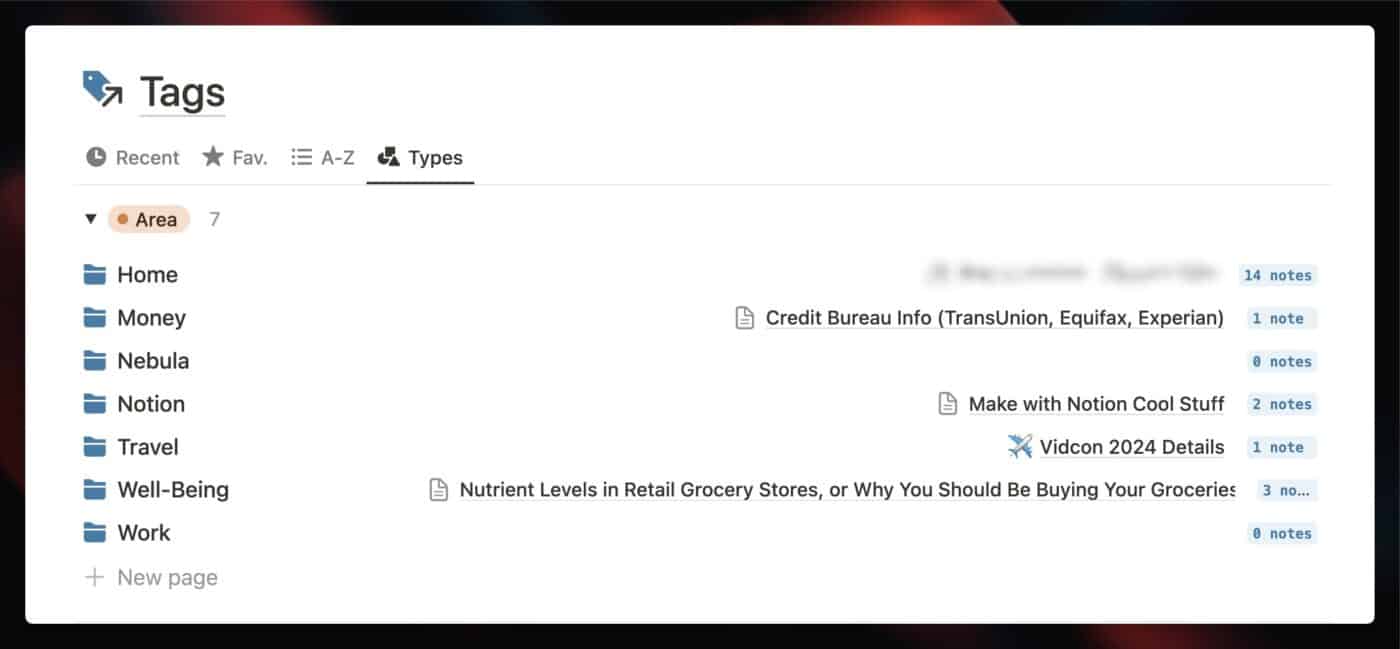
You can see that I have several, including Home, Work, Well-Being, and Money. These are very broad Areas, but I also have a couple of narrower ones, such as Notion and Nebula. Even though I’m not employed by these companies, I have so much involvement with them that I consider them to be Areas.
If you’re not sure whether something should be an Area or a Resource (covered next), ask this question:
“Do I anticipate having projects related to this part of my life?”
If they answer is yes, you’ve got an Area on your hands. You’re organizing an area of your life in which you have responsibility, and often where there is a standard to be maintained.
If not, then you’re likely fine just creating a Resource instead.
Pro-tip: You can always convert an Resource to an Area, or vice-versa. All you need to do is re-apply the correct template to an existing page.
Copy link to headingOrganize Information with Resources
Create Resource-type Tags to organize notes and web clips that pertain to topical interests you have. For example, here are a few of mine:
- Computer Science
- Databases
- Energy (e.g. electricity)
- Guitar
- Laravel
- Productivity
- Singing
- UI/UX Design
Resource pages come with both a set of Notes views and a set of Web Clip views. For capturing web clips, I recommend using Flylighter – our Notion web clipper!
When creating a Tag page, you can alternatively choose the Entity template. Entity pages are identical to Resource pages. Marking a page as an Entity simply lets you diffentiate it – if you switch to the Types view of the Tags section on the Ultimate Brain homepage, you’ll see all of your pages grouped by Type.
Where Resources are based on topics, Entities are based on the shape of information – e.g. Apps, Essays, or Research Papers.
Copy link to headingAvoiding Overwhelm
Ultimate Brain includes a lot of tools, and several of them are designed for specific types of people.
For example, the Process (GTD) dashboard is entirely designed for people who practice David Allen’s well-known Getting Things Done method.
I don’t personally practice GTD, so I don’t use this page at all. I use my own Baseline practice of simply adding tasks to Projects and creating a a My Day plan each day.
But for the folks who do practice GTD, it’s a useful page. The same can be said for folks who really value contact-tracking – for them, the People page is an excellent addition. For you, maybe it’s too much.
The best piece of advice I can give you is to let your tools follow your workflow, not the other way around. This, in my opinion, is the entire point of Notion. More than perhaps any other tool, we can mold Notion to our needs.
The same applied to Ultimate Brain. It gives you a starting point, but you don’t have to use everything – and everything is open for customization.
