
Several years ago, I wrote about the Feynman Technique – a simple, yet highly effective study technique in which you deepen your own mastery of a concept or topic by attempting to explain it simply to someone else. In other words, teach to learn.
Today, I’m going to share a modified version of the Feynman Technique that I’ve been using in my own independent learning projects.
This method is conceptually similar to the classic Feynman Technique, but quite different in execution. Therefore, I’m giving it a distinct name: The LPC Method – short for Learn, Present, Critique.
I’ve been using the LPC Method in my study of anatomy, biomechanics, and bioenergetics as part of my path toward earning both CSCS and PBC strength training/coaching certifications.
In my experience, this technique has an extremely high ROI in terms of helping me retain key concepts and facts while spending relatively little time studying compared to other methods.
The LPC Method works for many types of information, and can actually be combined with the original Feynman Technique for extra benefit. Here’s how it works.
Copy link to headingThe LPC Method in 30 Seconds
The LPC Method is a three-stage method of study and review.
- Learn: Intake the material and take notes as you normally would.
- Present: Record yourself explaining the concept, as if you were explaining it to a friend.
- Critique: Upload your video to your notes, watch it, and add a written critique that corrects errors, clarifies anything vague, and adds useful detail.
Below, I’ll walk you through each step in detail, and work through an example so you can see the whole method in action.
Copy link to headingHow to Use the LPC Method (With Examples)
As mentioned above, the LPC Method is composed of three different steps.
Copy link to headingStep 1: Learn
This is your typical “learning” stage. Read the textbook, follow along with the lecture, watch the video – whatever the format may be.
In my case, the primary material I’m working through is Barbell Logic’s Principles course, which is their educational path that leads to PBC (Professional Barbell Coach) certification and a foundation of knowledge required for strength coaching.
My reason for pursuing this certification: I’ve been a client of Barbell Logic’s coaching service (affiliate link) for about 18 months, and I’ve gotten to a point where I want to fully understand what’s going on with my own training. I also want to be able to make fitness content in the future, and I want to properly know what I’m talking about.
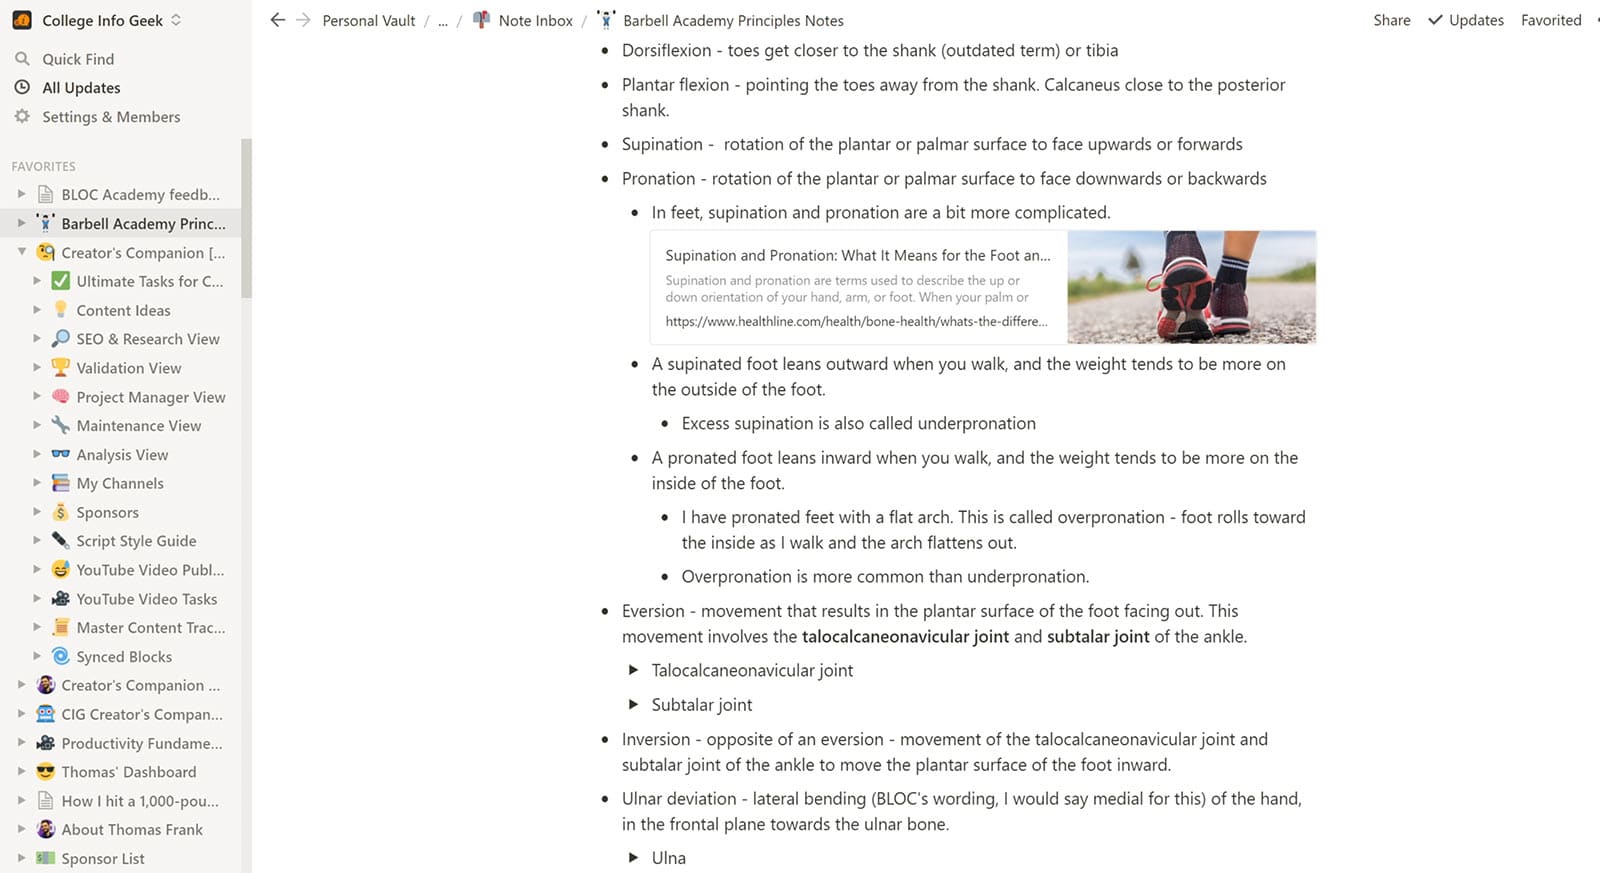
I use a pretty typical outline-style notetaking method (see my breakdown of the best ways to take notes if you’re curious) in Notion, my note-taking app of choice.
I also take and paste frequent screenshots using Snagit (I recommend ShareX for a free Windows alternative – MacOS can add screenshots to the clipboard natively). I also add supplemental materials to my notes, like YouTube videos that explain concepts more deeply or in a different way.
These note-taking methods aren’t super-relevant to the LPC Method, but they’re useful enough to include here.
Copy link to headingStep 2: Present
Once you’ve learned the information and written up your own unique notes on it, the next step is to present it. This step is analogous to the classic Feynman Technique, but with a twist:
Instead of writing down your explanation on paper, use your phone camera to shoot a video of yourself explaining it.
Here’s an example video, in which I’m explaining the different type of synovial (moveable) joints in the body:
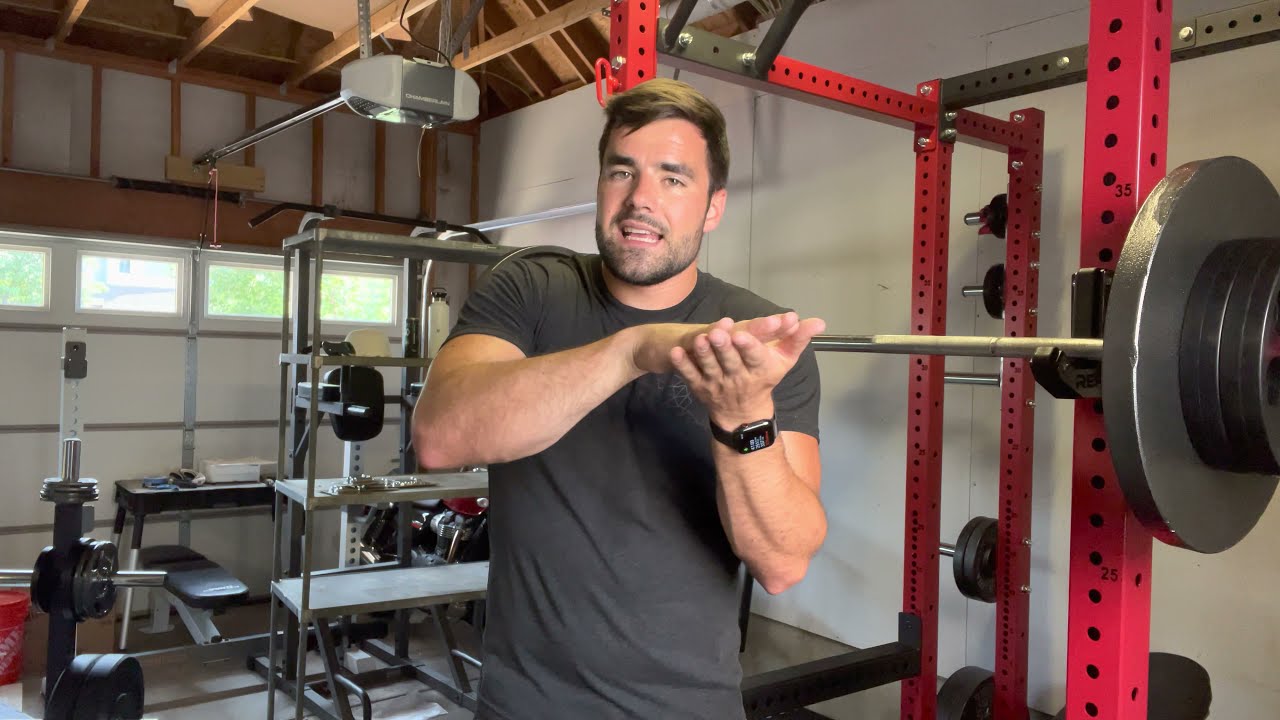
Filming a video of yourself also allows you to to use body language to demonstrate your knowledge. In the video above, you’ll notice how I actively demonstrate the types of joint movement using my own body, and even add in a few visual representations to show the basic design of each joint.
Note that you could also shoot an overhead video of your hands drawing out a concept on a whiteboard as well. The key is explaining the concept to your camera so you have footage that you can watch and critique later.
Copy link to headingStep 3: Critique
Finally, you want to watch your video with a critical eye and write some notes next to it.
I upload my videos unlisted to a second YouTube channel I have. I can do this directly from the YouTube app on my phone, which makes the process very quick.
Once uploaded, I grab the unlisted video’s URL and embed it into my Notion notes at the top of the section for the concept I’m explaining.
I want my accurate notes to be near the videos’ embed location so I can quickly review them and be primed to catch any errors.
Notion allows you to add captions to embeds, so I write up my critique there:
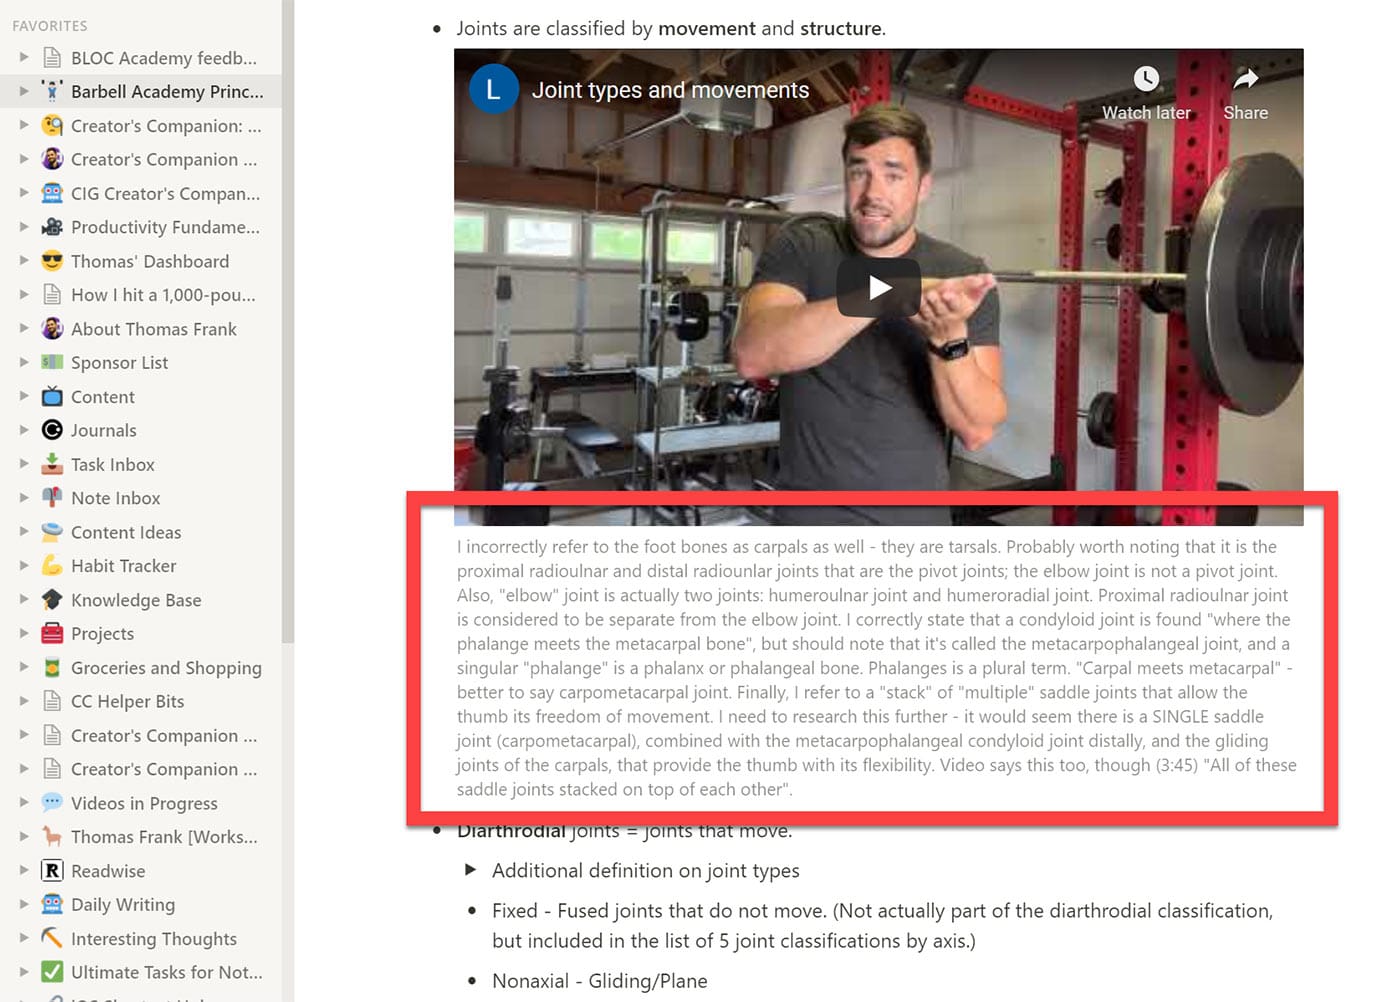
I incorrectly refer to the foot bones as carpals as well – they are tarsals.
Probably worth noting that it is the proximal radioulnar and distal radiounlar joints that are the pivot joints; the elbow joint is not a pivot joint. Also, “elbow” joint is actually two joints: humeroulnar joint and humeroradial joint. Proximal radioulnar joint is considered to be separate from the elbow joint.
I correctly state that a condyloid joint is found “where the phalange meets the metacarpal bone”, but should note that it’s called the metacarpophalangeal joint, and a singular “phalange” is a phalanx or phalangeal bone. Phalanges is a plural term.
“Carpal meets metacarpal” – better to say carpometacarpal joint.
Finally, I refer to a “stack” of “multiple” saddle joints that allow the thumb its freedom of movement. I need to research this further – it would seem there is a SINGLE saddle joint (carpometacarpal), combined with the metacarpophalangeal condyloid joint distally, and the gliding joints of the carpals, that provide the thumb with its flexibility. Video says this too, though (3:45) “All of these saddle joints stacked on top of each other”.
In general, you want to look for three things while critiquing:
First, look for factual errors and correct them. For example, in the video above, I incorrectly referred to the tarsals as carpals. You’ll see my correction in the critique text.
Second, look for opportunities for clarification or specificity. In the video, I refer to the “joint between the metacarpal and phalangeal bone”. While there is indeed a joint there, it also has a name! It’s called the metacarpophalangeal joint. I write this out explicitly in my critique so I’ll remember it.
Third, work to notice any questions that warrant further exploration. Learning should be active. Don’t just be content with learning the specific material you’re studying – chase down answers to any questions that come up, and use supplemental resources to do it if needed.
Note that it may be useful to wait a day before doing your critique, or even before filming your video. One of the absolute best study hacks is to space out your practice. When add progressively longer amounts of time between attempts to recall information, those recall attempts actually build stronger memory pathways.
This is called the spacing effect. If you’re a lifter like me, you might notice that its effects for memory draw some natural comparisons to how progressive overload affects the muscles!
Copy link to headingWhy the LPC Method Works
I’ve found this method to be a useful addition to my arsenal of study techniques. It’s an exercise that adds multi-modal learning into my study process, while encouraging multiple forms of actively learning – namely:
- Verbal and body-language driven performance (with useful pressure added by the camera)
- Post-performance critique
Due to these additional forms of active learning, I find the LPC Method to be even more effective than the classic Feynman Technique when reviewing certain types of information.
For one example: In reviewing the different anatomical terms of movement – flexion, extension, abduction, adduction, etc. – visually demonstrating them on video just once has resulted in near-perfect long-term recollection and understanding of many terms.
Were I to use the classic Feynman (paper-based) Technique to review these terms, I’d either need to simply write the definitions (much less effective than physically demonstrating them with my own body), or draw them (much more time-consuming).
Speaking of writing and drawing, though…
Copy link to headingThe LPC Method vs. The Feynman Technique
If you’re observant, you may have noticed that these two techniques do not need to be mutually exclusive.
In fact, you could very well write or draw up an explanation of a concept on paper, and then talk through your explanation to your camera.
You could also incorporate a whiteboard into a demonstration, filming yourself drawing out diagrams to assist in your explanation.
The real addition that the LPC Method brings to the table is the recorded video and the critique phase that happens later on.
So, for concepts and subjects that warrant it, you may get the best possible ROI by combining the Feynman and LPC methods. You might also do even better by adding in your own study techniques!
The main thing to remember here is that you’ll almost always benefit from incorporating both multi-modal learning and active learning into your study process.
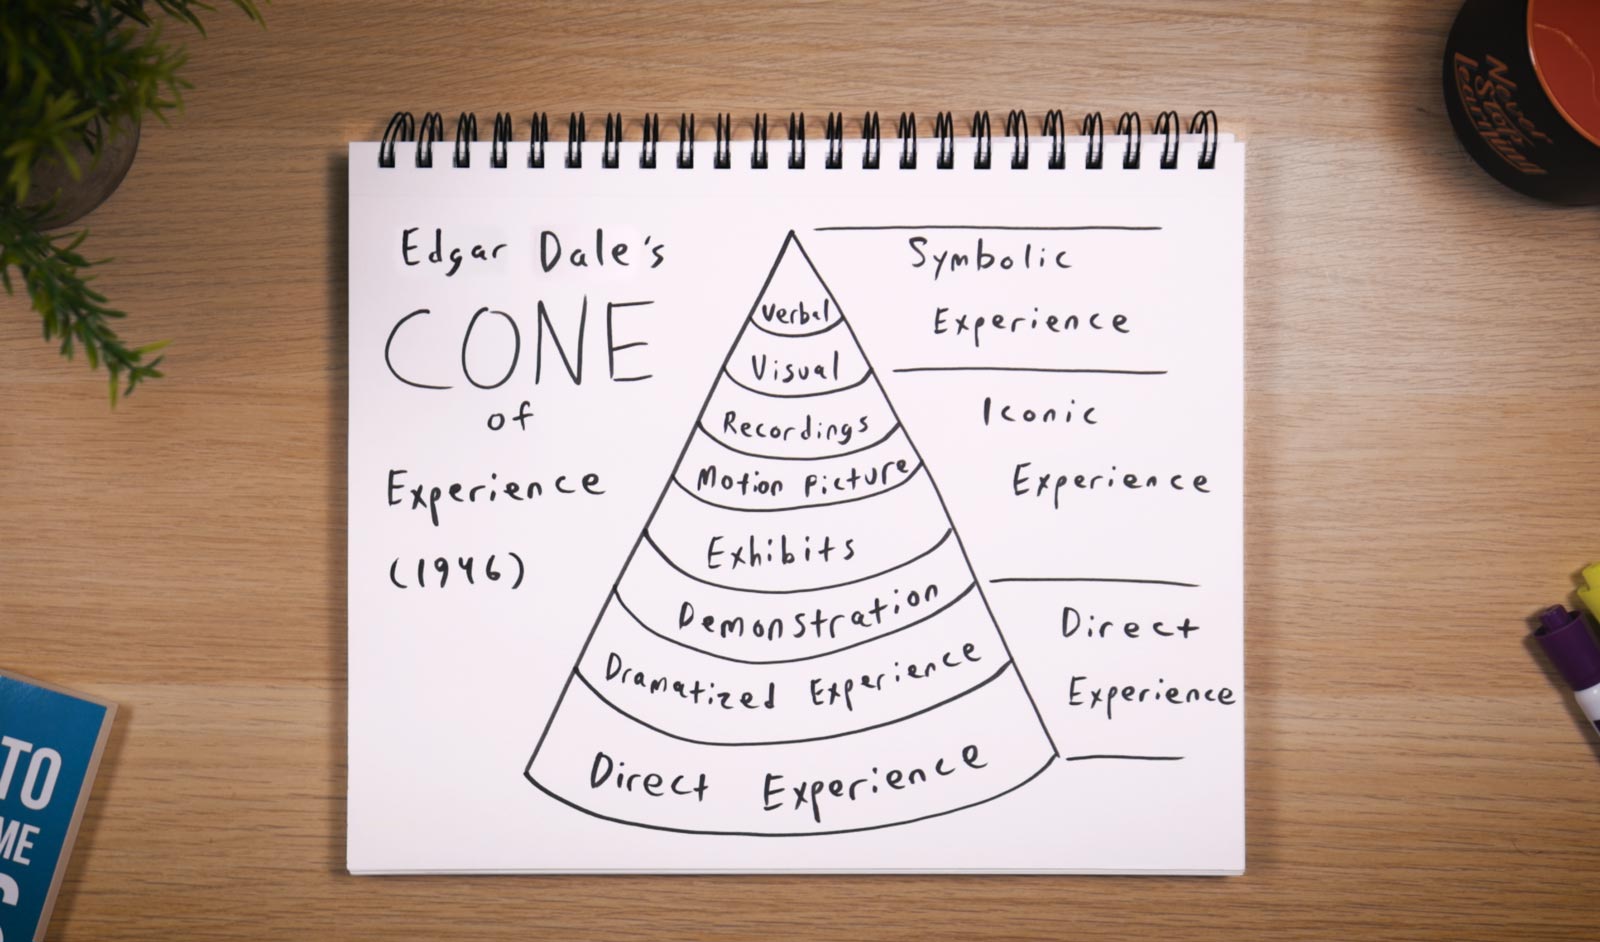
Research has shown that there’s no single “best” method of learning. Even direct, hands-on learning – what most people would naturally point to as the “gold standard” – isn’t always the right tool for the job.
As the education researcher Edgar Dale wrote in 1969:
“Too much reliance on concrete experience may actually obstruct the process of meaningful generalization.”
More recent research has found that more abstract, basic learning methods often work better for introductory concepts, while hands-on experience works better for more advanced concepts.
Additional research has found that different areas of the brain are involved in speech and writing, which means that verbally explaining a concept may build memory traces and help retention differently to how writing out the same concept would.
In general, the only thing we know for sure is that combining several learning methods results in better outcomes.
This is what I strive to do in my own learning, and it’s why I’m able to work through the study materials for my CSCS and PBC exams quite quickly while still retaining the vast majority of what I learn.