I’ve invested a lot of time into creating macros, shortcuts, and other ways of doing my work faster on my Mac.
Part of the reason I’ve done this is that I deal with RSI (Repetive Stress Injury) issues, particularly in my left hand.
Even though I practice good posture, have set up my workspace for proper ergonomics, and exercise like a maniac, I still spend a lot of time typing (as well as playing guitar), which can lead to overuse injuries. The less typing I can do, the better.
Beyond that, I’m also just fascinated with tools that can help me work faster and do more with less input. This post is a regularly-updated guide to many of the different utilities, shortcuts, and macros that I’ve developed specifically for my Mac computer that allow me to work faster.
Below I’ve created a major section for each app that I use. Within that section, I’ve listed all of the customizations, sub-apps, and shortcuts that I’ve created.
I think it’s worth noting that I “wrote” 95% of this post by talking to my Mac, not by actually typing.
Copy link to headingMacWhisper
MacWhisper is an app that transcribes audio to text. It does this either locally, using transcription models like OpenAI’s Whisper or Nvidia’s Parakeet (my current choice), or remotely via APIs offered by Groq, Eleven Labs, and others.
The model is extremely accurate and, at least on my M2 Mac Studio, very fast.
I started using MacWhisper to transcribe my YouTube videos and create subtitle files, and I still use it for that purpose.
However, the real killer feature of this app is called Dictation. Once you’ve enabled it in the settings, you can hold down a customizable hotkey to enable dictation in a push-to-talk fashion. I personally use the right ⌘ key, since I almost never use that key for anything else.
This lets you start speaking, and then transcribes your audio into text directly into the active app. I estimate that I do about 95% of my text input using this feature.
MacWhisper has a free version, which includes the Dictation feature. There’s also a Pro version, which you can buy for a one-time fee that gives you access to some more features, including the ability to run your transcribed text through an LLM like ChatGPT or Anthropic’s Claude.
I tested that LLM cleanup feature, but I find that in most cases, the raw output from Whisper is better. So I don’t use it now. However, it did give me the idea to develop custom macros with Keyboard Maestro that let me select and clean up text with an LLM on an as-needed basis.
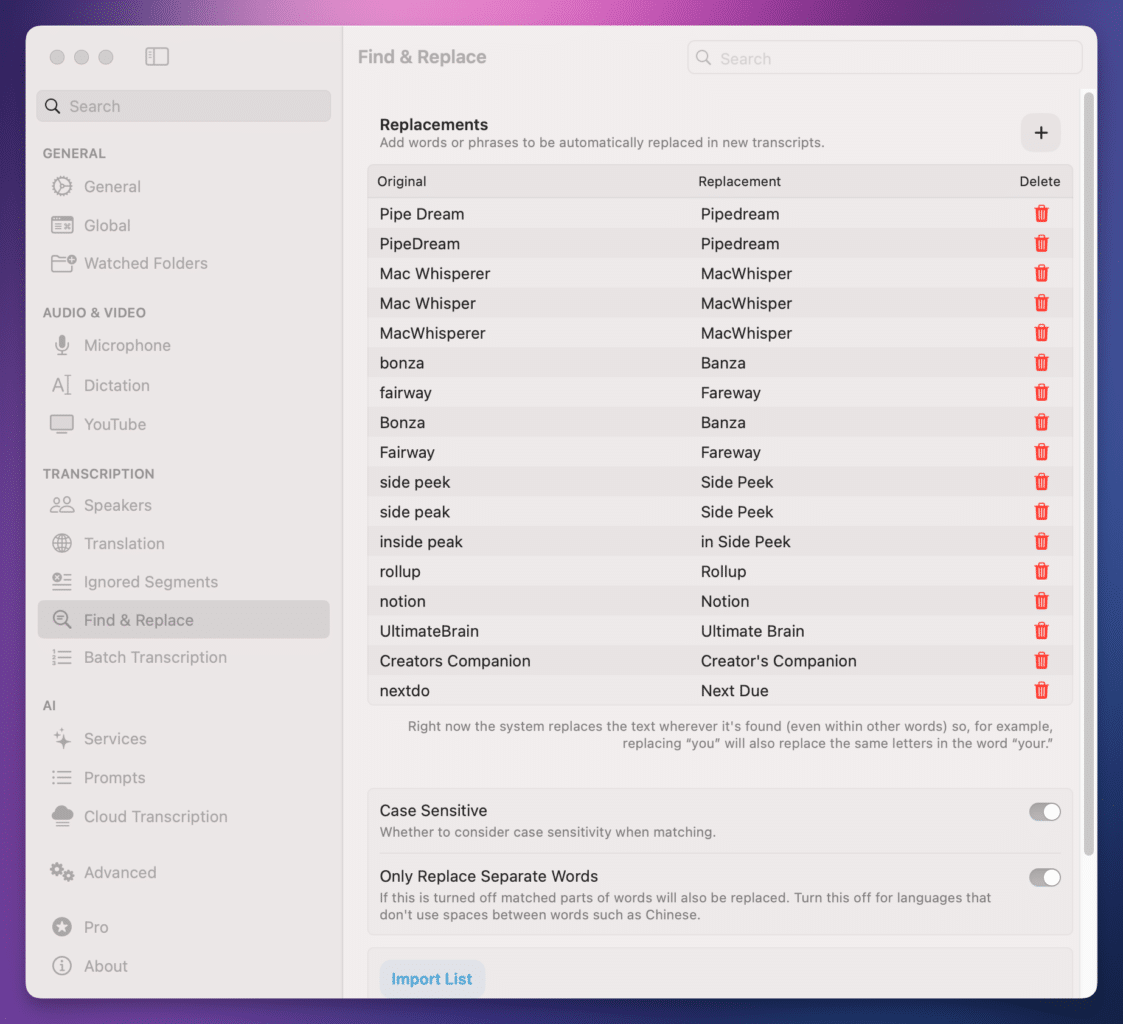
There’s also a useful Find and Replace feature which allows you to specify words that should be replaced with other words in all transcripts. Whisper is already a very accurate model, but this allows you to make your transcripts even more accurate.
I should note that macOS has a built-in dictation feature which I’ve also tested. Here’s how it stacks up against MacWhisper as of December 2024.
macOS Dictation pros:
- It’s included in macOS.
- Transcription happens live. It’s not real-time, but you can see the text being entered as you’re speaking. MacWhisper requires you to let go of the dictation key before it will transcribe anything.
MacWhisper Dictation pros:
- It’s currently more accurate, and it handles grammar and punctuation better than macOS Dictation.
- I like being able to hold down the right ⌘ key to trigger Dictation. Mac OS dictation requires either double tapping ⌘ or hitting the Microphone button (F5), which is more of a reach on my keyboard.
I’ll also note that macOS has a separate voice control feature that can be turned on in System Settings → Accessibility → Voice Control. This is separate from Mac OS dictation, and will automatically transcribe any spoken audio without the need to toggle a hotkey. It also allows you to literally control your computer using a huge list of commands.
Currently, I prefer using MacWhisper dictation out of all these three options, but things may change in the future. I’m particularly interested in how Apple Intelligence might improve the quality of the Dictation feature’s transcription in the future.
Copy link to headingRaycast
Raycast is a super-handy launcher app that essentially replaces Spotlight on macOS, and gives you the ability to take a ton of actions directly from your keyboard.
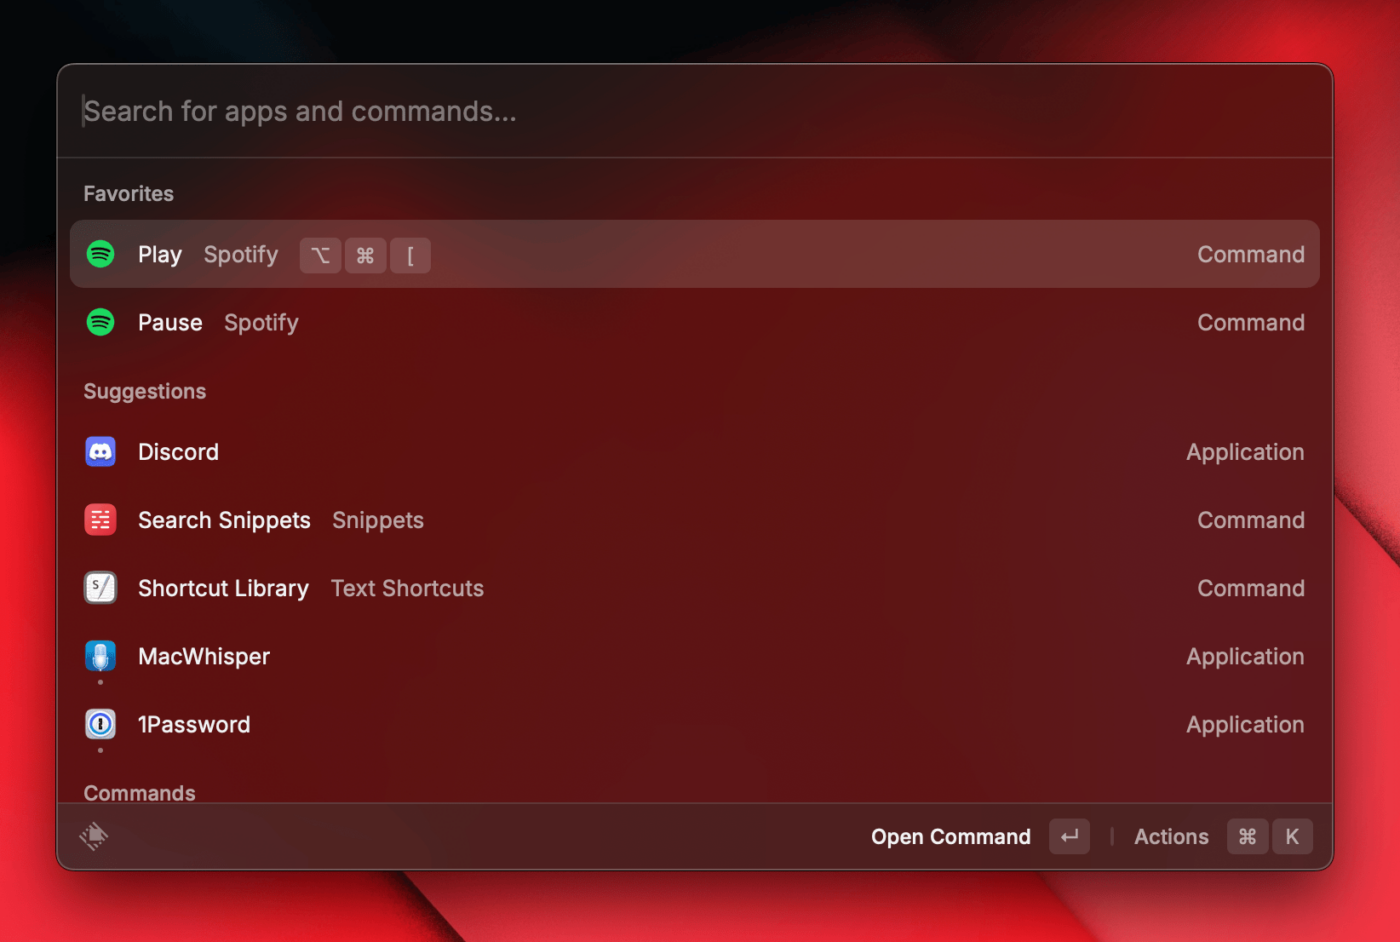
Just like with Spotlight, you hit a hotkey (I use ⌘ + Space) to bring up Raycast’s text input window. From there, you can type to filter through your actions, use the arrow keys to navigate, and hit Enter to run actions or launch programs.
Here are my most-used shortcuts and extensions:
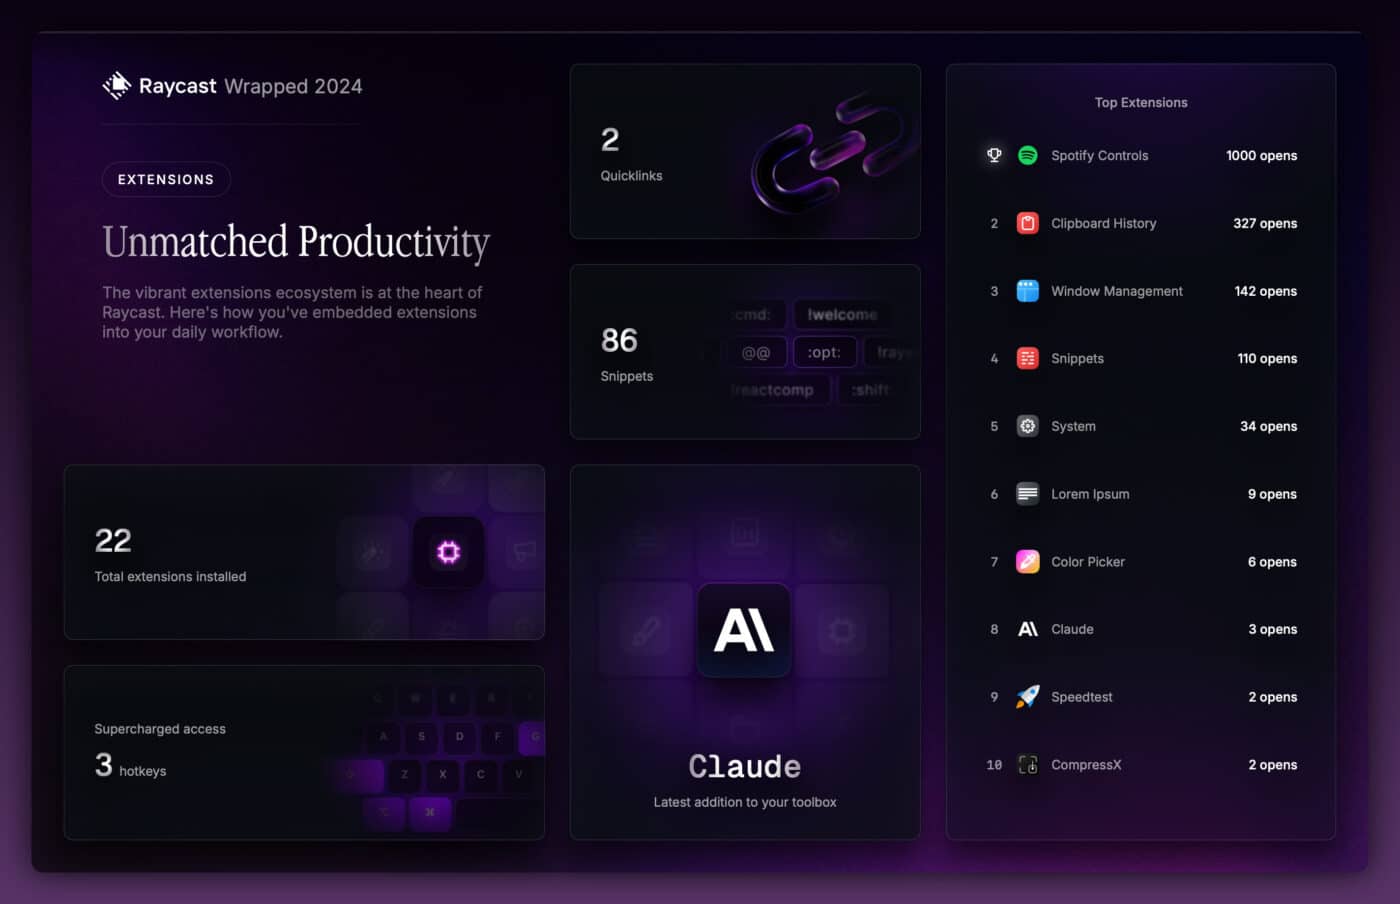
- Spotify Controls – MacOS doesn’t let you force your media keys to only control Spotify. So I’ve set ⌘ + [ to Play and ⌘ + ] to Pause using this extension.
- Clipboard History – Included in Raycast. Retains my clipboard history. I can’t believe macOS hasn’t included a clipboard manager by default at this point.
- Window Management – Included in Raycast. Lets me type commands like
first halformaximizeto manage the active window. There are many other window managers for macOS (Aerospace is a popular new one), but I’m happy with the commands in Raycast. - Launching Apps – Type to find and launch any app
- Snippets – Much like a text expander, Raycast allows you to create snippets of text, then automatically paste them by typing shorter strings. For example, I use
hthto pasteHope this helps!in our customer support community. I’m slowly replacing all of these with Keyboard Maestro macros. - Text Shortcuts – This extension lets me run useful shortcuts to transform text. For Example, I Can Highlight Some Text and Run the Title Case Transformation on It. I like this extension, though I find myself steadily creating Keyboard Maestro macros for many of its actions, since using it requires more key presses than what I need to trigger a macro. I’m slowly replacing this with Keyboard Maestro macros.
- Color Picker – Spawns an eyedropper tool which lets me click any part of the screen to copy that pixel’s hexadecimal color value.
- Dictionary – Launch Raycast, type a word, get a definition for it using the built-in system dictionary. I primarily use this to quickly spell-check words while writing.
Interestingly, Raycast’s new Wrapped feature actually shows me which of these extensions I use the most:
Raycast also has a Pro plan, which starts at $8/month. I have used it in the past, but my main use case was syncing all of my snippets between devices. That is a useful feature, but paying $8 a month for it seems a bit steep.
Copy link to headingKeyboard Maestro
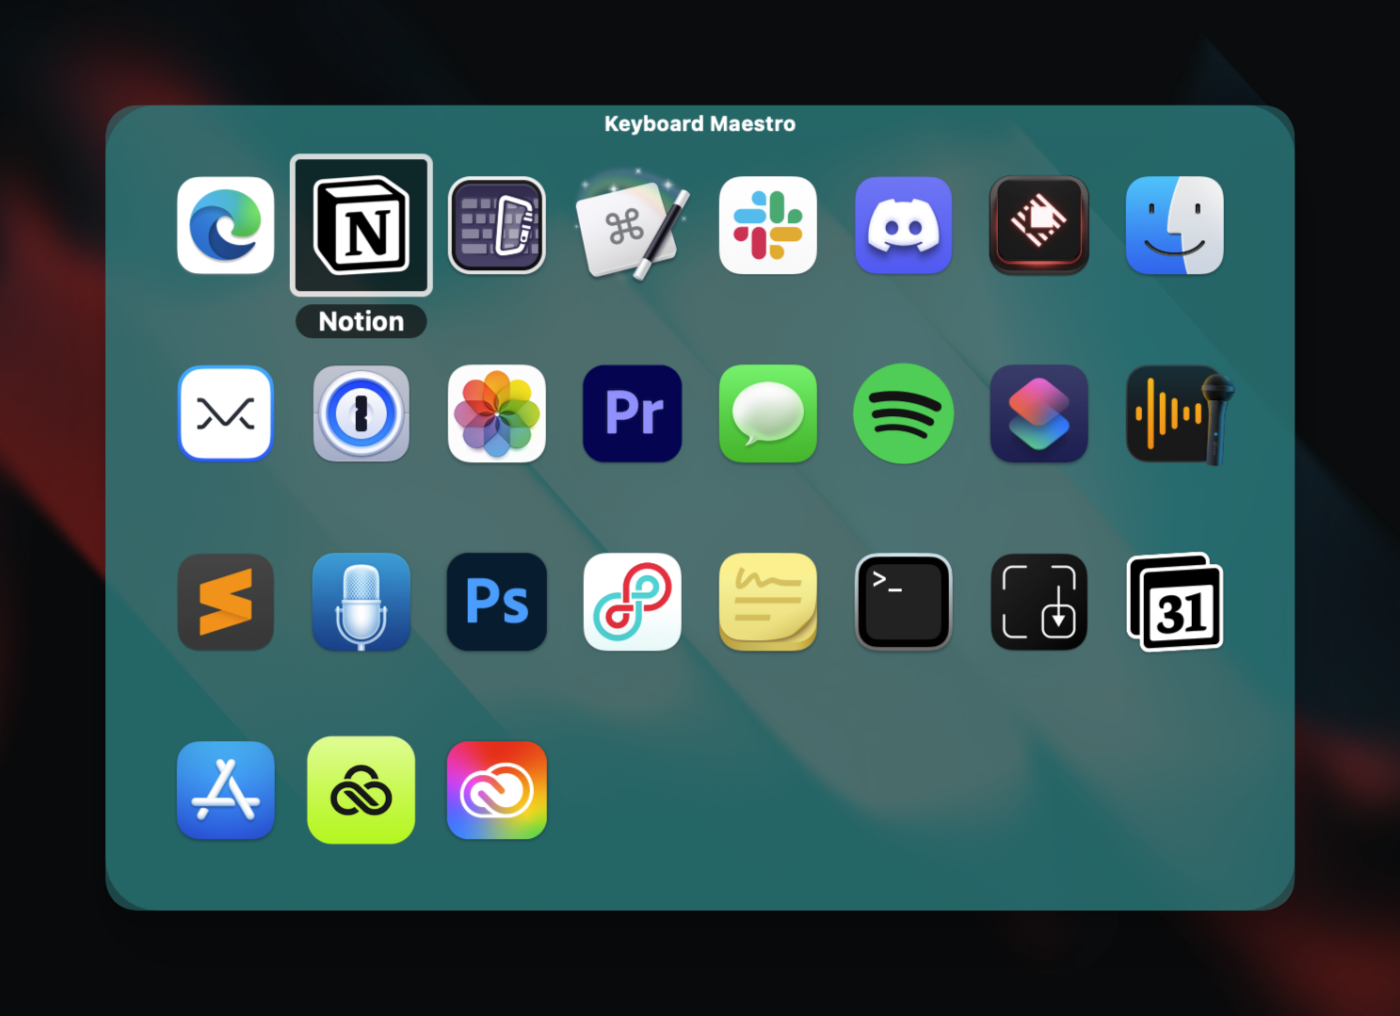
Keyboard Maestro is an incredibly powerful – and complex – automation tool for macOS. It allows you to create macros which you can trigger using keyboard shortcuts, scripts, or even via other macros.
These macros can do nearly anything, including:
- Copying and pasting to and from the clipboard
- Manipulating the contents of the clipboard
- Launching, controlling, or closing apps
- Controlling the actual OS (e.g. shutting down the system via a macro)
- Reading and writing to the file system
- Running custom scripts – including Shell scripts, AppleScript, JavaScript/Python scripts, etc.
Macros can also consist of several steps, and you can define custom variables to pass information from step to step.
Honestly, I feel like I haven’t even scratched the surface with Keyboard Maestro. If you really want to dig into the many, many macros you could build, check out the macro library in their community forum.
I’m finding myself using this tool more and more, though, and I’ll be regularly updating this post with new macros I create. It scratches the same itch for me that Notion does – instead of being rigid software with a set of defined functions, it gives me a robust set of tools and building blocks. I’ll note that Hammerspoon takes this idea even further, though using that tool involves writing actual Lua scripts.
Copy link to headingCleaning up Dictated Text with AI
My main use case for Keyboard Maestro right now triggering a massive, multi-step macro that can use OpenAI’s gpt-4o-mini model to clean up my dictated transcripts from MacWhisper. It can even inject links to other pages on my site, using a list of links I’ve included in the system instructions.
The macro is fairly complex, and it also uses Apple Shortcuts in addition to Keyboard Maestro (thanks to Thought Asylum for sharing the initial Shortcut I used as a base to build mine). I’ve made a full video explaining how it works below:
Copy link to headingBuilding My Own Text Expander
I’ve also started using Keyboard Maestro to paste URLs and other long text strings. I have two different sets of macros for doing this:
- A folder of string replacement macros – e.g.
kmbecomesKeyboard Maestro - A macro that brings up a list of common links and strings I can paste
The obvious question is: Why do this with Keyboard Maestro? There are countless tools that do this already – from TextExpander to Raycast’s built-in Snippets feature.
The answer is flexibility. I was using Raycast Snippets, in the past, but I just kept running into issues that made it less than ideal. Here are a few:
- You can’t instantly bring up a list of your snippets. You have to either memorize their replacement strings, or dig into the Snippets app to access them. There’s no keyboard shortcut you can bind to instantly access the list.
- Snippets is very unreliable for turning symbols like
>>into Unicode arrows, e.g.→ - You have to pay for Raycast Pro to sync snippets across devices
- You can’t apply transformations to your snippets
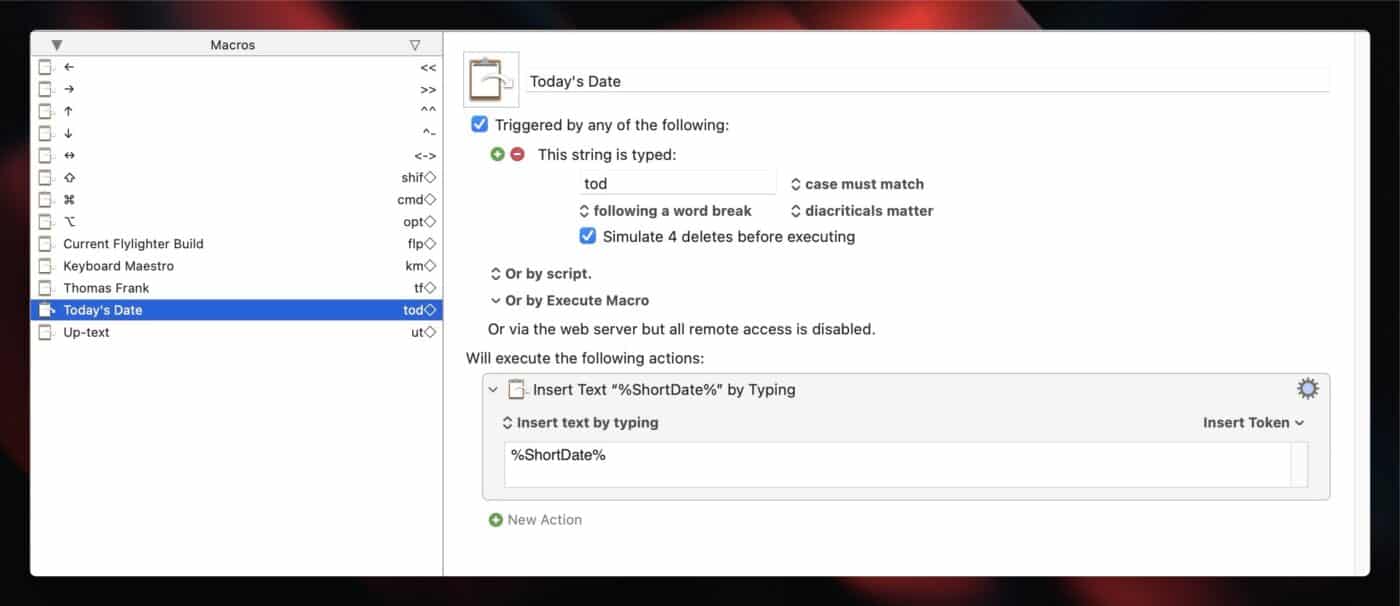
I’ve been able to solve all of these problems through Keyboard Maestro. First, I created a folder full of basic text-replacement macros:
Each of these is very simple. A short string, like km, triggers the macro. Keyboard Maestro simulates a number of Delete presses to delete that short string, then types or pastes a replacement string, such as Keyboard Maestro.
These macros are only useful for oft-typed strings that I’m unlikely to forget. For other replacements, I’ve created second set of macros that lets me bring up a menu of items to paste:
I developed this macro when I was editing a video, and realized that I was pasting the same URLs over and over again in many places – on-screen in the video itself, in the description, etc.
By hitting ^⌥⌘⇧+1, I can bring up a list of links, all of which are pulled from a simple Markdown file I have stored in iCloud. I can use the arrow keys to move through them, type to filer, etc – everything you’d also be able to do in Raycast.
But here’s the kicker: Once I select a link, I get a new menu listing out transformations I can make. Currently, I can do the following:
- Paste the link as-is
- Prepend
https://to the link - Paste the link in ALL CAPS
I’ll also note that my iCloud Markdown file, plus Keyboard Maestro’s own macro syncing feature, let me sync my snippets across devices for free.
I’ve paid this with another macro that makes adding new links extremely easy. I just copy the link to my clipboard, then hit ^⌥⌘⇧+3. A small prompt comes up for me to add a label, and then the link and its label are saved to my Markdown file in iCloud.
I’ll note that AnyBox seems to get close to this workflow, though it doesn’t do the text transformations – which are pretty crucial for me.
Here are my current versions of each macro:
Copy link to headingHyperkey
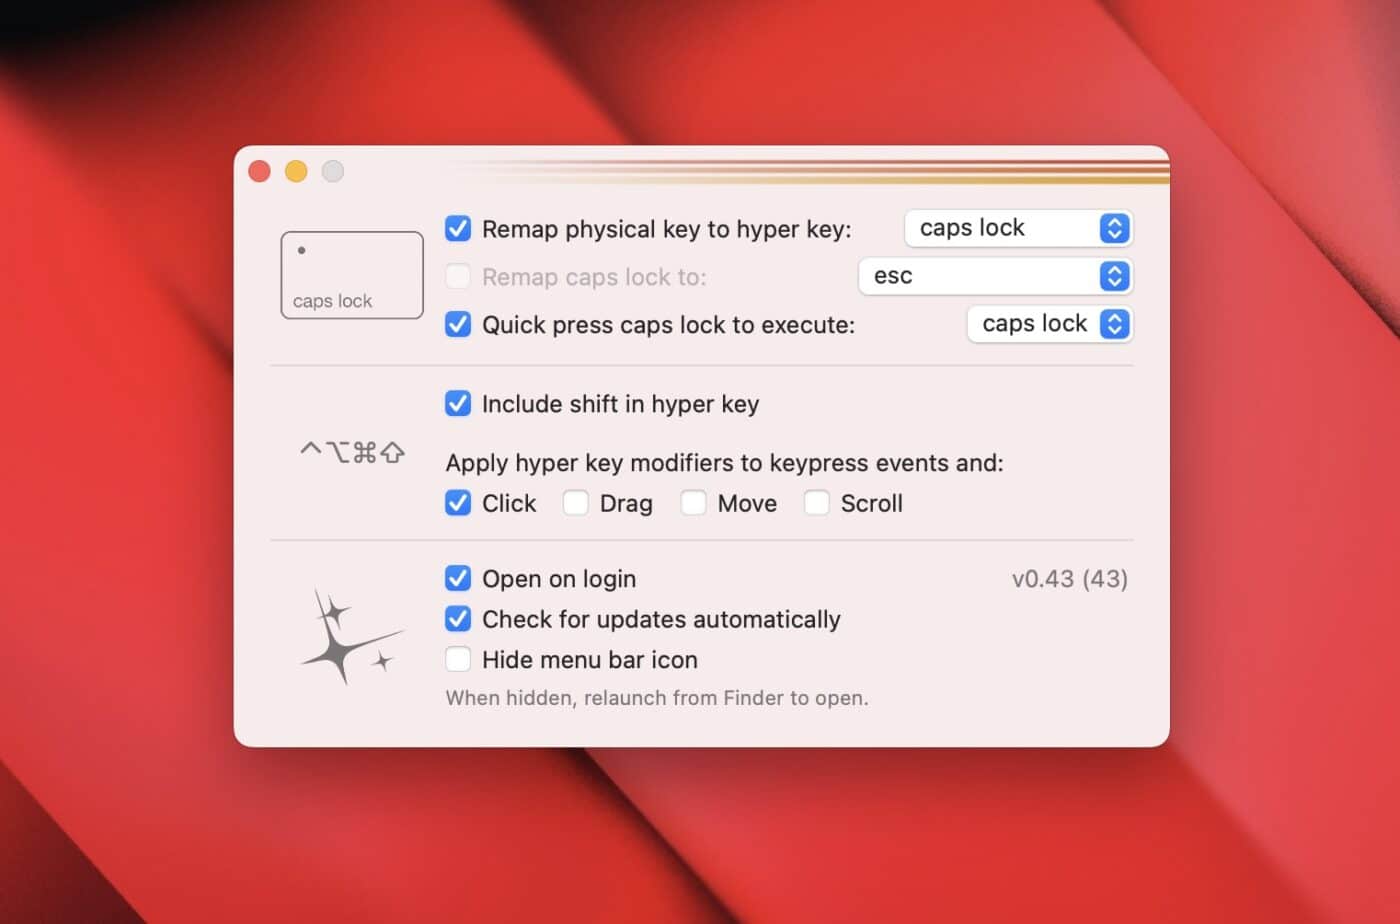
Hyperkey is a simple (and free) utility that lets you bind the “hyper” key combo ^⌥⌘⇧ to a single key, such as Caps Lock.
This key combo is awkward to execute manually, so hardly any apps use it. That makes it a perfect modifier key for custom Keybaord Maestro macros or Raycast shortcuts – especially on my Macbook, where I don’t have the Number Pad.
Hyperkey only works for hyper (^⌥⌘⇧) or for meh (⌃⌥⇧) – you have to choose. If you want to remap keys for both, you can replace Hyperkey with Karibiner Elements, as explained by Kevin Kipp:
I’ll probably do this soon, as I’ve started using Karabiner Elements for other purposes explained in that app’s section within this post.
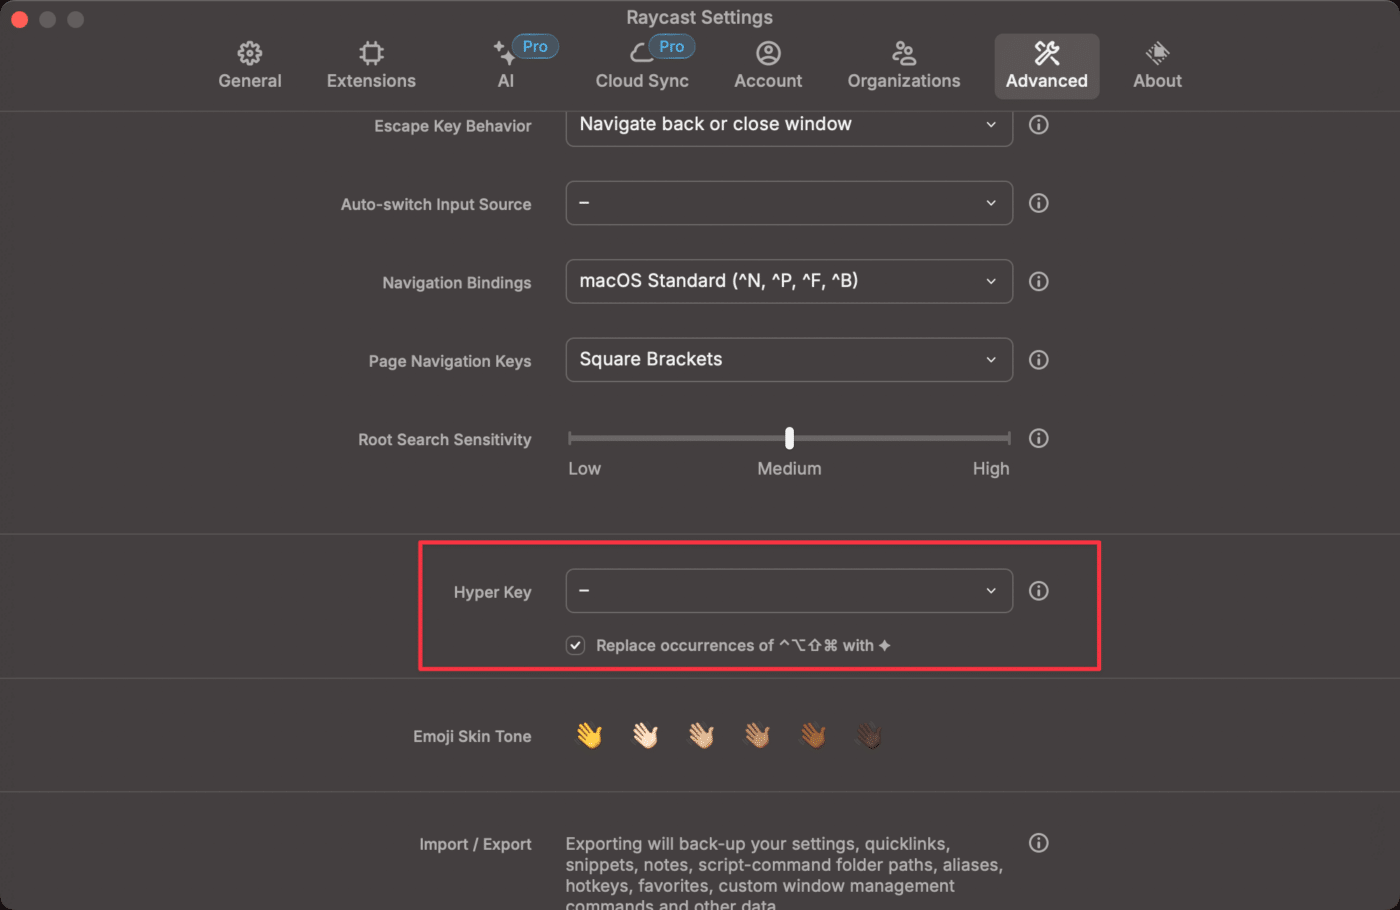
Raycast also now has a Hyper Key option that you can turn on. This didn’t exist when I first wrote this post. It’s fairly simple at the moment, only allowing you to execute hyper (^⌥⇧⌘), not meh (^⌥⌘).
If you want to go further down the rabbit hole, you could also use QMK to write your own custom keyboard firmware, which will let you do things like building Layers which map keys to different functions. I haven’t gone this far yet, but Eli, our lead developer on Flylighter, has built his own custom ortholinear split keyboard that uses this firmware. It’s somewhat like a ZSA Voyager, but built from scratch (a bit like this 3W6 project).
I am not yet on Eli’s level, but I aspire to get there.
Copy link to headingApple Shortcuts
Apple’s Shortcuts app is a powerful tool that can automate nearly anything, both on iOS and macOS.
I primarily use shortcuts on my phone, where I have shortcuts that can launch specific Notion pages directly from my home screen, as well as a shortcut that allows me to add tasks to Notion using my voice.
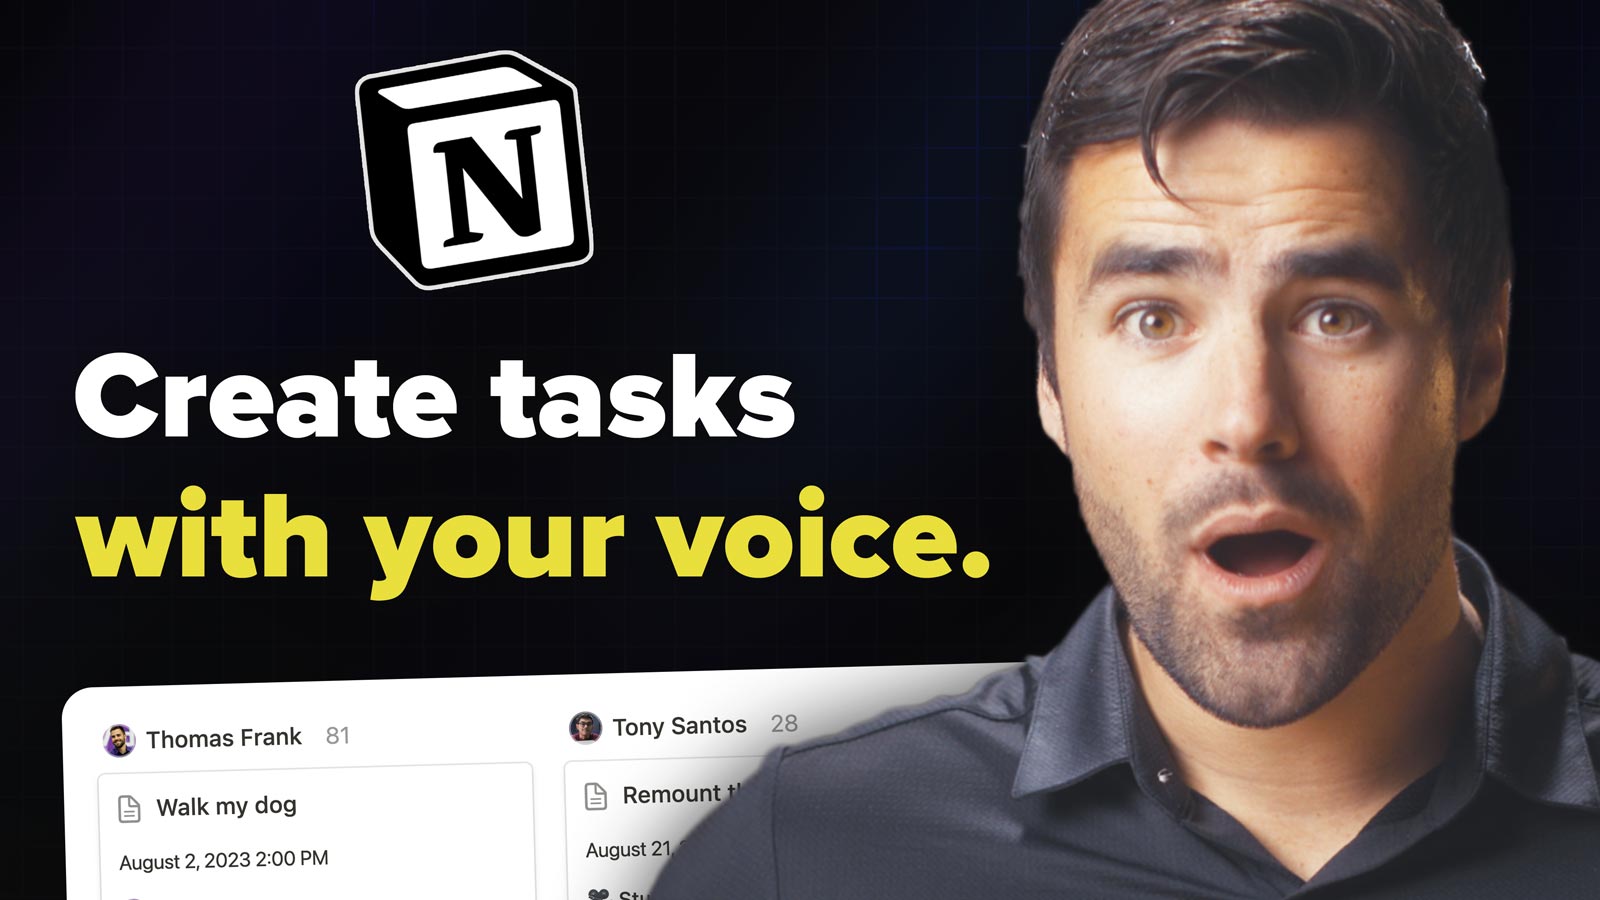
However, I also use this Notion Voice Tasks Shortcut on my Mac as well. While it is easy to open up Notion and create a new task, it’s even easier to launch the Shortcut from my Dock and brain-dump multiple tasks using my voice.
Additionally, I use Shortcuts in conjunction with Keyboard Maestro to run my AI text cleanup macro, which I detailed in the Keyboard Maestro section above.
Copy link to headingAudio Hijack & Loopback
I’ve been creating YouTube videos and podcasts for well over 10 years, and I’ve always been very persnickety about my audio quality.
In the past, I’ve always spent time in the post-production process adding effects like EQ, compression, and de-essing to the audio in my raw files. Recently, I’ve been working on optimizing that process by improving the quality of the audio as I record it.
On my streaming computer, this involved investing in a DBX286s channel strip, which is a hardware unit that can apply EQ, compression, and other effects directly to the signal coming from the microphone before it reaches my computer.
This thing rocks, and I won’t be mad at all if you choose to buy it using my affiliate link above. That said, it ran me $200, and it’s a pretty big unit.
So when I wanted to figure out how to improve the default audio quality on my work computer (separate from the computer I use for streaming), I decided to figure out if I had any other options besides buying another DBX 286s.
That’s how I discovered Audio Hijack and Loopback. Together, these two apps allow me to send the input audio from my microphone through an effect chain, then to route that audio to any app I want. The result is podcast-quality audio in every app I use, from Slack huddles and Zoom calls to Loom videos.
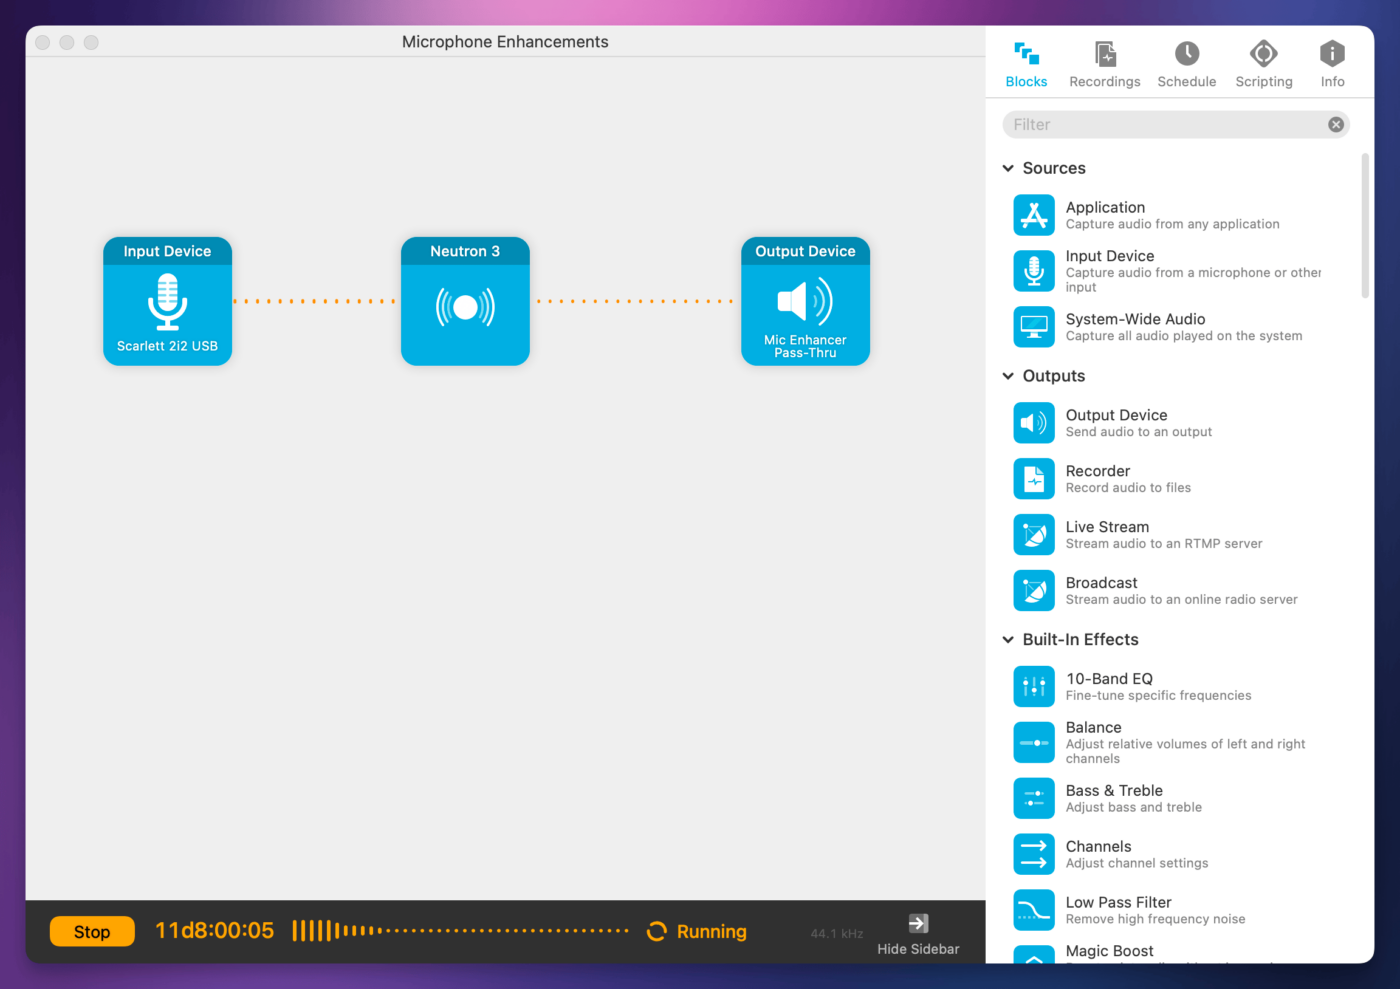
To set this up, I first created an Audio Hijack session that uses my Scarlett 2i2 USB interface as the input device.
If you’re curious, the mic I’m using is a Shure SM7B – though I don’t recommend it for most people. It’s a famous mic – Michael Jackson recorded Thriller on it – but if you’re just talking into it, it’s overkill. It costs way more than you need to spend, and it’s also extremely gain-hungry – which means you pretty much have to run it into a Cloudifter or some other form of preamp unless you have an especially beefy audio interface. If you want a mic of similar quality, get the Shure MV7+ (which works via USB or XLR), or the cheaper, XLR-only MV7x if you already have an audio interface.
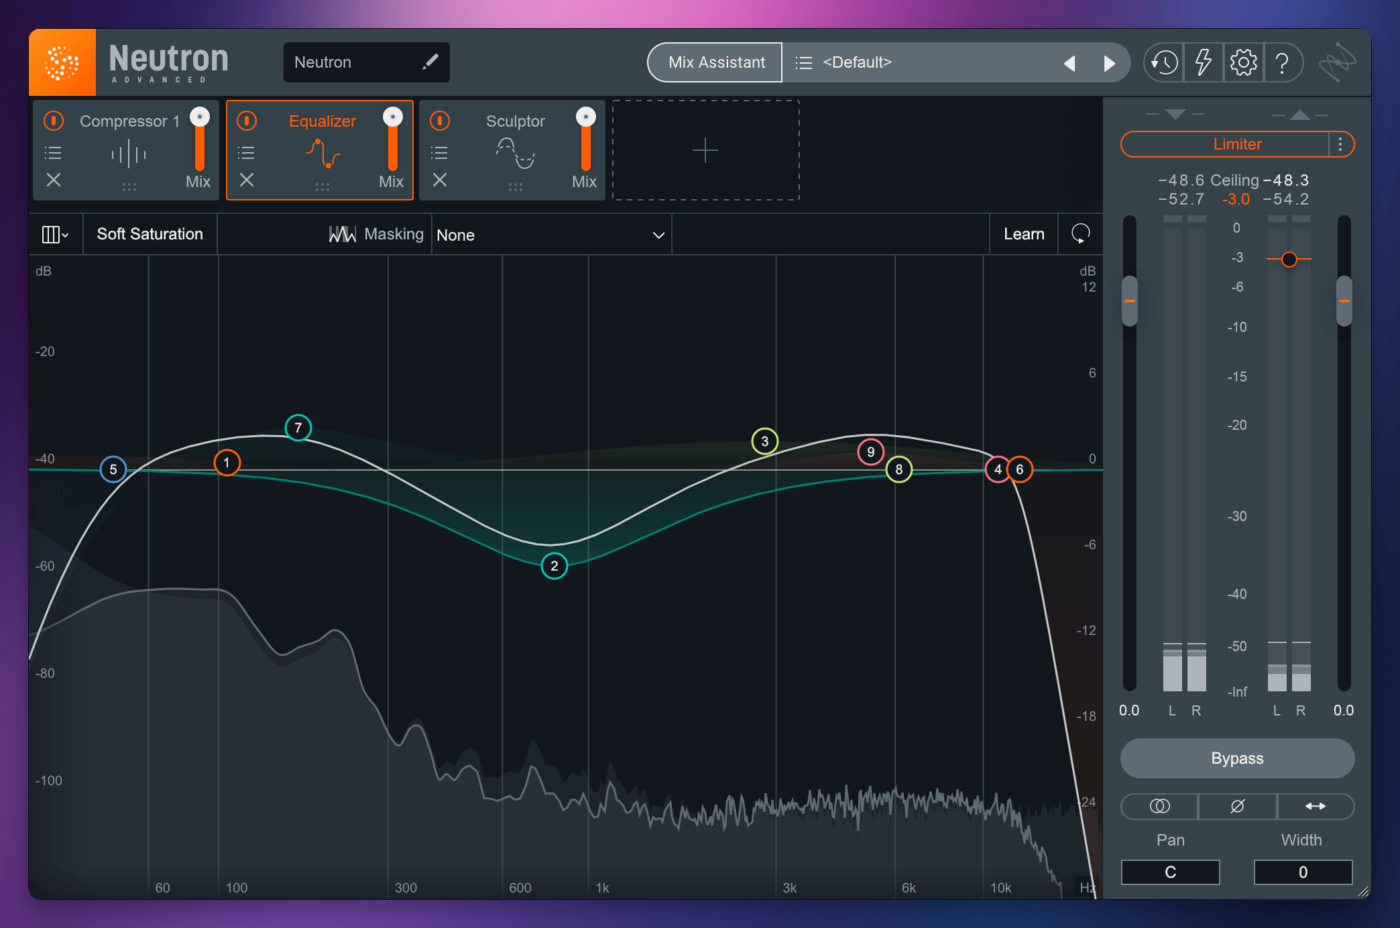
In Audio Hijack, I route the input from my audio interface into Neutron, which is an effects suite plugin made by Izotope. Like my microphone, this is absolute overkill. Neutron is meant for professional music production (I use it on my music), so using it just to boost the quality of my spoken-word audio is like hunting pheasant with an M1 Abrams tank.
In Neutron, I’ve built out a pretty simple effects rack:
- Compressor
- Equalizer
- Sculptor (set to the Dialogue setting)
- Limiter, limiting output to -3db
Audio Hijack actually comes with plugins that will let you do almost all of this without installing any VSTs. If you still want to use VSTs, you can find plenty of free ones that still rock, such as:
Whatever you choose, the principle is the same. Boost the signal a bit, use equalization and compression to shape the character of the audio, and limit the output so you don’t get any peaking.
The last thing I’ve done in Audio Hijack is set my session to run when Audio Hijack launches. I also have Audio Hijack launch at startup, which means the session is always running.
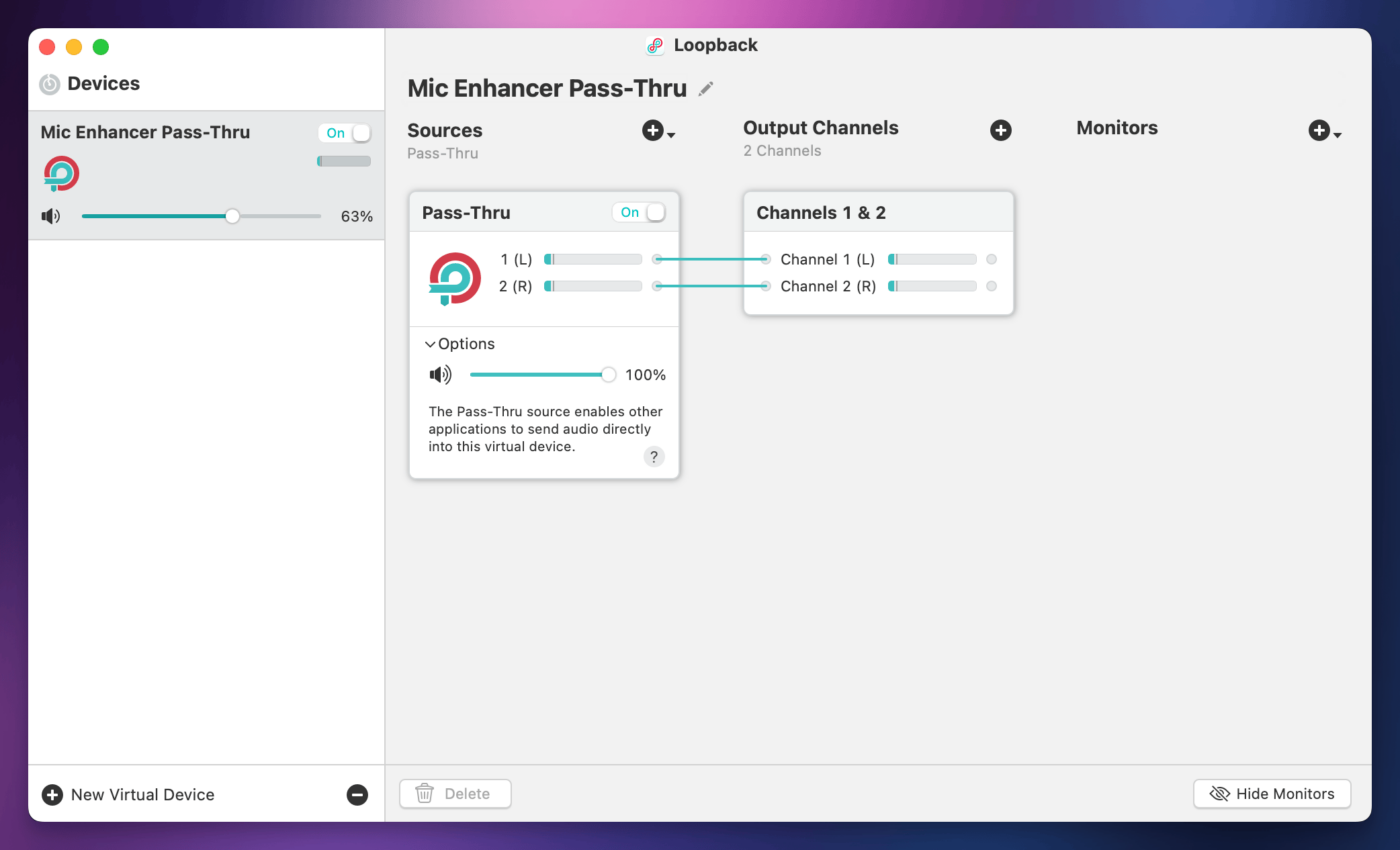
In Loopback, I’ve created a virtual device called Mic Enhancer Pass-Thru. I’ve routed this to my output channels and then set the Mic Enhancer Pass-Thru virtual device as the output in my Audio Hijack session.
The Mic Enhancer Pass-Thru virtual device shows up alongside all the other input devices I have connected to my computer, which means I can select it in any app as if it were a hardware input.
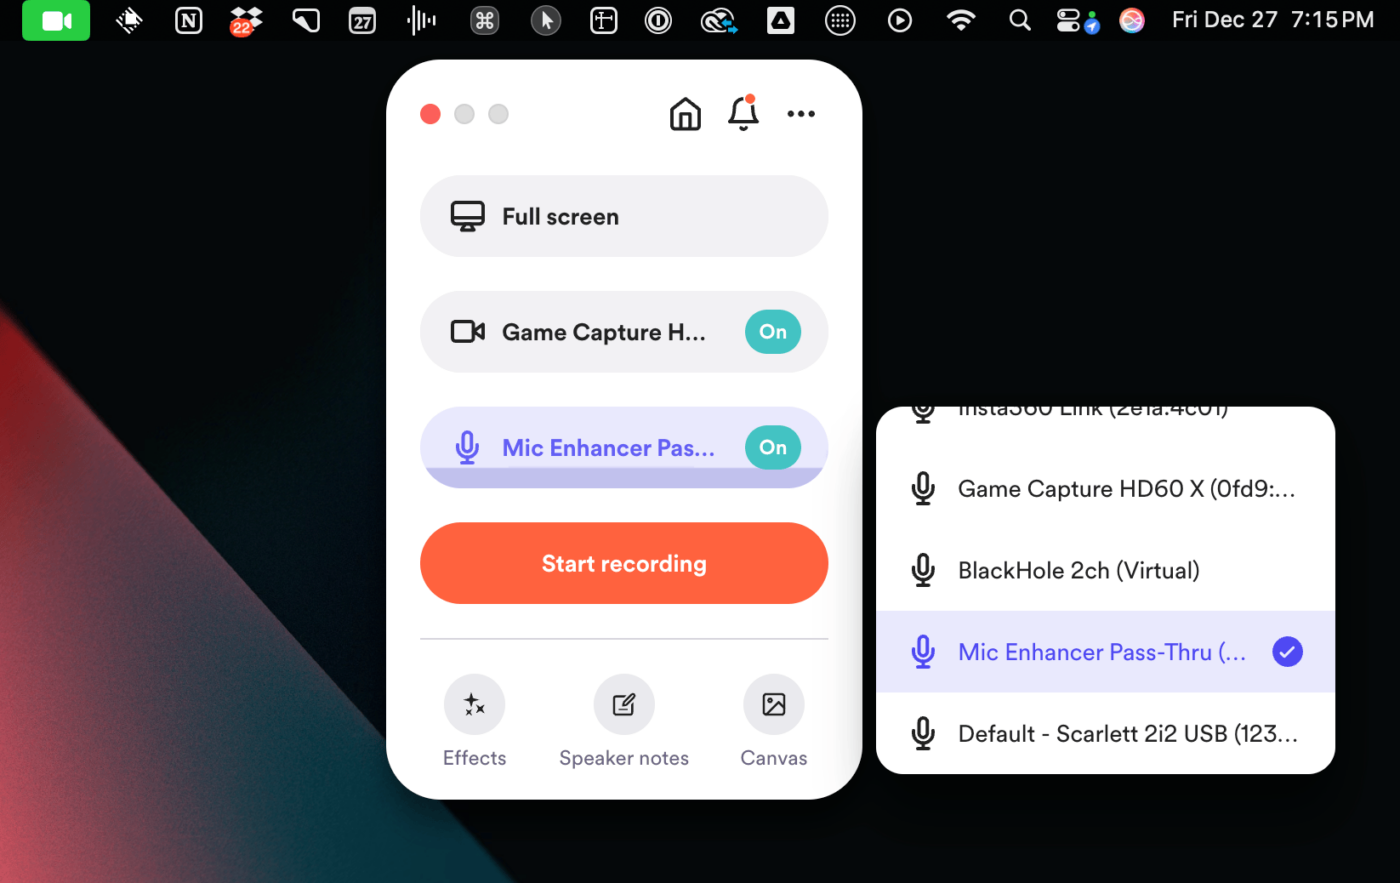
As a bonus, the fact that my audio is enhanced through Audio Hijack means that I can speak very quietly into my mic and still get near-perfect dictation with MacWhisper. I’ve gotten great results out of a barely-audible whisper.
In the near future, I’m planning on testing whether or not I can whisper into a portable headset (or even into my AirPods) in a public setting like a coffee shop.
Copy link to headingKarabiner Elements
Karabiner Elements is an app that remap keys on your keyboard to do other things.
I currently use an Aula f75 mechanical keyboard, which has a 75% layout (no number pad), and unfortunately lacks Right ⌘ and Right ⌥ keys. I didn’t realize this when I bought the keyboard, but I love the sound and feel of it so much that I’m hesitant to swap it for something else.
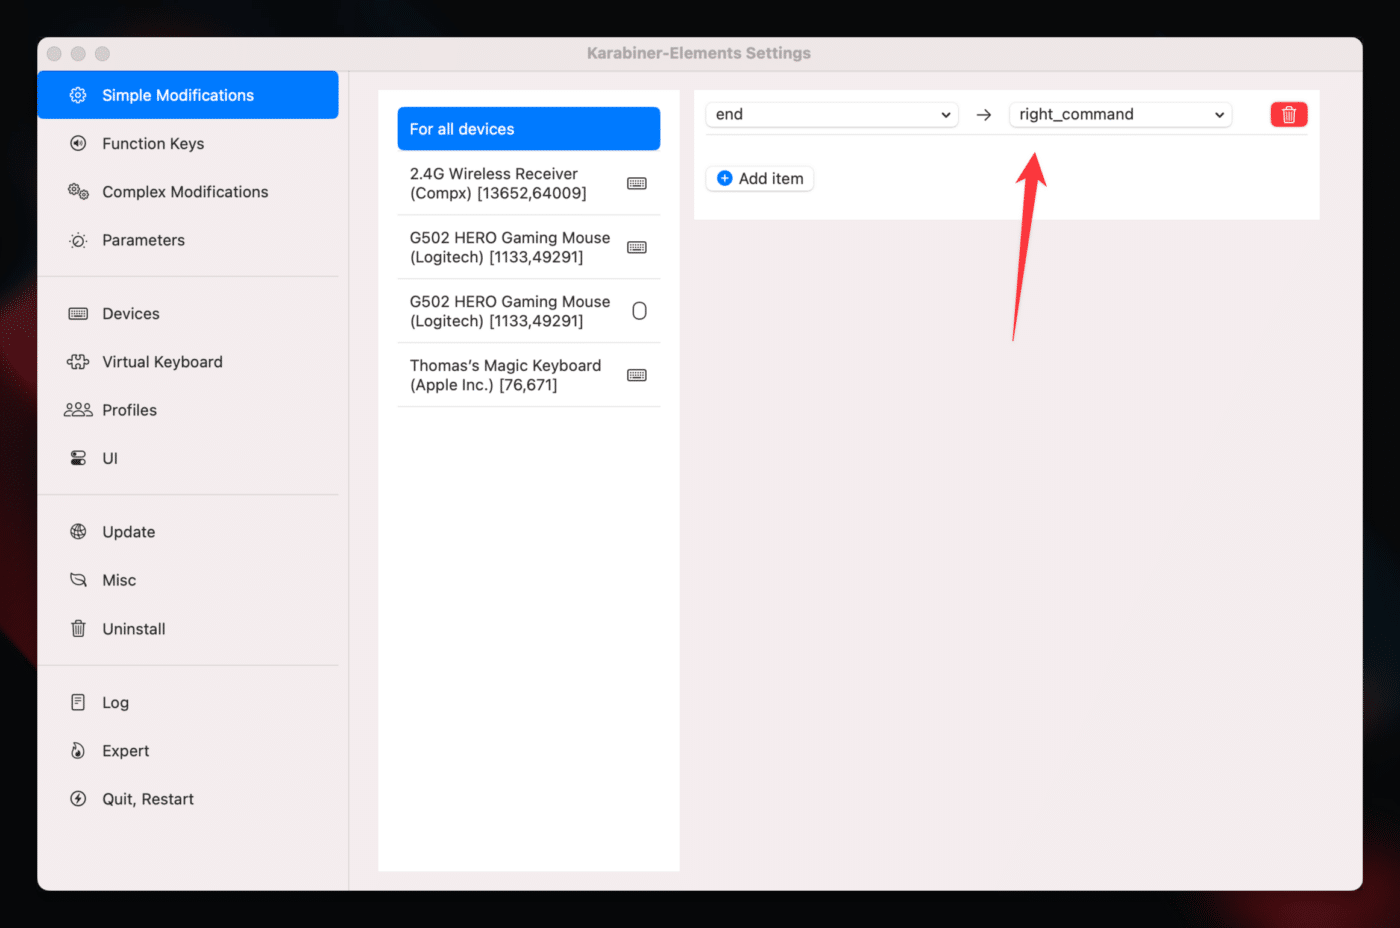
Since I’ve long used my Right ⌘ key to trigger dictation through MacWhisper, I remapped the End key on the Aula f75 to Right ⌘. The End key is practically useless in macOS anyway, since you can use ⌘ + → to skip to the end of a line .
I also bound one of the thumb buttons on my Logitech G502 mouse Right ⌘ as well, which means I can trigger dictation from the mouse!
Finally, I bound another of the mouse buttons to ⌘ + Numpad 3, which is one of my LLM Cleanup activation shortcuts in Keyboard Maestro. This requires creating a Complex Modification, which uses JSON to define rules. Here’s the JSON I’m using:
{
    "description": "Bind Mouse Button 5 to ⌘ + NumPad 1",
    "manipulators": [
        {
            "from": { "pointing_button": "button5" },
            "to": [
                {
                    "key_code": "keypad_1",
                    "modifiers": ["left_command"]
                }
            ],
            "type": "basic"
        }
    ]
}Code language: JSON / JSON with Comments (json)AltTab
AltTab simply recreates the Alt + Tab functionality from Windows in macOS. I freaking love it!
Yes, you can use ^ + ↑ to show all open windows natively, but I’ve always found that to be extremely chaotic, and I could never quickly find what I was looking for. This is much better.
Plus, you can define multiple shortcuts. I have mine set up so that Alt + Tab lets me switch between all open programs, while Alt + ` switches between windows of the currently active program – e.g. between multiple Notion windows.
Copy link to headingLoom
I make a lot of screen recordings. Not only are the majority of my YouTube videos screen-recorded Notion tutorials these days, but I also create tons and tons of screen recordings to provide support to people who have bought my premium Notion templates (like Ultimate Brain).
For the latter use case, Loom is my secret weapon. Instead of shooting, editing, manually uploading, and sharing a video, Loom lets me simply start recording my screen. Once I’m done, the video is automatically uploaded to my Loom account, and the URL is on my clipboard.
Loom also automatically generates a transcript and adds subtitles to the video. It is the fastest way to create a video, especially when I need to share something I’m doing on my computer screen.
I don’t use Loom for everything; if I’m creating a really short video that I want to paste into Slack or into a blog post, I typically use CleanShot X instead. But for longer, tutorial-style videos where I want to show a face-cam and include narration, Loom is my go-to tool.
Copy link to headingCleanshot X
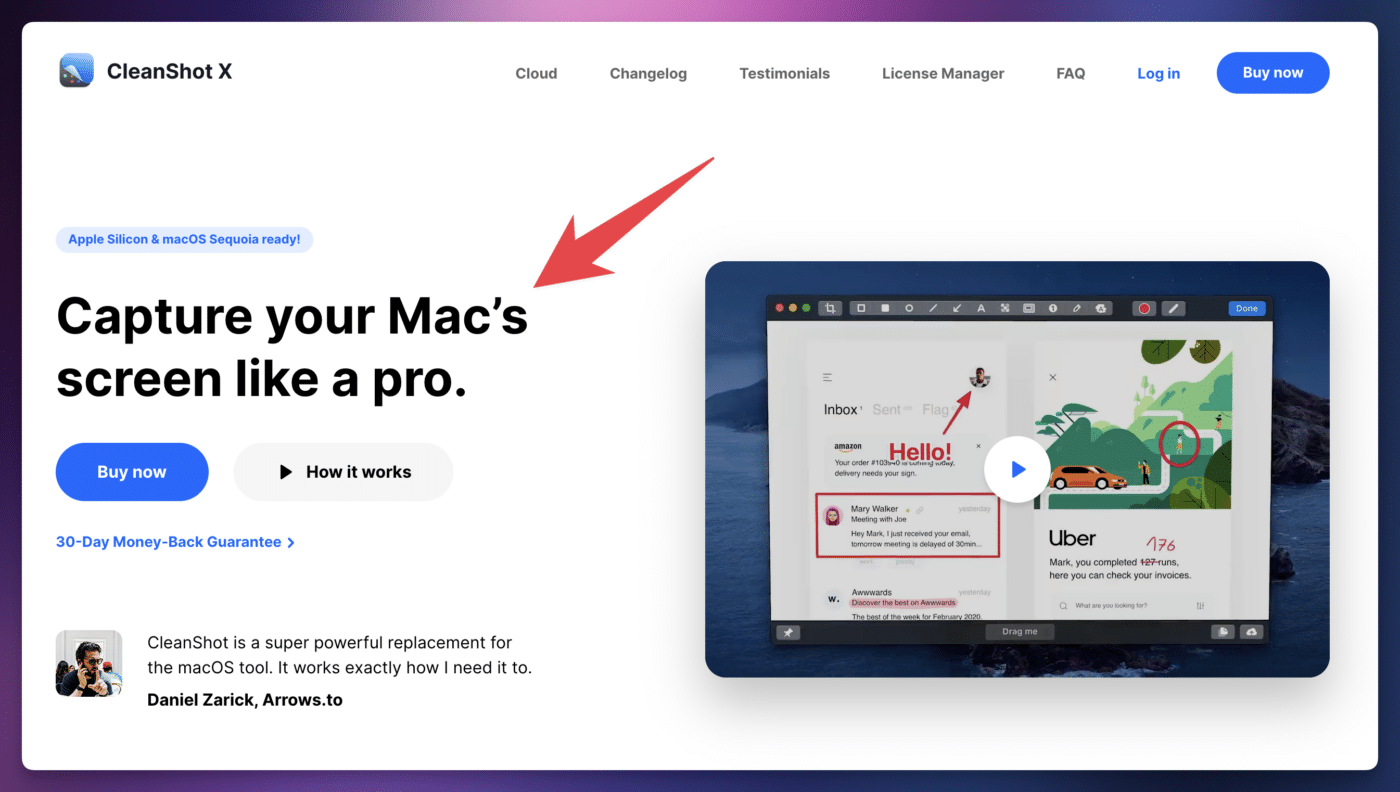
Cleanshot X is the best screenshot tool, period. I feel bad that Windows users can’t use it (they should use ShareX instead).
I take a lot of screenshots every single day. I’m often sharing screenshots in Slack, in responses to support tickets in our customer community, and of course in blog posts like this one.
Cleanshot lets me take those screenshots very quickly, and it also has tools for making quick annotations. I know this is going to sound extremely picky, but Cleanshot has the best arrows in the game – and to me, that matters.
I can also quickly add borders to my screenshots, which makes them prettier and makes me happier.
Most importantly, Cleanshot can automatically copy screenshots to my clipboard. It can also record videos, and it’ll copy those to the clipboard as well.
Combined with Clop (detailed below), Cleanshot gives me an extremely quick workflow for creating high-quality, low-file-size screenshots and videos that I can paste anywhere. I’ve set my copy up with several hotkeys to perform different actions:
- ⌘+⇧+1 – Draw a rectangle to take a screenshot and copy it to the clipboard
- ⌘+⇧+2 – Draw a rectangle to take a screenshot and open the annotation tools
- ⌘+⇧+3 – Make a screen recording
- ⌘+⇧+4 – Take a screenshot of a specific app window and open the annotation tools
- ⌘+⇧+5 – Launch scrolling capture (scroll inside a drawn rectangle to create a long screenshot – handy for web pages)
Clop
Clop is a handy little utility that can automatically optimize the file sizes of images and screen recordings that I make with CleanShot.
I use the heck out of this tool as I’m always trying to make sure my site’s pages load as quickly as possible – and minimizing image and video file sizes goes a long way towards that purpose. Additionally, certain apps like Slack have a file attachment size limit. Automatically reducing the file size of screen recordings I make allows me to paste longer files (I don’t like using Loom for videos I share in Slack, as you can’t make a Loom video full-screen while still seeing the current threat).
I’ve used other file compression tools in the past, but what makes me love Clop is the fact that it can automatically optimize images and videos the moment I save them – or even add them to my clipboard.
This creates an extremely efficient workflow for creating and sharing screenshots:
- Take the screenshot with Cleanshot.
- Add annotations if needed.
- Copy the screenshot to the clipboard with Cleanshot.
- Clop automatically compresses the screenshot, placing the optimized version on the clipboard.
- Paste the screenshot anywhere.


