One of the most useful tools that you can combine with Ultimate Brain is a web clipper.
Once you have a Web Clipper installed in your browser, you’ll be able to capture all sorts of useful information to Ultimate Brain, including:
- Websites you don’t want to forget
- Full articles and blog posts
- Highlights
- Recipes
- LinkedIn and social media profile data
In this guide, I’ll show you how to get set up with a web clipper – and how to get the most out of it.
There are several web clippers available for Notion, but the one I recommend using is Flylighter.
It’s far more powerful than the official Notion web clipper, and it’s also free. Additionally, my team and I built it, so it’s designed from the ground up to work perfectly with Ultimate Brain!
Copy link to headingUsing Flylighter
My team and I designed Flylighter to be the ultimate quick-capture tool for Notion. It’s a free browser extension that will let you:
- Capture web pages and articles to any Notion database or page
- Append data to existing pages
- Capture full articles
- Capture highlights on any web page
- Add information to nearly any Notion database property – Text, Number, Select, Status, Relation, etc.
- Create unlimited “flows” – forms that capture page content and property values to a specific database or page
- Take notes on YouTube videos with clickable timestamps
- Auto-fill property
- Use instant capture and custom keyboard shortcuts to capture anything at the speed of thought
Flylighter is the quick capture tool I’ve always wanted. I’m obsessed with creating tools that help me capture anything I come across to my second brain as quickly as possible (like my voice notes capture workflow). I started building Flylighter with my co-founder Eli because my ideal web clipper didn’t exist yet.
In the future, we also have plans for Flylighter mobile apps, Raycast integration, support for other destinations (like Obsidian and Zapier), and much more. Some of these features will be part of our future paid plans; all the features listed above will stay free. Join our Discord if you’d like to help shape our roadmap and share your feedback.
Here’s how to set up Flylighter and start using with Ultimate Brain. Note that you can find more tutorials at our official Flylighter docs.
Copy link to headingInstalling Flylighter
Flylighter is currently available for Chrome and Chromium-based browsers. This includes:
- Google Chrome
- Microsoft Edge
- Arc
- Brave
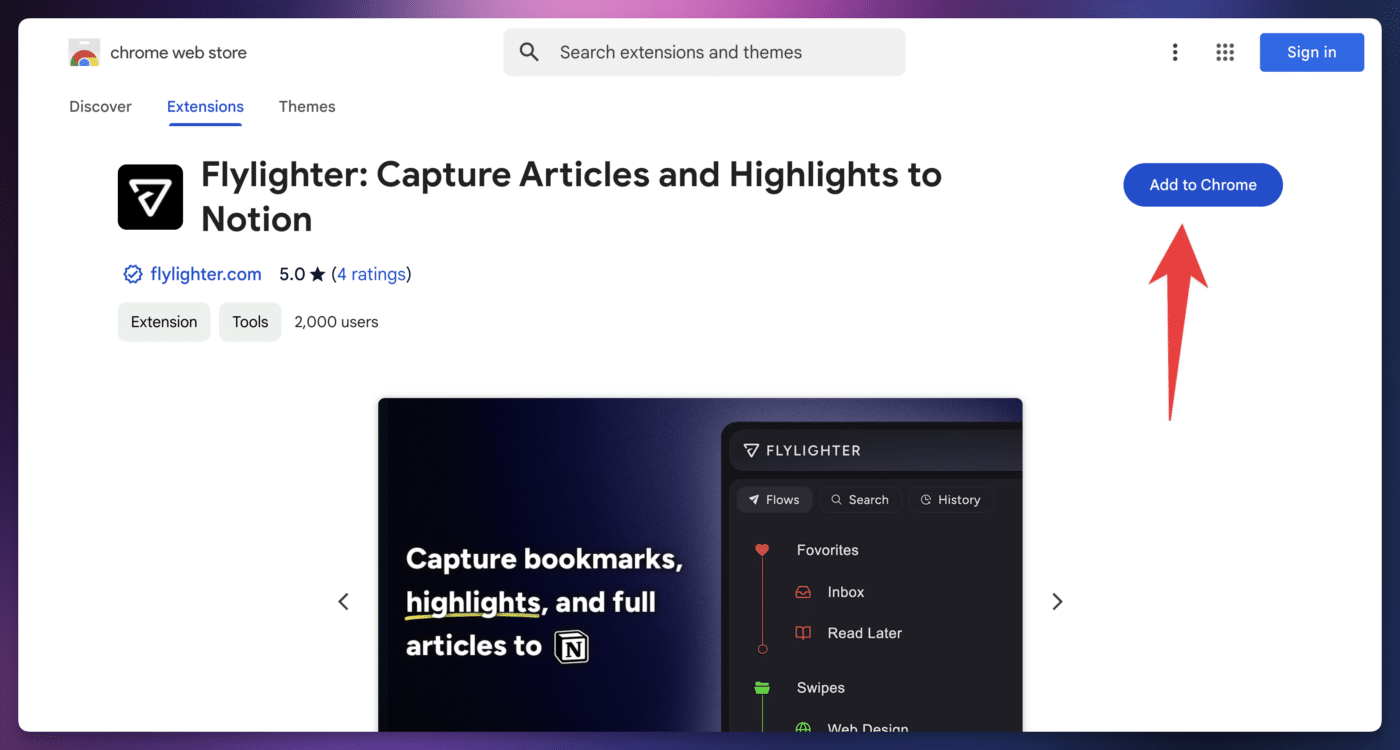
Install Flylighter from the Chrome Web Store to add it to your browser.
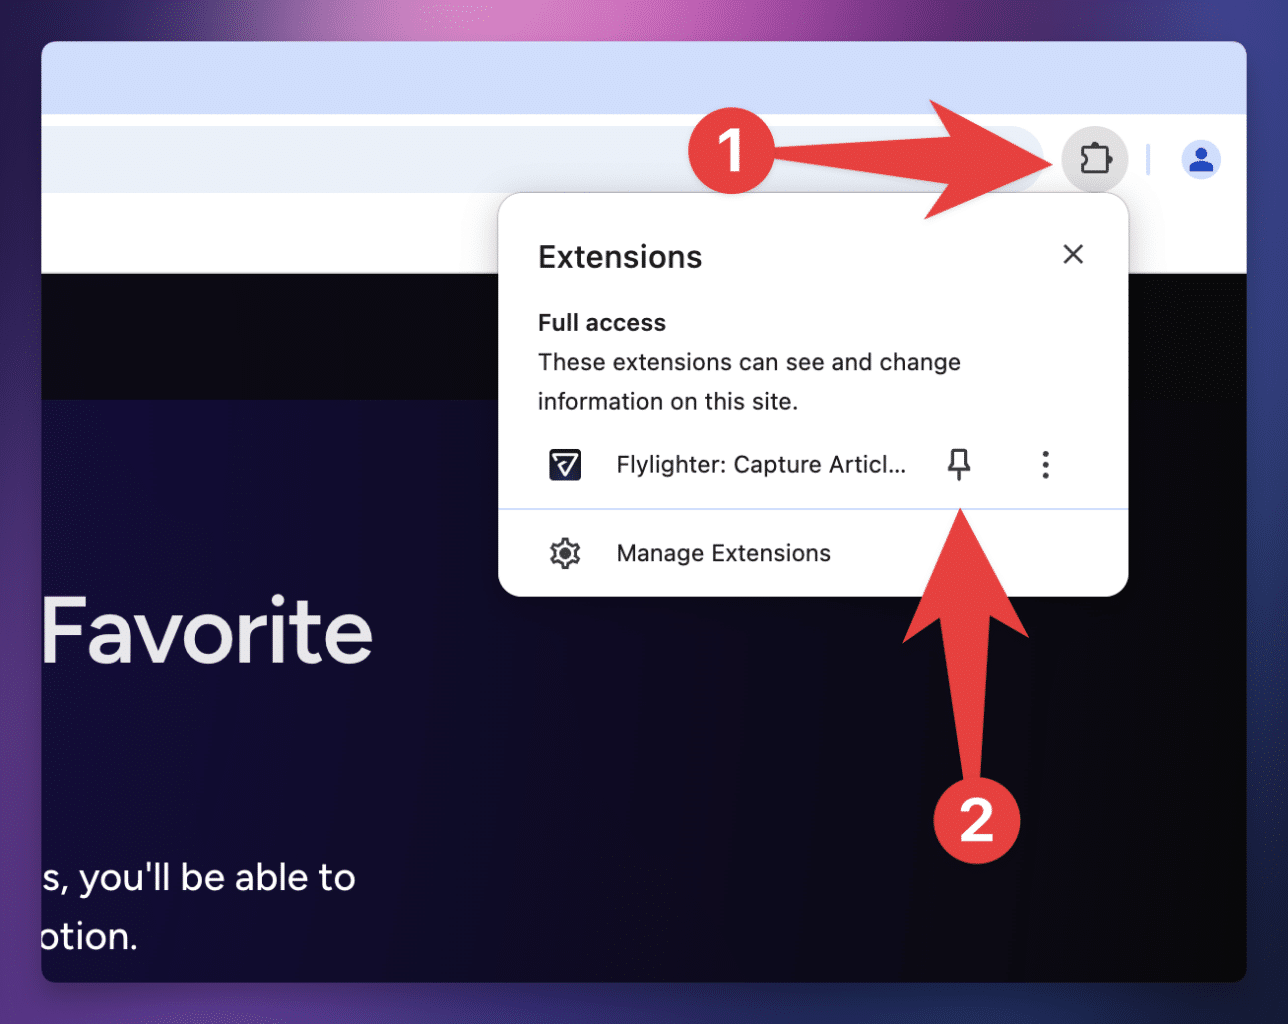
Next, I recommend pinning the extension to your browser’s toolbar so it’s easier to access.
Depending on the browser you’re using, this may look a little bit different than what is shown in the screenshot below. For example, extensions are shown in the left-hand sidebar in Arc.
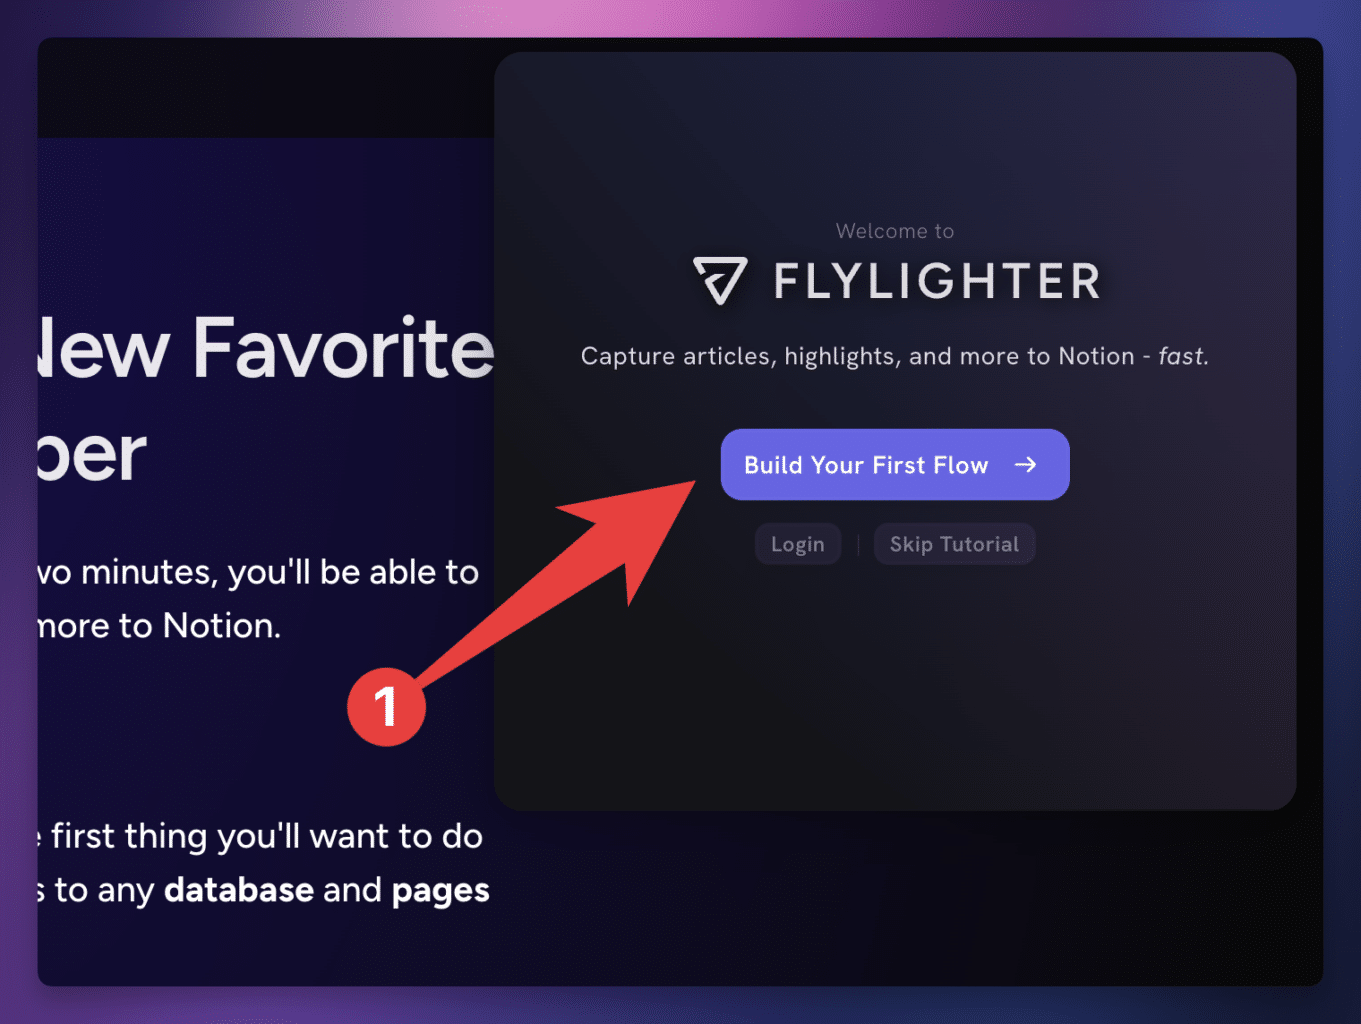
Open Flylighter and click Build Your First Flow. This will take you through Flylighter’s guided tutorial, which will help you create a Read Later flow that you can use to capture anything you’d like to save to Notoin for later.
Alternatively, you can click Skip Tutorial if you’d just like to connect Notion and start building flows right away.
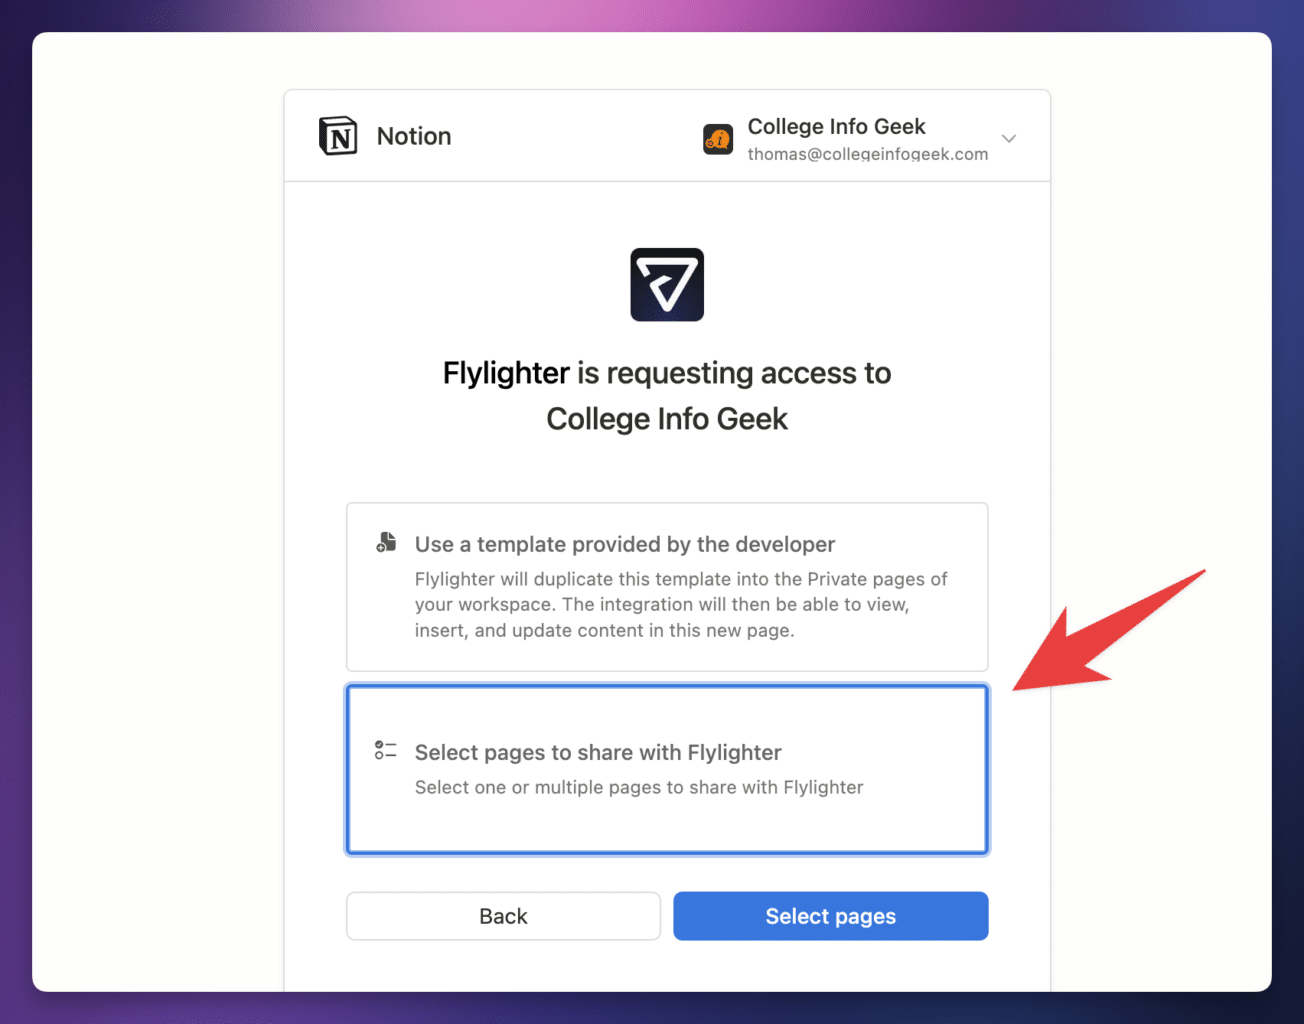
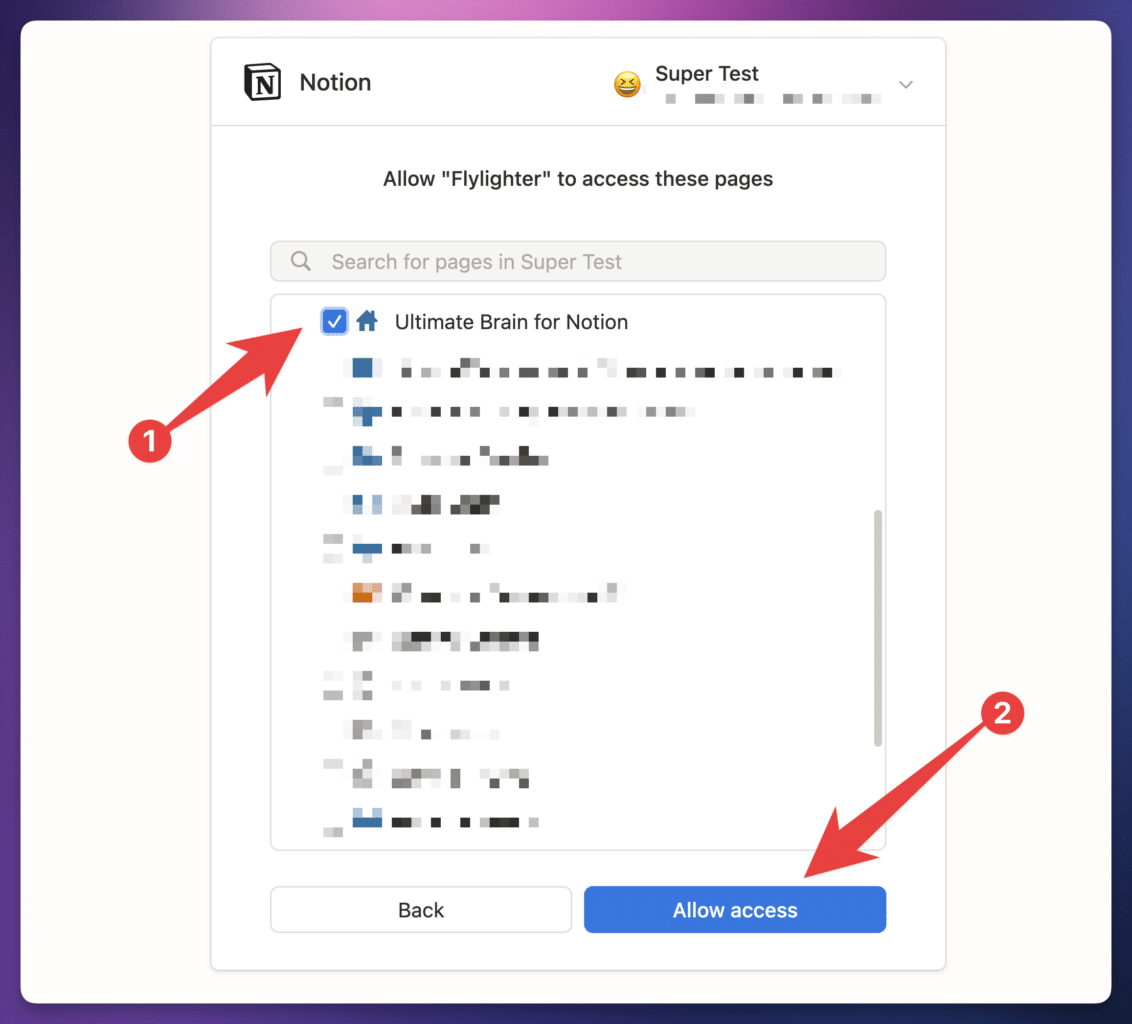
Click Connect Notion and you’ll be taken to the standard Notion authentication popup, where you can give Flylighter access to specific pages in your workspace.
Since you’re likely trying to use Flylighter with Ultimate Brain, choose the Select pages to share with Flylighter option instead of the Use a Template Provided by the Developer option.
I recommend granting Flylighter access to your entire Ultimate Brain page. This will also give it access to all sub-pages, including all of the databases that run the template.
Alternatively, you can grant permission only to the specific database where you want to capture your web clips. However, keep in mind that you’ll also need to provide permission to any databases connected to that target database via Relation properties. If you don’t, the Notion API won’t tell Flylighter that those relation properties even exist.
For example, if you want to set tags from your Tags database on web clips captured to your Notes database, Flylighter needs access to the Tags database as well. This is why granting access to the full Ultimate Brain page is the best overall solution in most cases.
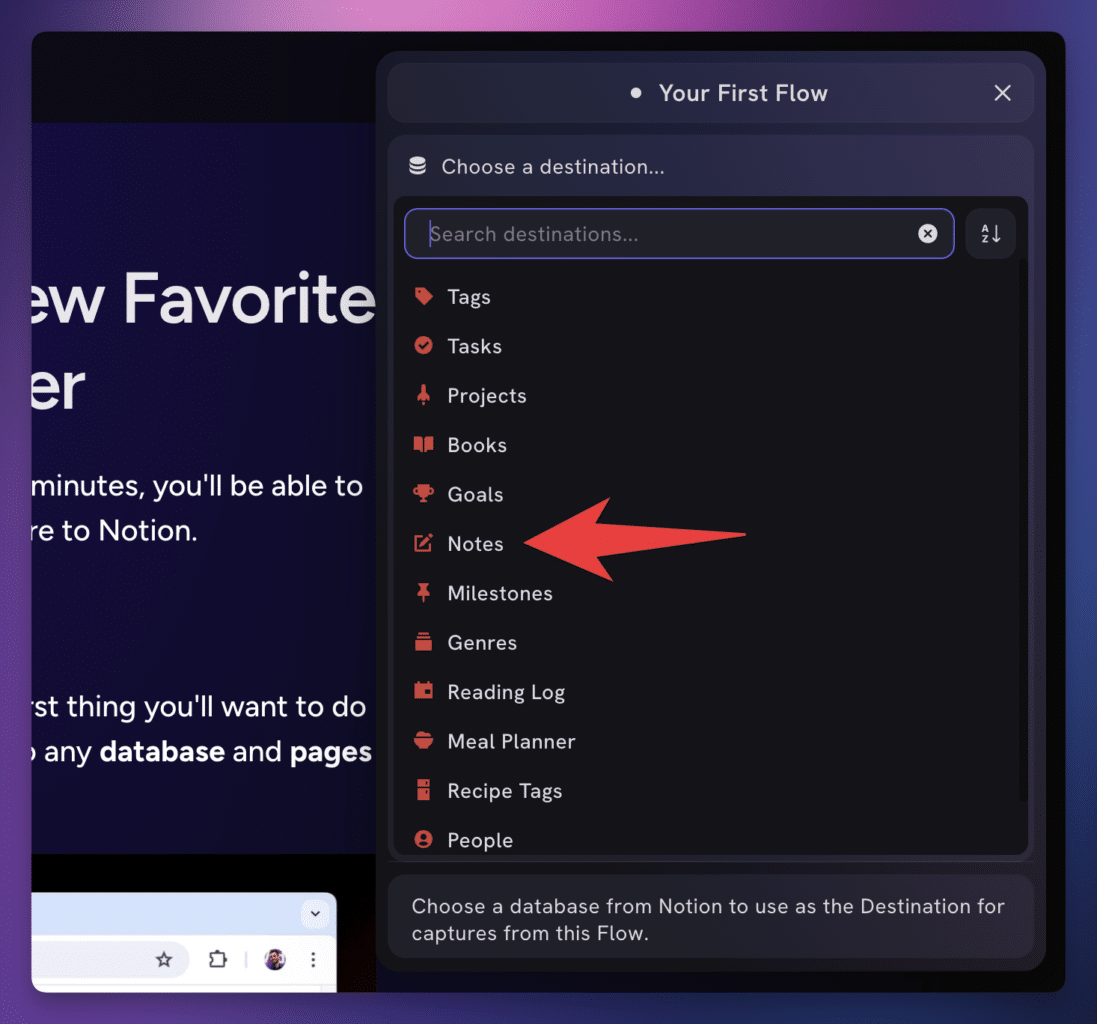
Back in Flylighter, choose your Notes database as your destination.
You could also choose any other database you wanted – just keep in mind that whichever database you choose here will be the database where new pages are created every time you run this flow.
Note: The Notion API can sometimes be slow to grant permission to all of your databases. If you don’t see the database you’re looking for after a few seconds, try refreshing the page and opening Flylighter again.
From this point, the tutorial will show you how to set property values, and also will teach you about autofilling properties whenver you run the flow.
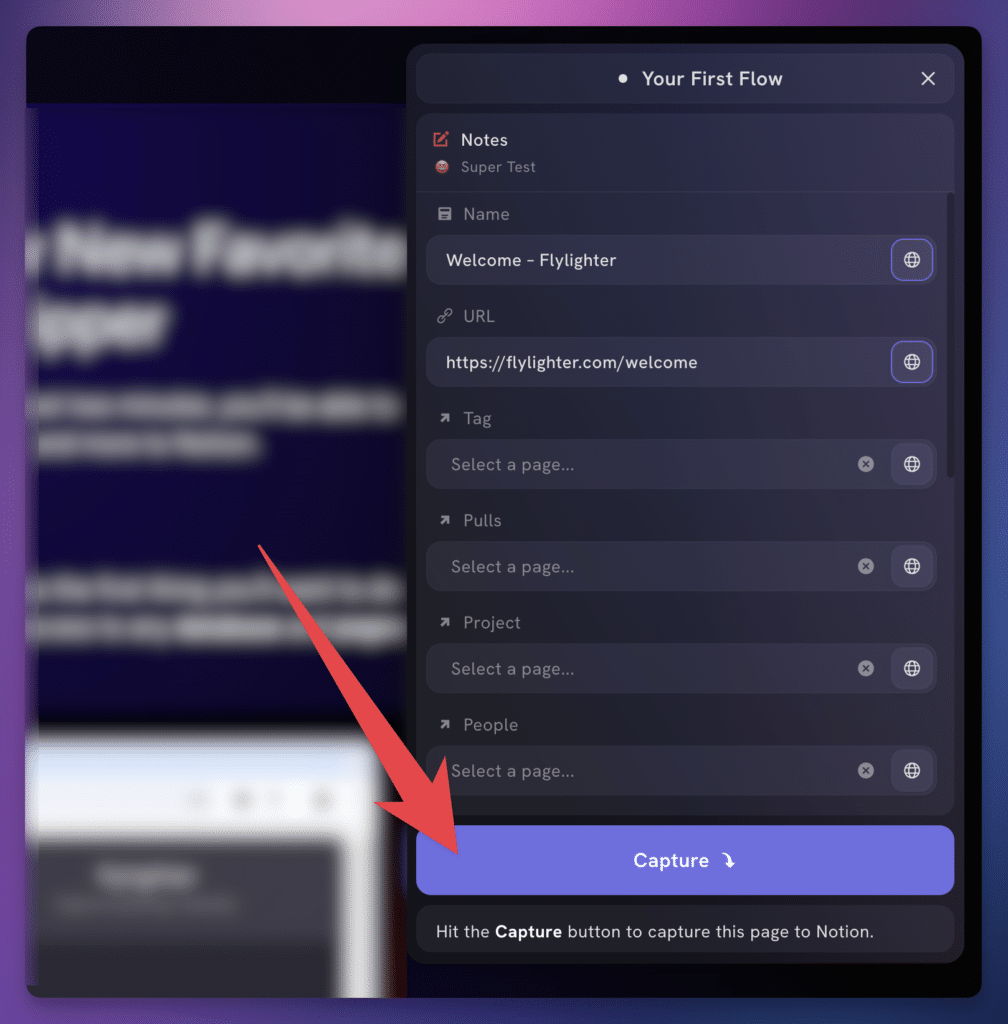
Once you’ve chosen the page URL for your URL property, click Next. For now, I don’t recommend auto-filling values for any of the other properties. Keep in mind that you can always set them on a one-time basis when you’re capturing a specific page using this flow (e.g. setting a Tag when capturing a blog post).
Next, you’ll see a Capture button which will allow you to capture the current page to your chosen database.
You’ve just made your first capture!
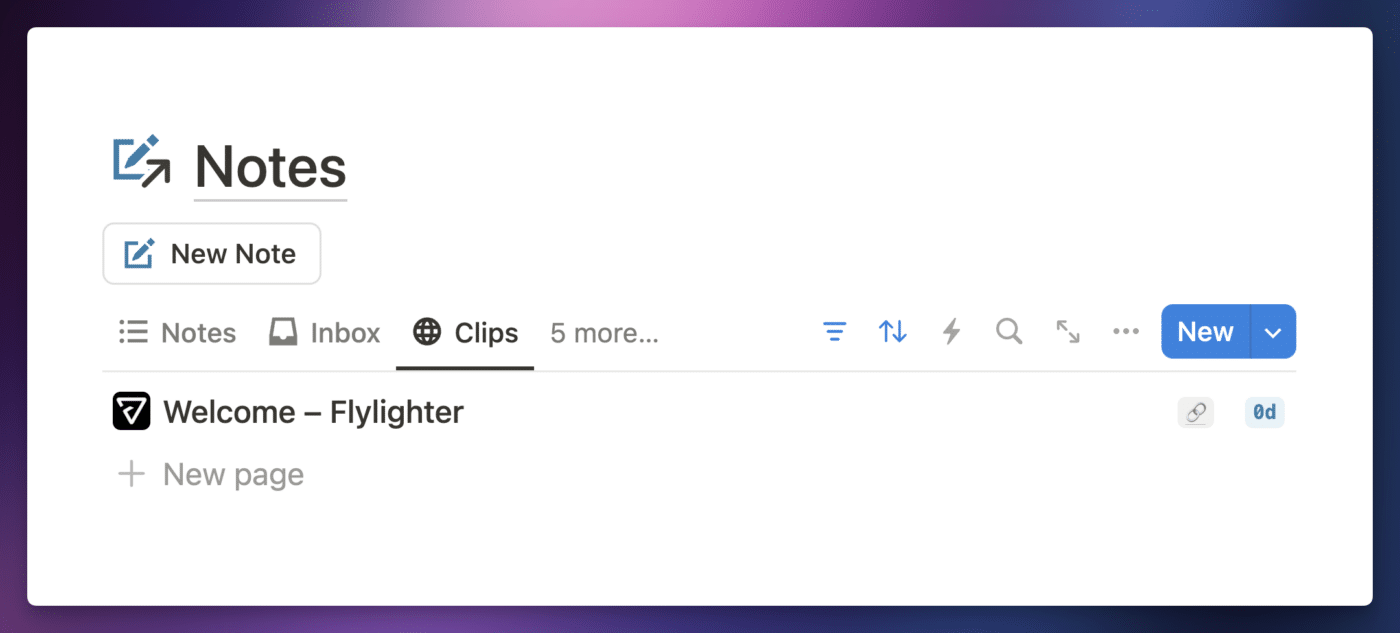
Now, anytime you run this flow, you’ll see your captured page in the Clips section of your Notes section. You’ll also see it in your Inbox tab, unless you choose to apply a Tag or Project during the capture process.
Copy link to headingCapturing Full Articles
Next, let’s create a flow that will capture full article text to a Notion page in your Notes database.
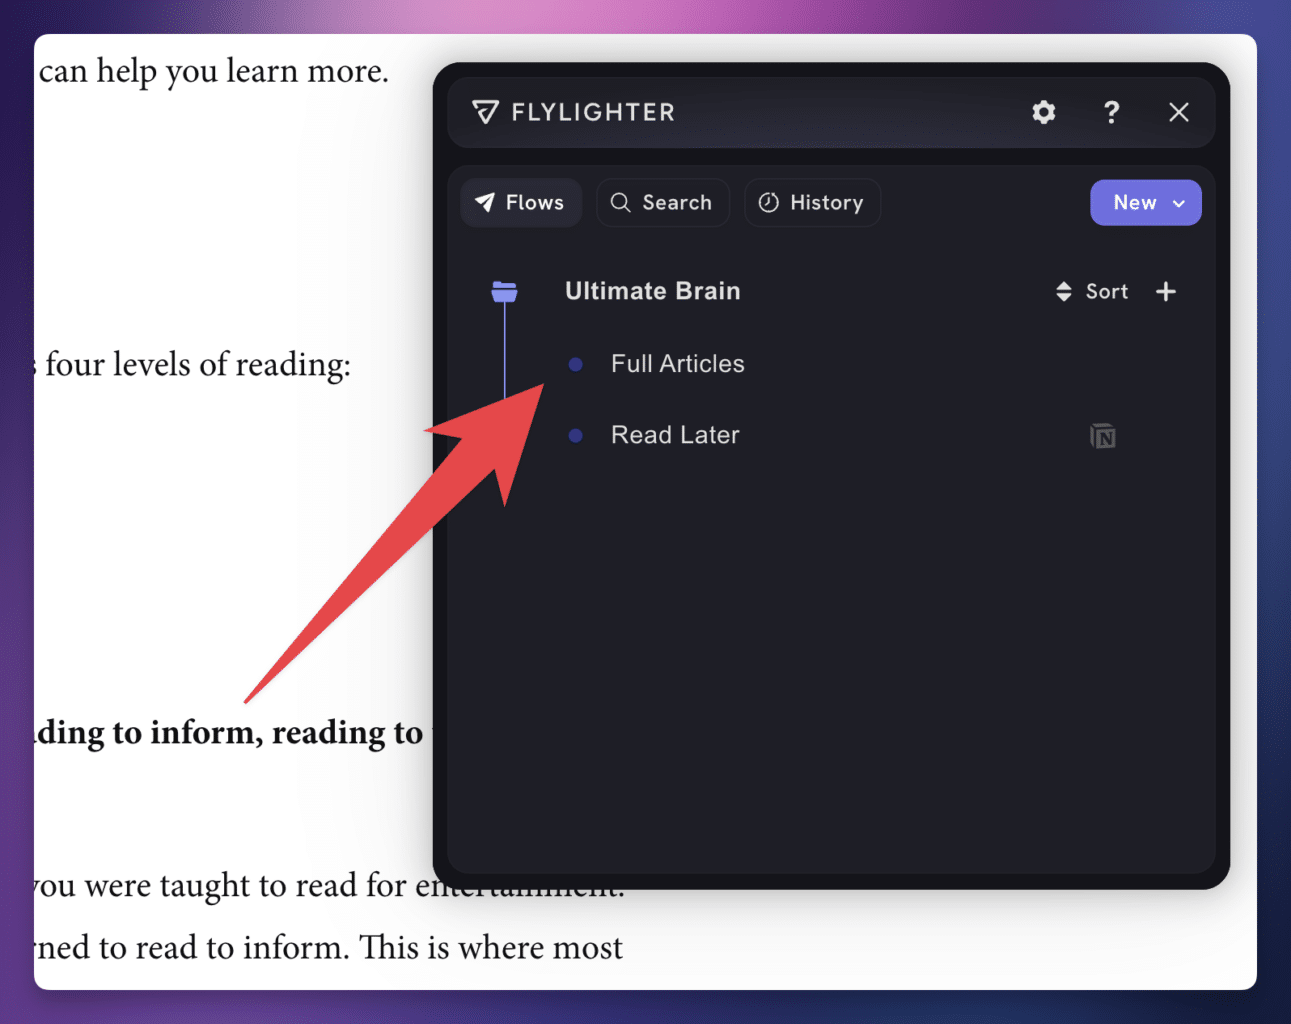
In the main flow list, create a new flow and name it Full Articles.
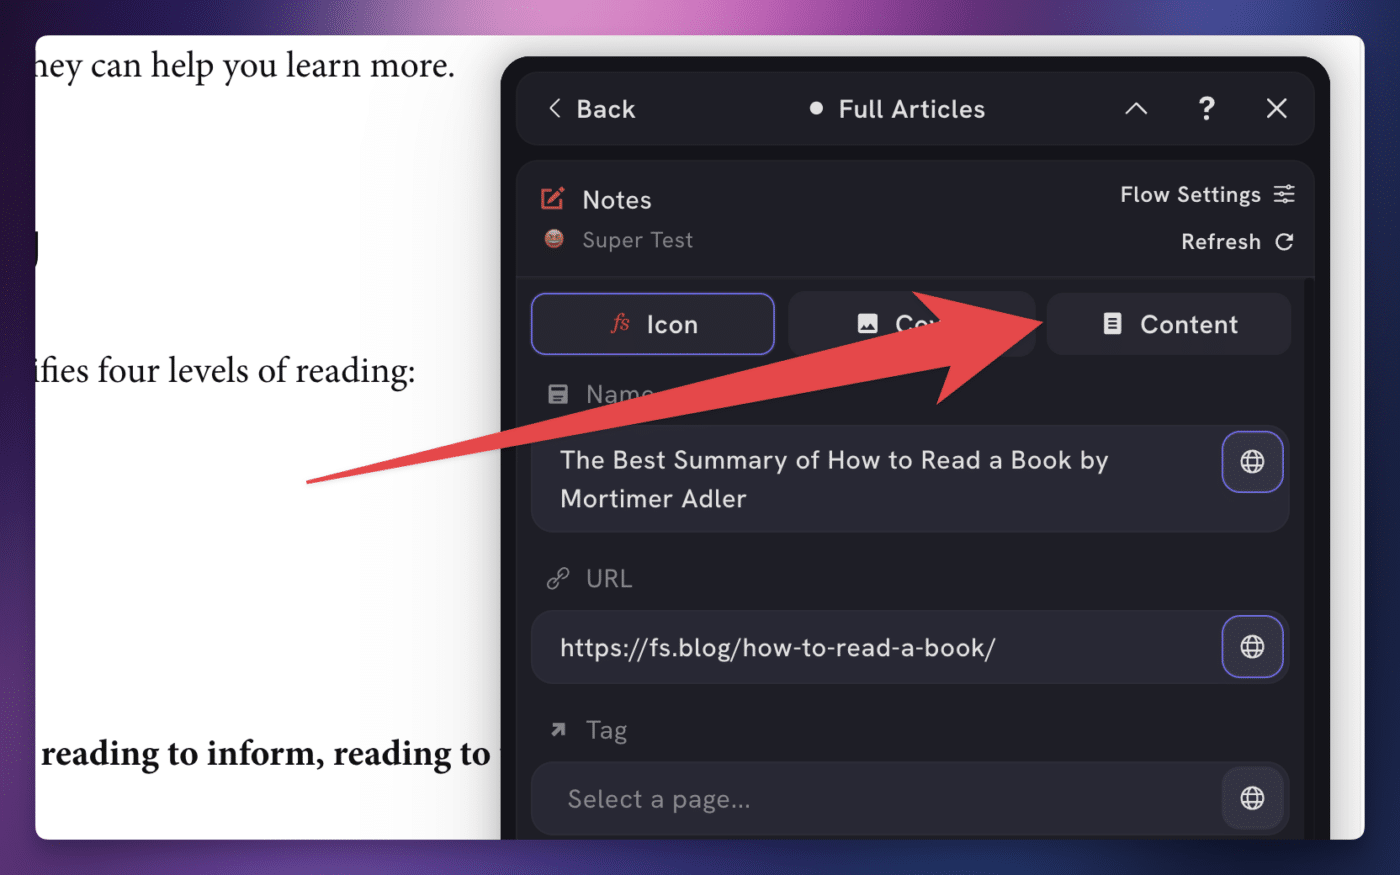
Select your Notes database as the destination once again, and set any of the properties as needed.
Next, head into into the Content section of the flow editor.
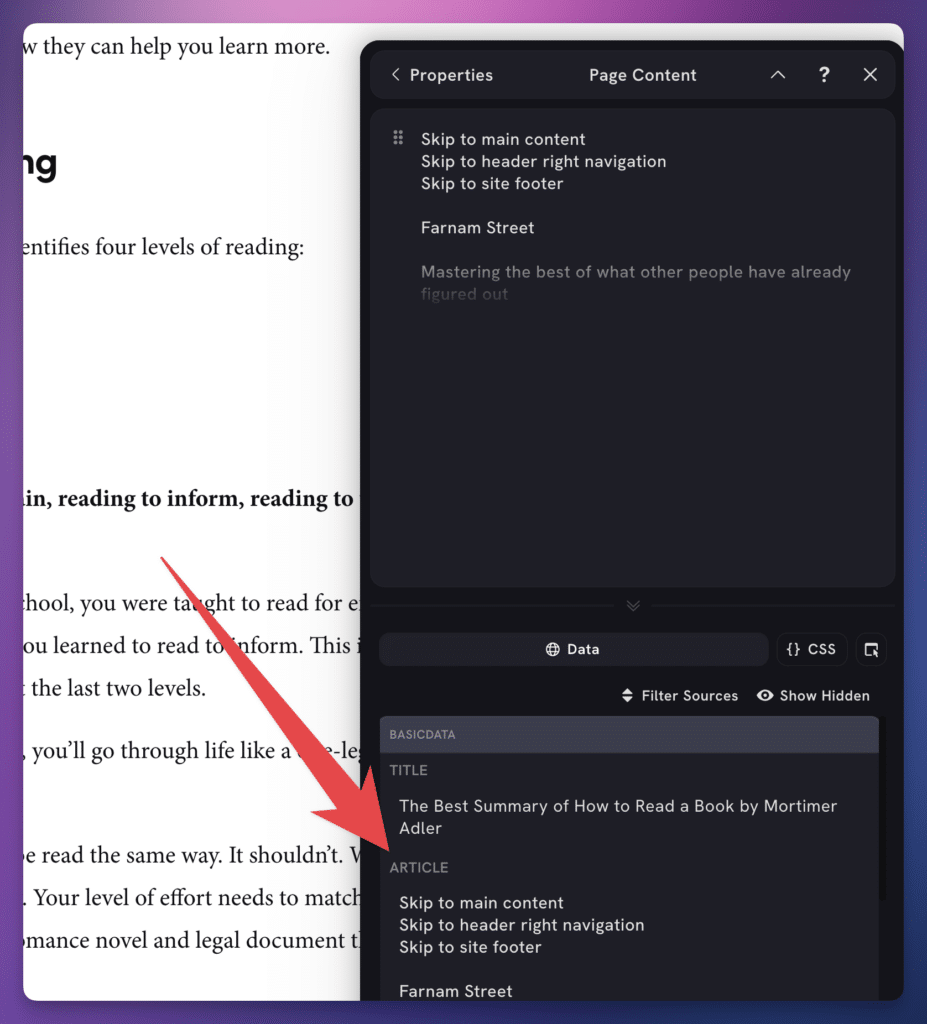
In the Data Picker beneath the Content Editor, you’ll find an Article data chip.
Click it to add the entire article to the Content Editor.
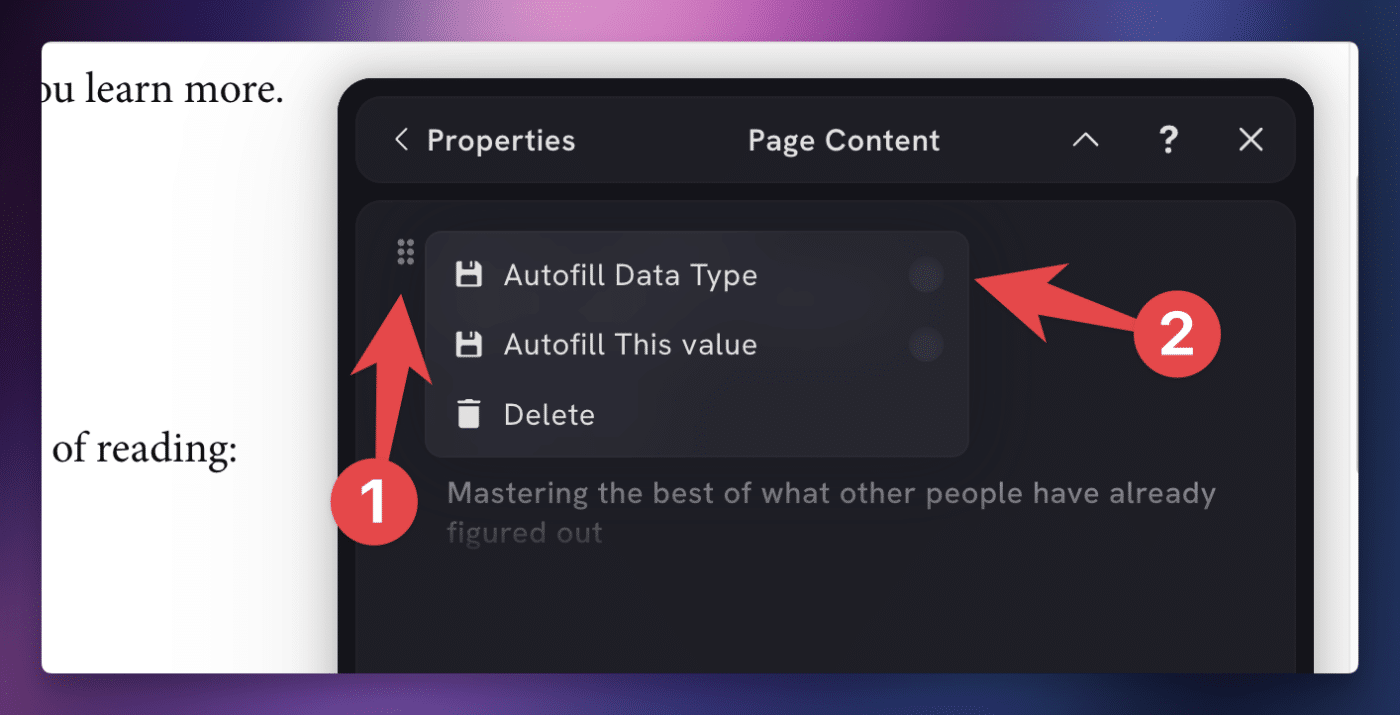
If you want this flow to always append the entire article text to new captures, click the block menu button on the article chip you’ve added and select Autofill Data Type.
Now, anytime you run this flow, the entire article of the page will be appended to your new Notion page.
Hit Capture to test your new flow.
Copy link to headingCapturing Highlights
You can also use Flylighter to capture highlights from the page you’re on.
Flylighter has a powerful highlight parsing engine that allows you to highlight code blocks, HTML tables, quotes, and much more. You can take multiple highlights on a page and append them all to Notion, along with your own manually-typed text and other pieces of web data, such as social media share images.
To capture a highlight, simply highlight any text on the current page, then right-click and choose the Capture Highlight context menu action. Alternatively, you can use the Capture Highlight keyboard shortcut:
- On macOS: ⌘+⇧+S
- On Windows: Alt+Shift+S
If you already have a flow open when you capture a highlight, it will be automatically appended to the content editor of that flow. If you capture a highlight before opening Flylighter on the page, it will be captured in the background and appended to the content editor when you open a flow.
The Content Editor is a block editor, much like Notion’s own, which means you can capture multiple highlights and even manually type your own notes between those highlights.
Copy link to headingTake Notes on YouTube Videos
Flylighter is a fantastic note-taking tool for YouTube videos.
When watching a YouTube video, if you start typing to create a new block in the content editor, you’ll automatically get a clickable timestamp at the beginning of that block.
Once you’ve captured the page to Notion, clicking on that timestamp will take you back to the video at that specific moment.
Copy link to headingUse Flylighter as a Forms Tool
Flylighter mainly works as a web clipper. However, it also serves as a de-facto forms tool right in your browser, since you can set nearly any Notion database property value when capturing a page.
For example, if you want to add a person to your People database directly from their LinkedIn profile, you can use a Flylighter flow.
Auto-filled web data can fill in the LinkedIn Profile URL property, along with any other fields you want.
To fill in the rest of the fields, you can simply type right inside the flow, or choose values in any Select/Multi-Select properties.
When you capture the page, you’ll get a brand new entry in your personal CRM with all the manually-entered data along with the web data pulled from the LinkedIn profile.
This makes Flylighter an extremely efficient forms tool, allowing you to use web data to automatically fill many profile fields that you would otherwise have to fill in either manually or by copying and pasting.
Copy link to headingUsing the Official Notion Web Clipper
You can also use the official Notion web clipper with Ultimate Brain. This browser extension is available for Chrome, Edge, other Chromium-base browsers, Firefox, and Safari.
The Notion web clipper can only capture the following data to Notion:
- Page URL
- Page Title
- Page Content
You can’t use it to set property values in database pages.
Additionally, note that your browser must be signed into the Notion account that contains the workspace you want to use for captures. If you’re signed in to multiple Notion accounts, you’ll need to make sure the account you want to use is the active one – the Notion web clipper won’t allow you to select workspaces from multiple accounts.
Note: Flylighter uses the Notion API, so it does not have this limitation. You can authenticate as many Notion workspaces as you want, and they can be from multiple Notion accounts.
When using the Notion web clipper to capture to Ultimate Brain, you’ll likely want to capture to one of the core databases in the template.
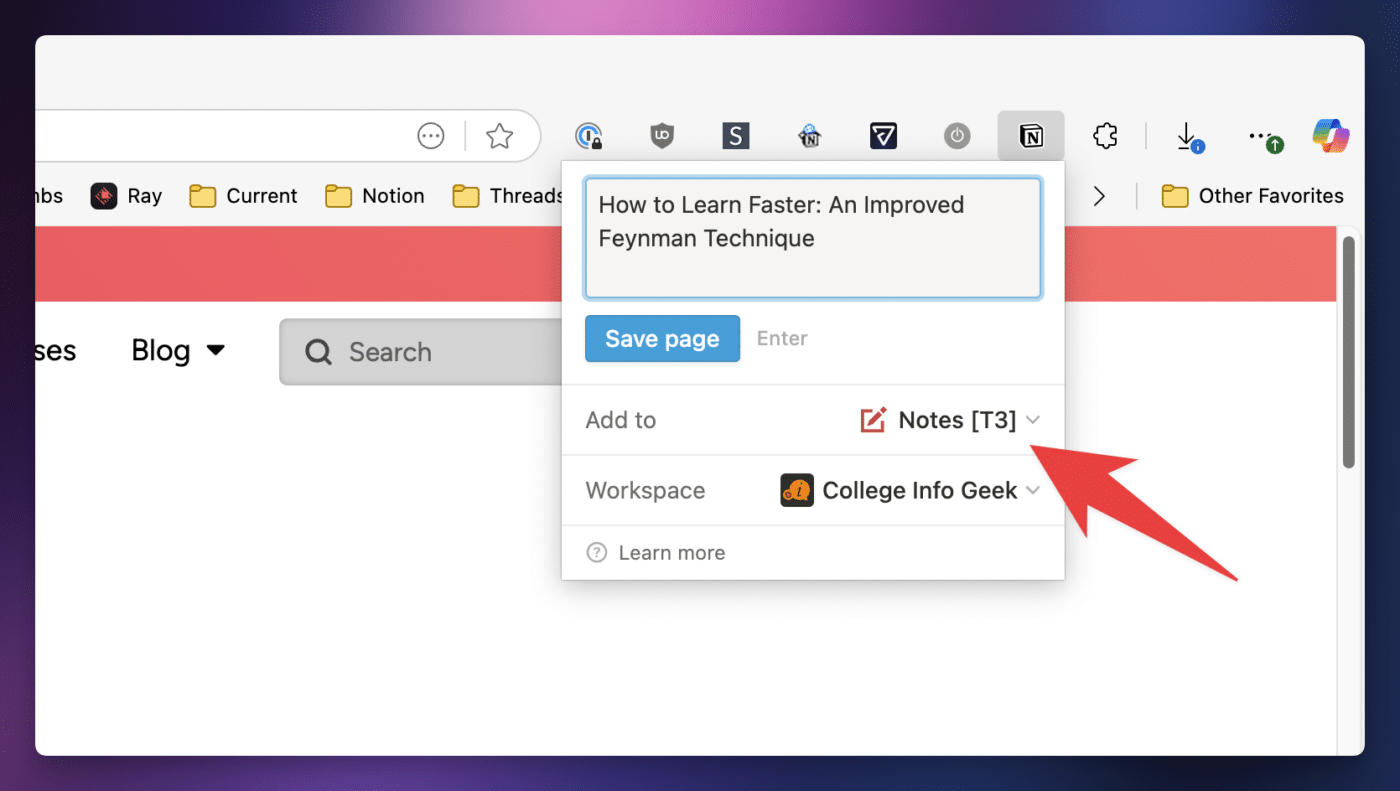
For example, if you want to capture web clips to your Notes database, be sure to select it under the Add To option.
In Ultimate Brain, databases have a red page icon by default – this is how you can distinguish them from pages that have the same name. I’ve also added a small “[T3]” suffix to my database names, to further differentiate them.
If you select a page instead, the Notion web clipper will create a new page for the captured web page, which will appear as a page block at the bottom of the page you selected. In most cases, this likely isn’t what you want.


